SSL Termination with Azure Application Gateway
This guide walks you through terminating SSL via an Application Gateway and assumes you have your SSL certificate file (.pfx format) available on your local machine.
In this example, I have configured an SSL cert (bryce-gcp-oauth) for my domain:
bryce-gcp-oauth.sftpgw.cloud
The first step of the process is to create your Application Gateway.
Creating the Application Gateway
Step 1: Basic Configuration
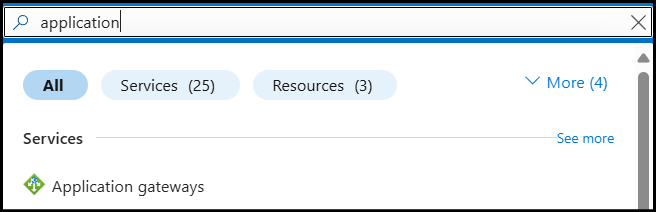
- Navigate to Application gateways in the Azure Portal
- Once inside the service, click Create
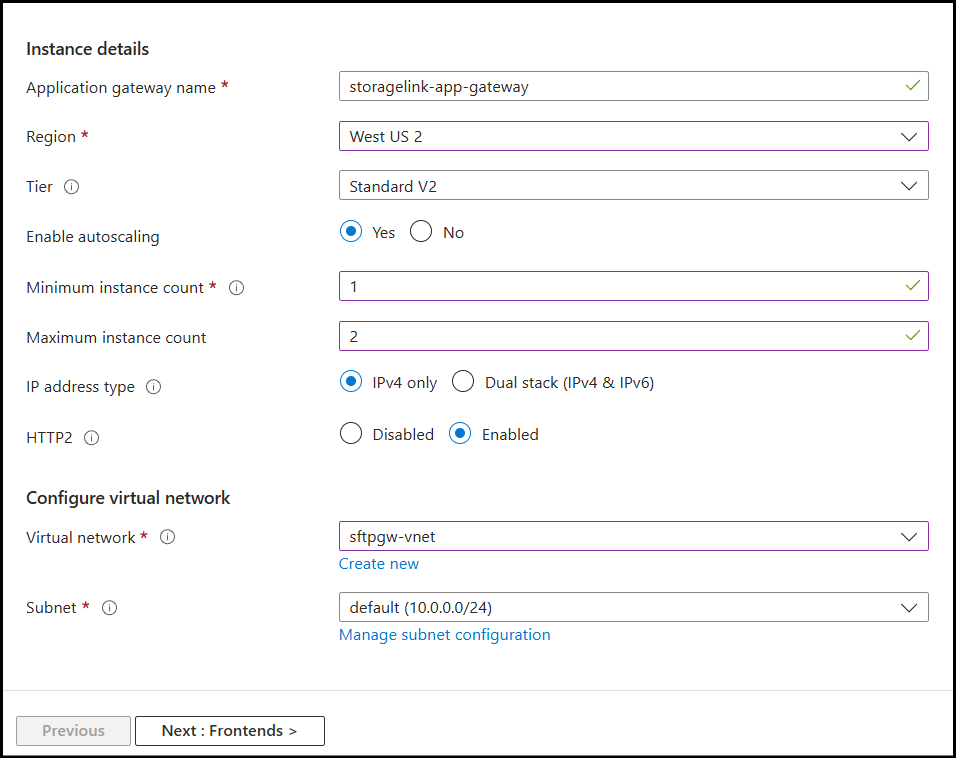
- Configure the Basics tab:
- Subscription: Select your subscription
- Resource group: Select existing or create new
- Application gateway name:
storagelink-app-gateway - Region: Same region as your VM
- Tier: Standard V2 (recommended)
- Enable autoscaling: Yes
- Minimum instance count: 1 (never set to 0)
- Maximum instance count: 2-10 based on expected load
- HTTP2: Enabled
- Virtual network: Select the same VNet as your VM
- Subnet: Select existing subnet
Note: The Application Gateway subnet can be different from your VM's subnet, but they must be in the same VNet.
Step 2: Frontend Configuration
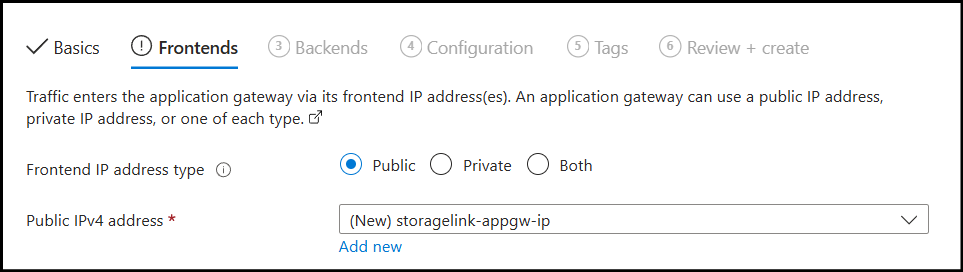
- Configure Frontends tab:
- Frontend IP address type: Public
- Public IP address: Create new
- Public IP name:
storagelink-appgw-ip
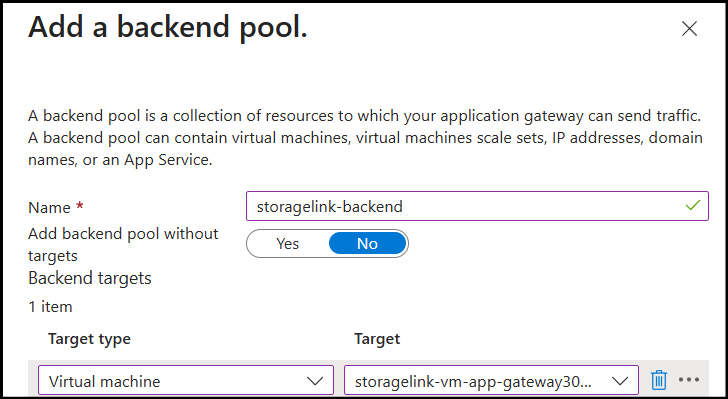
Step 3: Add Backend Pool
- Navigate to the Backends tab
- Click Add a backend pool
- Configure:
- Name:
storagelink-backend - Add backend pool without targets: No
- Target type: Virtual Machine
- Target: Select your VM from the list
- Name:
- Click Add
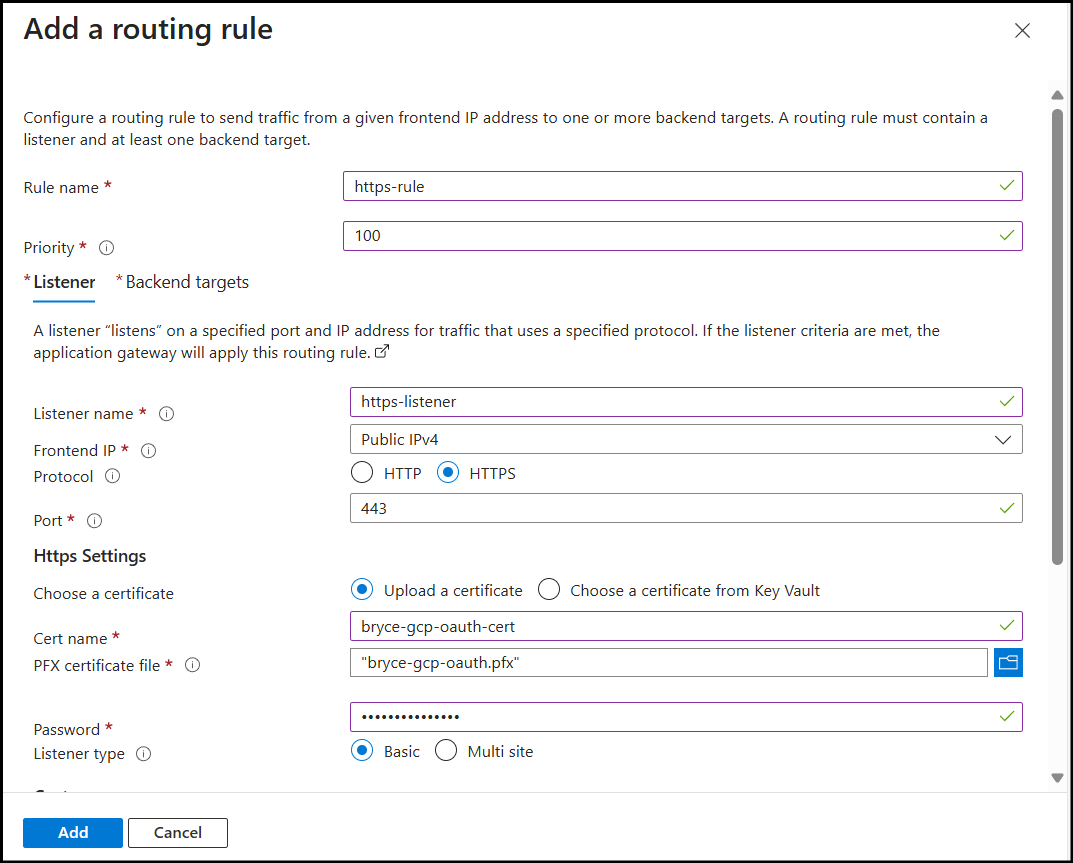
Step 4: Create HTTPS Routing Rule
- Navigate to the Configuration tab
- Click Add a routing rule
- Configure basic settings:
- Rule name:
https-rule - Priority: 100
- Rule name:
Step 5: Configure HTTPS Listener
On the Listener tab:
- Listener name:
https-listener - Frontend IP: Public
- Protocol: HTTPS
- Port: 443
- Listener type: Basic
- Error page url: Leave blank
- Listener name:
Certificate configuration:
- Choose a certificate: Upload a certificate
- Cert name: Enter a descriptive name
- PFX certificate file: Browse and select your .pfx file
- Password: Enter the certificate password
Step 6: Configure Backend Targets
- Navigate to the Backend targets tab:
- Target type: Backend pool
- Backend target: Select
storagelink-backend - Backend settings: Create new
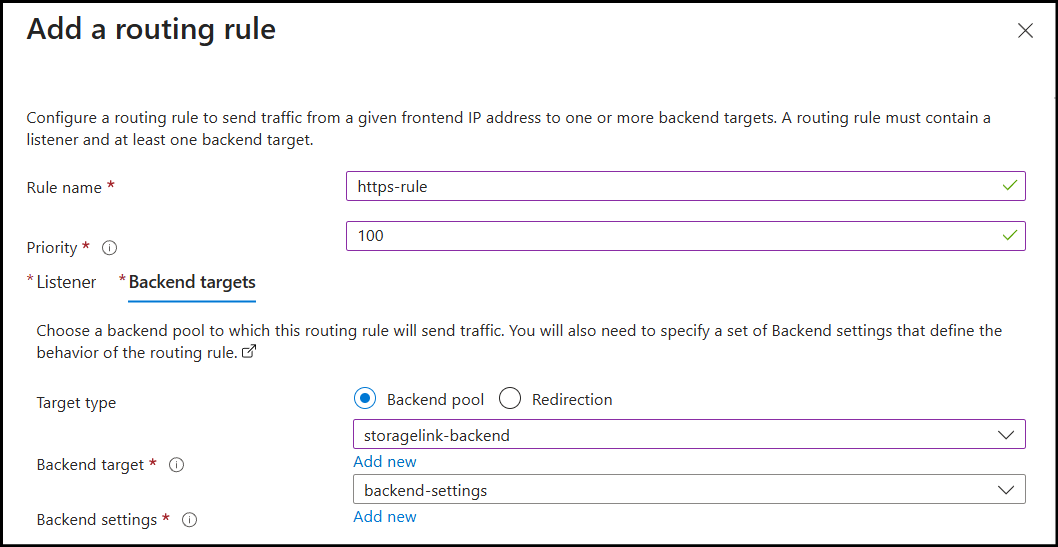
- Create Backend Settings:
- Backend settings name:
backend-settings - Backend protocol: HTTP
- Backend port: 80
- Cookie-based affinity: Disabled
- Connection draining: Enabled
- Request timeout (seconds): 30
- Override with new host name: No
- Backend settings name:
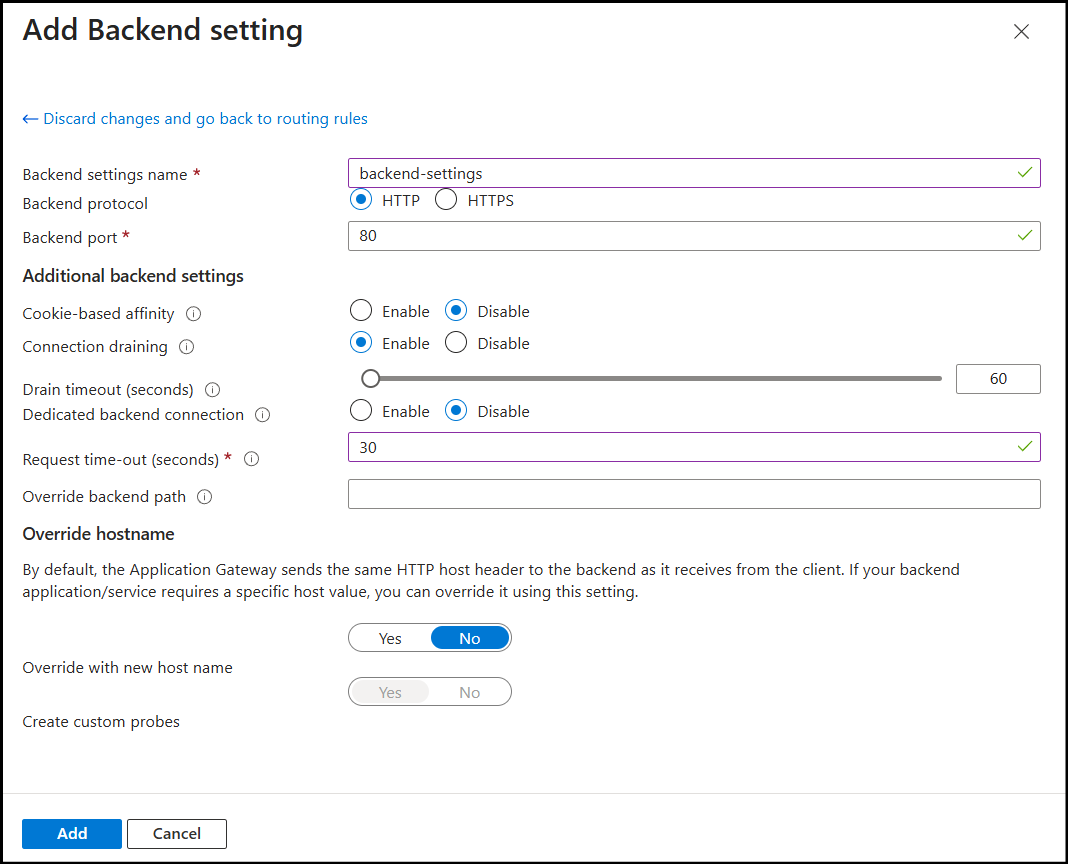
- Click Add to save the backend settings
- Click Add to save the routing rule
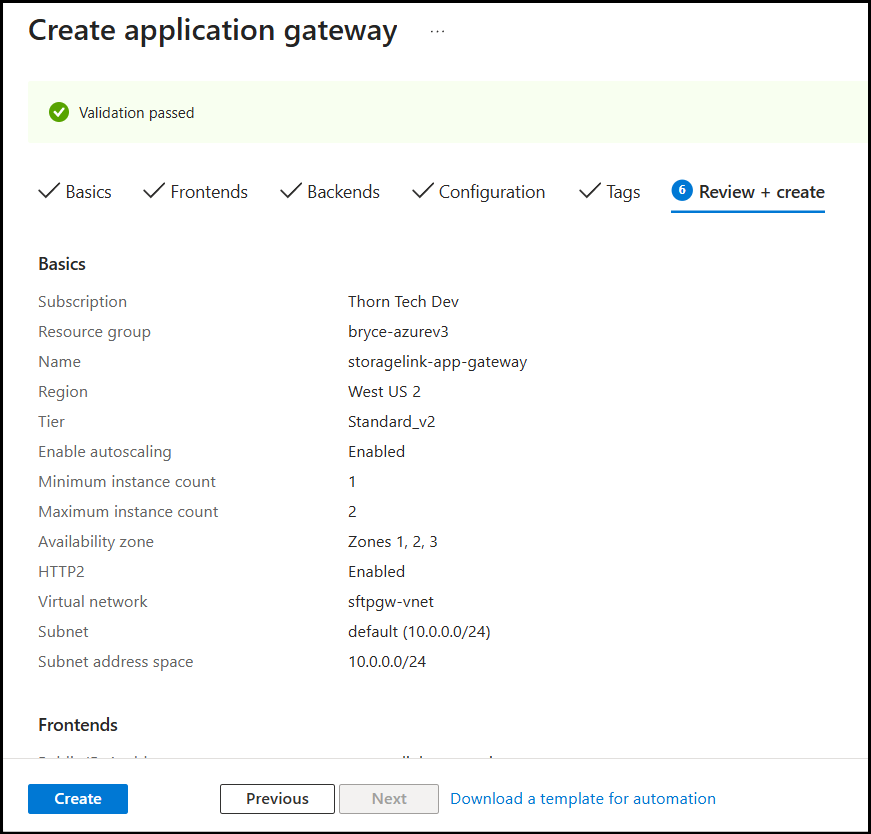
These are all the required steps, so we can proceed with the application gateway creation.
Step 7: Review and Deploy
Once validation has passed, create your gateway.
If your Application Gateway is in a different subnet than your VM, create an inbound port 80 rule to the subnet the gateway is located inside of (e.g., 10.0.1.0/24).
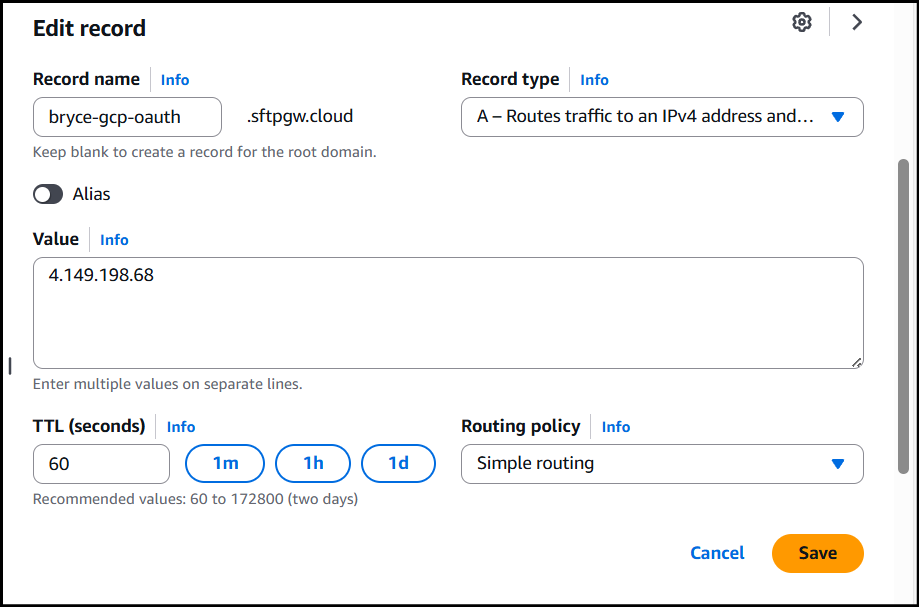
Step 8: Configure DNS
Get the Application Gateway Public IP.
- Navigate to your Application Gateway → Overview
- Note the Frontend public IP address
Update DNS Records.
- Access your DNS management console
- Locate the A record for your domain
- Update the record:
- Save the DNS record
- Wait 5-15 minutes for DNS propagation
Afterwards, when you navigate to the domain name, you should see you have a valid SSL cert configured.