Getting Started with SFTP Gateway 3.x
Introduction
SFTP Gateway is a pre-configured SFTP server that transfers files to Alibaba OSS.
Version 3.x of SFTP Gateway allows you to read and write directly to OSS, using the SFTP protocol. This version also includes a folder management feature for configuring sharing scenarios such as multi-user read/write to the same OSS location.
To start, you provision SFTP Gateway from the Alibaba Marketplace. This takes you to the VM creation wizard in the Alibaba console.
Alibaba Marketplace Steps
Navigate to the SFTP Gateway product on the Alibaba marketplace
You should see the following screen:
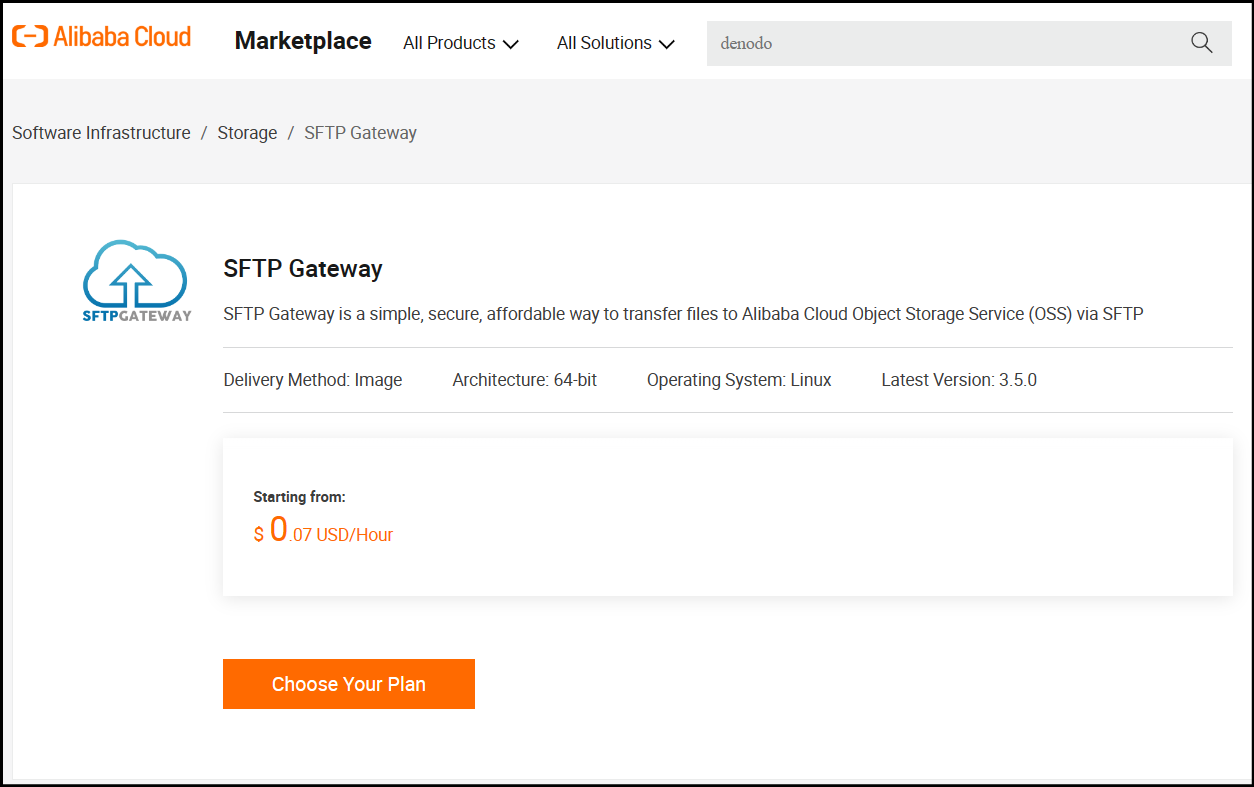
Click the Choose Your Plan button.
Azure Portal Steps
You will be taken to the Custom Launch VM creation wizard in Elastic Compute Service:
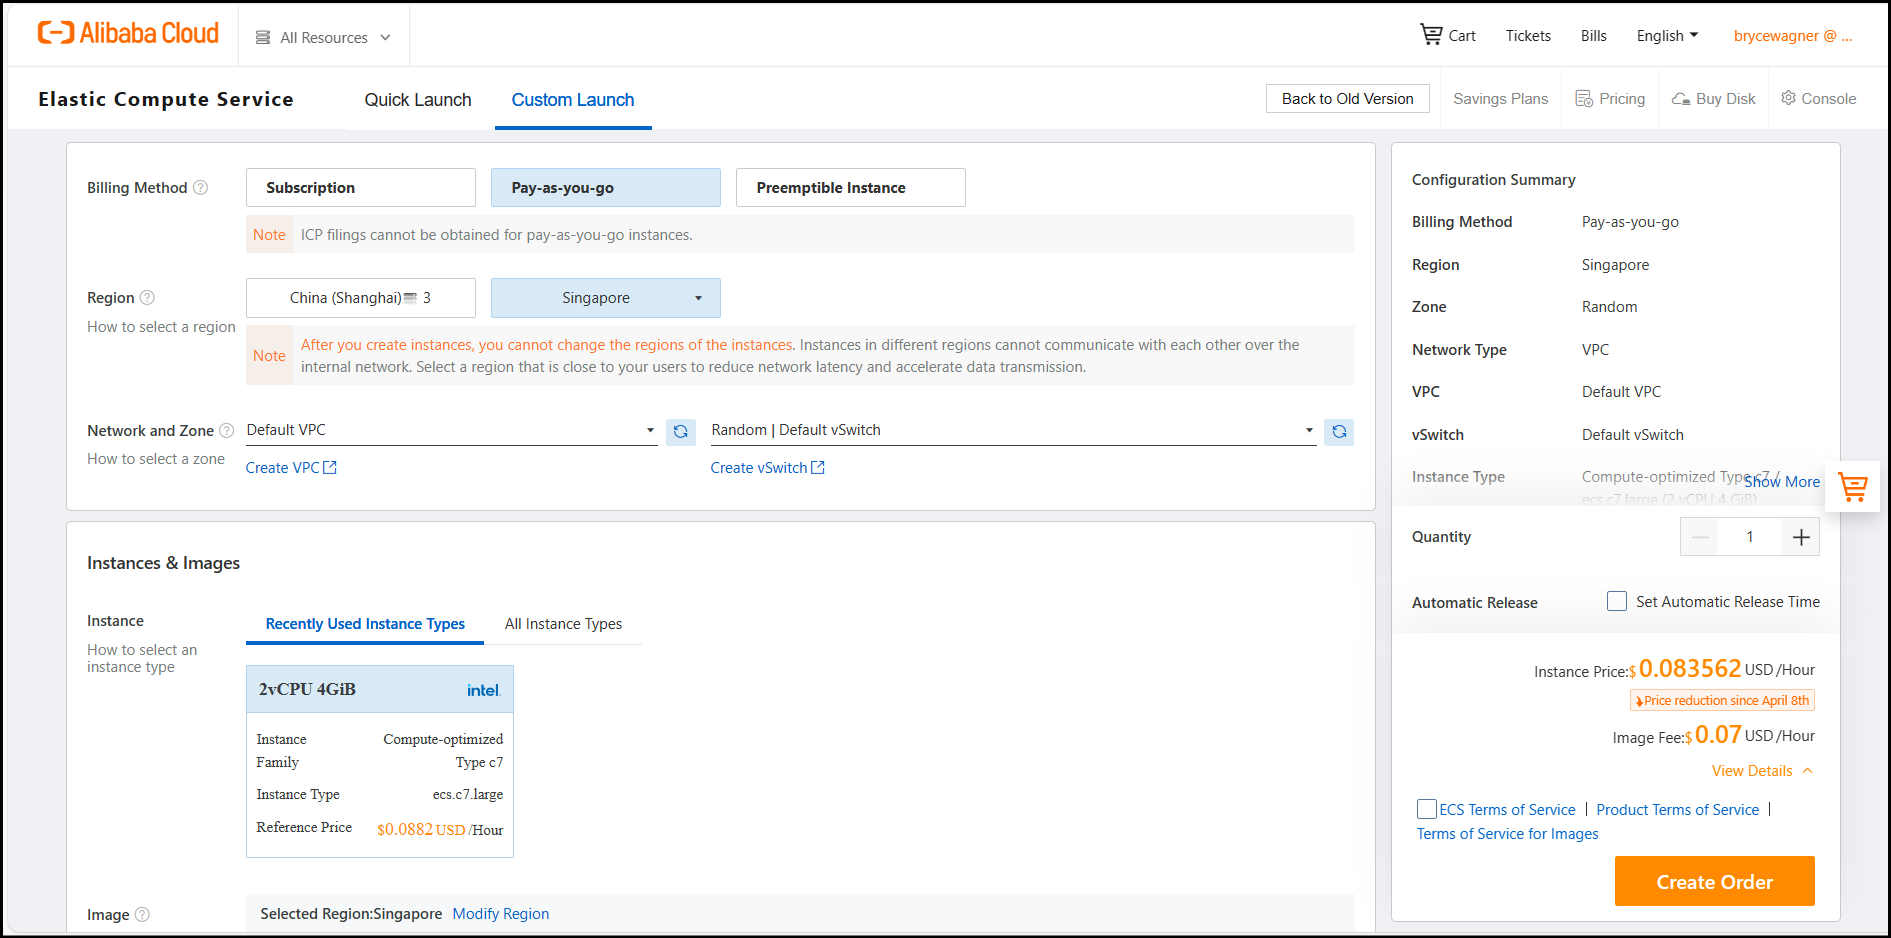
Create a VM
On the Custom Launch tab, fill out the following information:
- Region: Select a region.
- Network and Zone: Select an existing VPC from the drop-down menu, or click Create VPC.
- Instance: For testing purposes, you can use ecs.c7.large. For production, we recommend ecs.g7.xlarge or larger, depending on your workload.
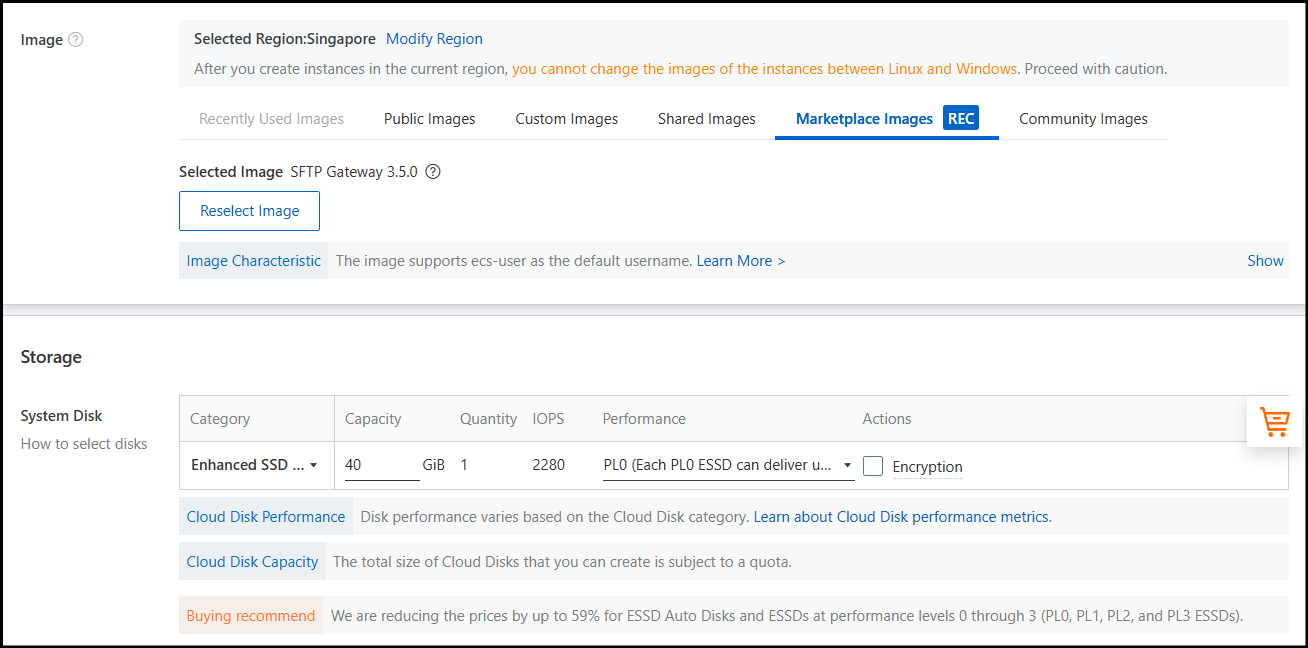
- Image: This should be pre-populated, since you were directed here from the Alibaba Marketplace.
- System Disk: This should be set to
40GiB by default. Since only the Operating System & Instance logs are stored on the disk, a larger disk isn't required.
- Public IP Address: Check the box to assign a Public IPv4 Address.
- Open IPv4 Ports/Protocols: Check the boxes for SSH, HTTP & HTTPS.
Once the security group has been created, make sure to add a rule for port
2222, as that is the default SSH port. Port22is reserved for the SFTP service, so you're unable to SSH using this port.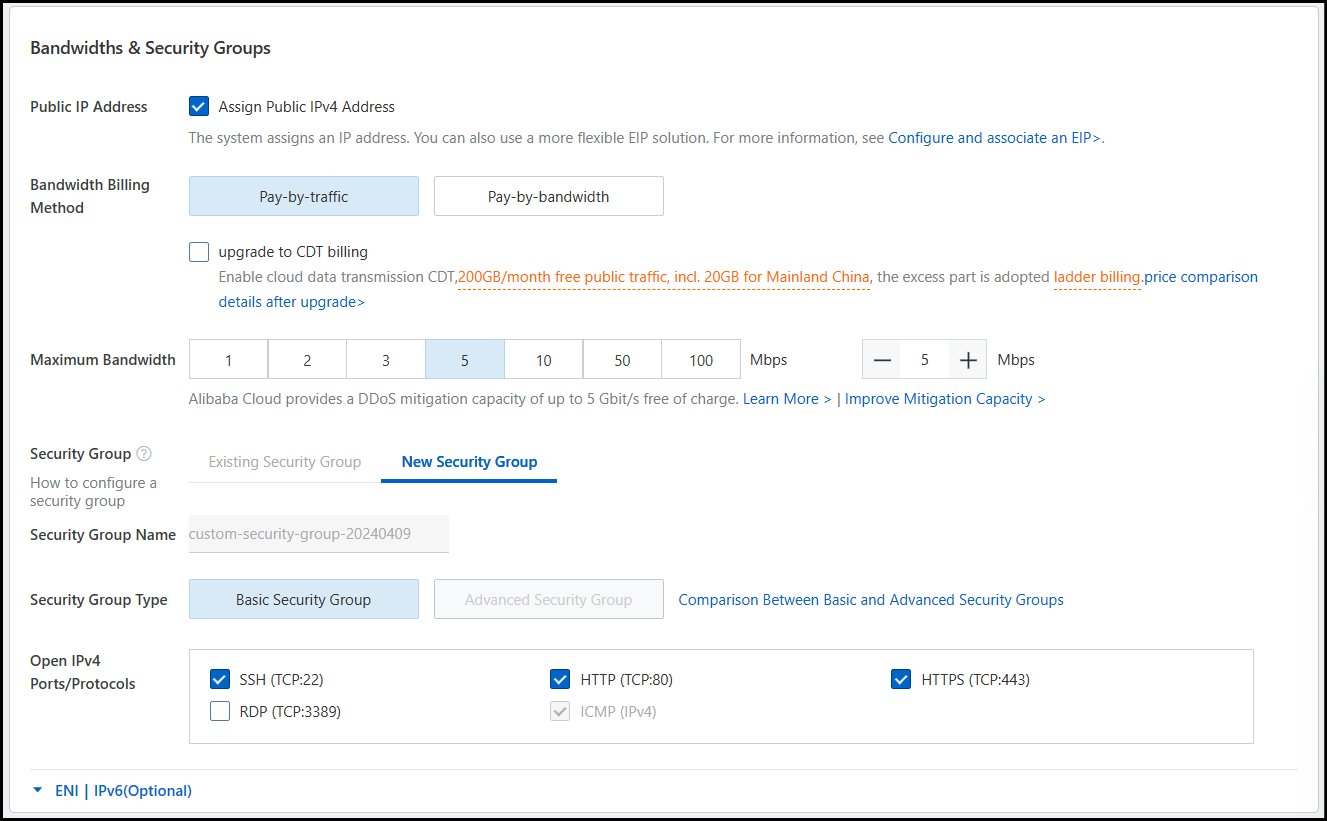
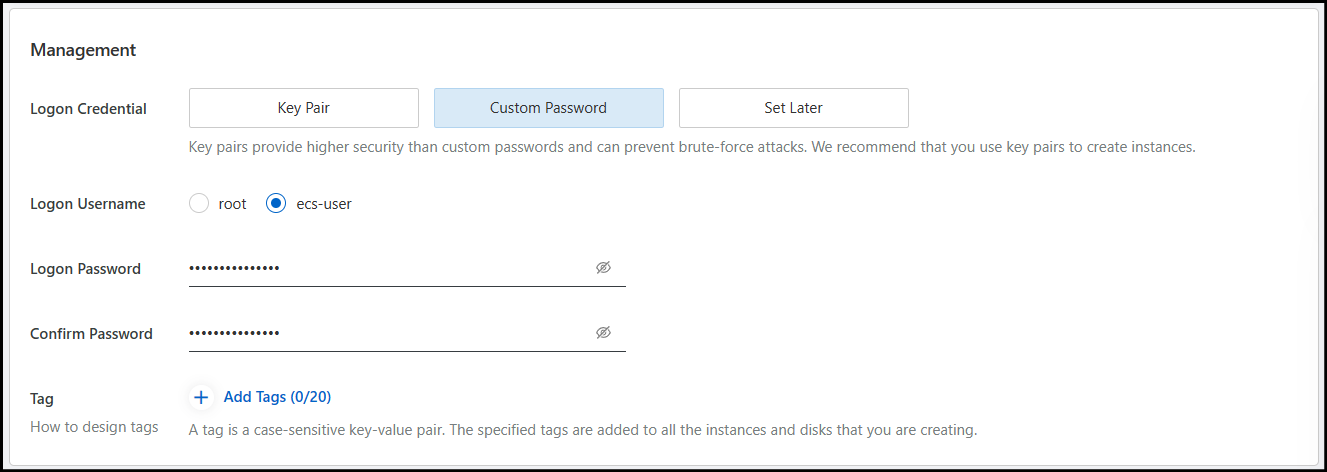
- Management: Configure either a Key Pair or Custom Password to use as SSH credentials.
- Instance Name: Configure a custom name for your SFTP Gateway instance.
- Instance RAM Role: Select a role with permission to your bucket in OSS, or click Create Instance RAM Role and follow this documentation for creating the role.
- Resource Group (Optional): Select an existing resource group from the drop-down menu, or click Create Resource Group.

Finally, at the bottom right, check the box to accept the various Terms of Service and click Create Order.

Access the Admin Interface
After making your order, you should be met with a Success page.
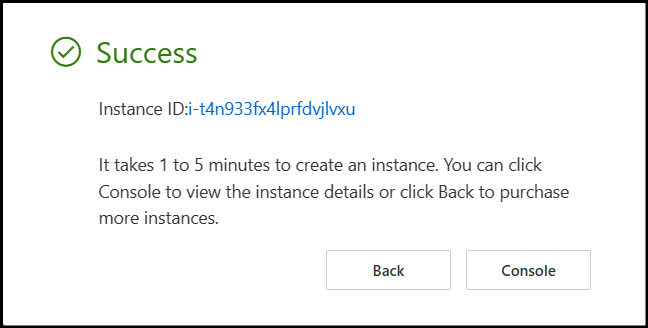
To access the SFTP Gateway Admin Interface, click on the Instance ID link and navigate to the Public IP Address of your newly created instance in a new browser tab.

The next step is to go through the First Launch Experience to create your first web admin account.
Video Example
For more information, we have a video that walks through setting up SFTP Gateway on Azure.