Amazon Cognito Authentication
Overview
With StorageLink, you can now integrate Amazon Cognito authentication with Admin & Web User authentication.
In other words, Admins & Web Users can leverage their existing Amazon Cognito credentials instead of managing another account just for StorageLink access.
Integrating Amazon Cognito authentication with StorageLink
Configuring Amazon Cognito authentication is a process. At a high level, you will be performing three steps:
- Create and configure a User Pool in Cognito
- Create users in Amazon Cognito
- Point StorageLink to the User Pool
Create a User Pool in Cognito
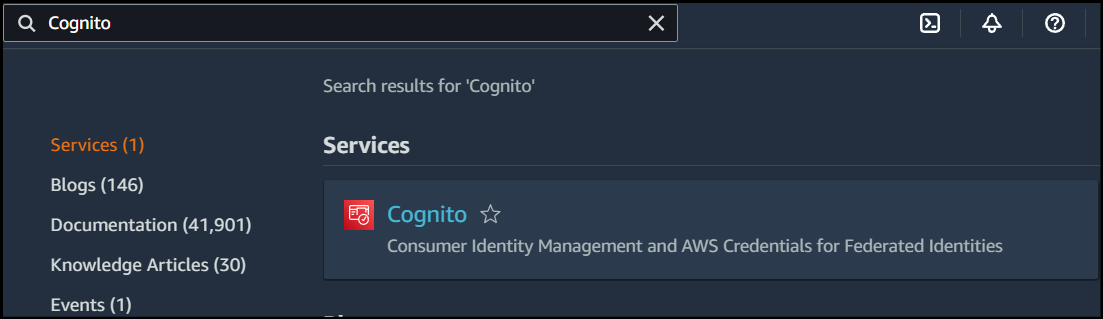
Open the AWS Management Console and search for Cognito.
If you already have a User pool configured with users, you can skip to the Get the User Pool IDs section.
In Cognito, click Create user pool. You will see the following screen:
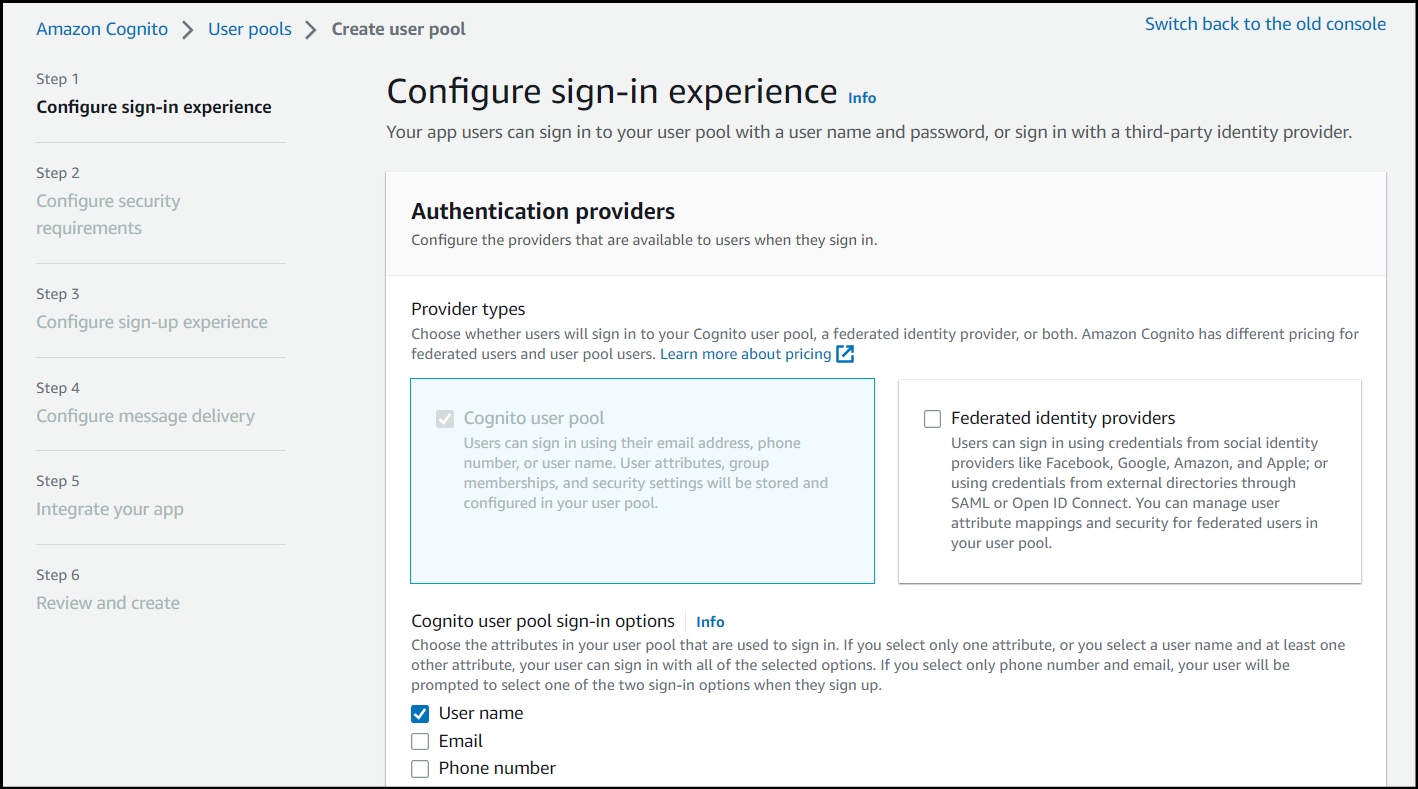
Configure the User Pool Steps 1 - 4 as needed for your environment requirements and preferences.
Step 5, Integrate your app, is where you will make the majority of the important configurations.
Configure a name for your user pool and under the Hosted authentication pages section, check the box for Use the Cognito Hosted UI, then configure the domain name to your liking.
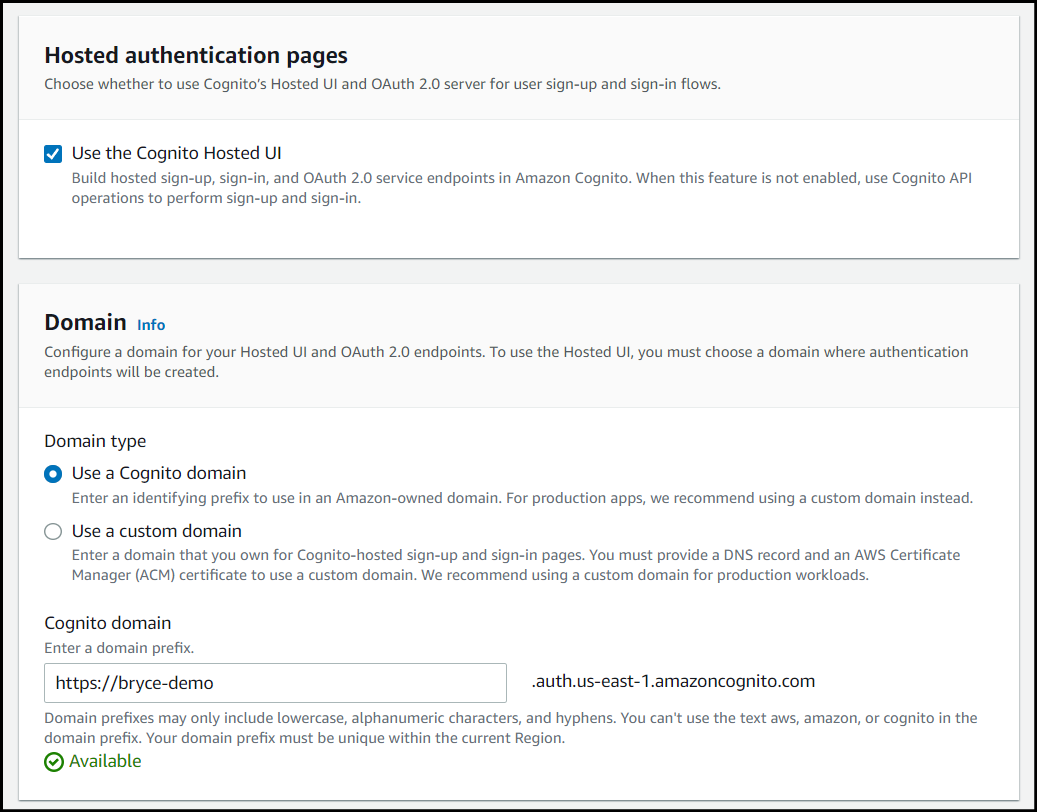
Under the Initial app client section, configure a name for your app client and choose to Generate a client secret.
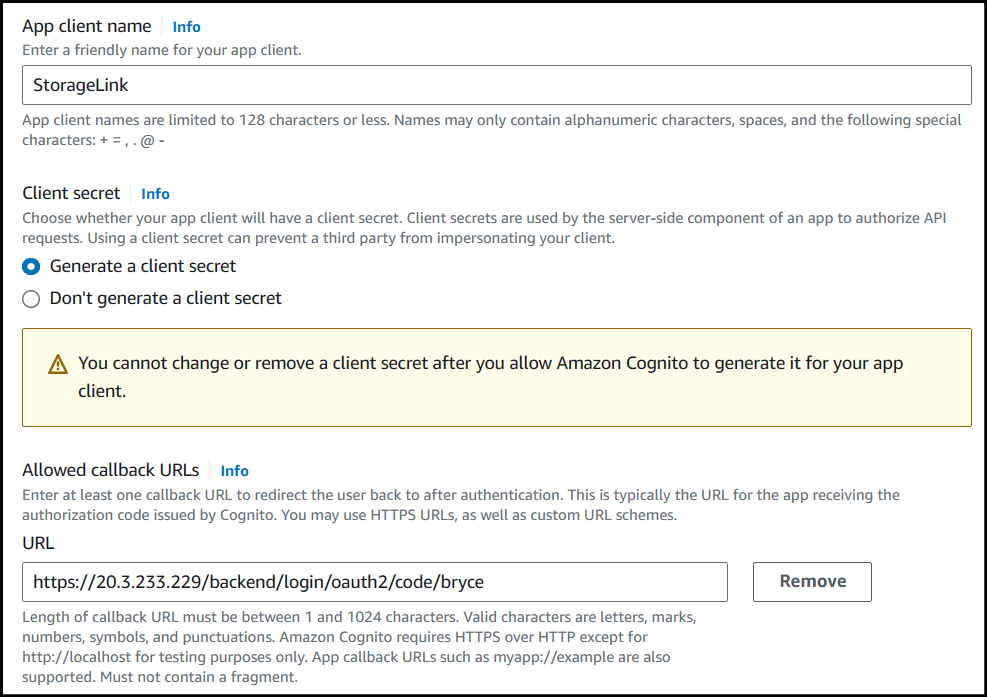
For the callback URL enter in this value:
https://storagelink-hostname/backend/login/oauth2/code/custom-name
The custom-name can be any value you'd like, but make sure to remember it, as you'll need it later on.
Next, you will need to configure the sign-out URL. Click the drop down for Advanced app client settings and navigate to the bottom where you will see the Allowed sign-out URLs section.
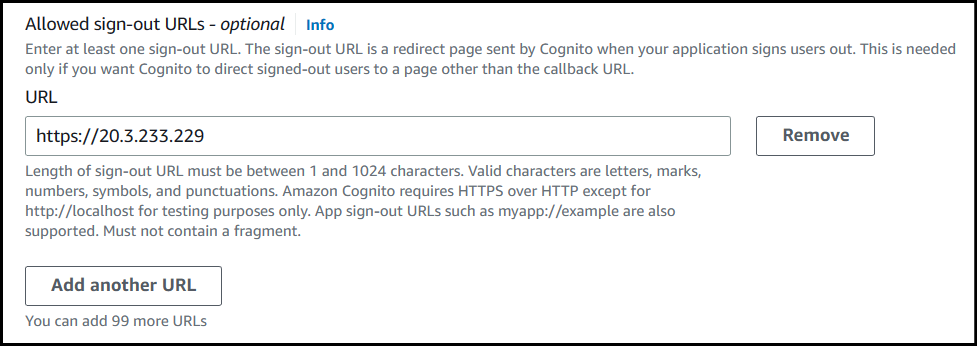
Set the sign-out URL to this value:
https://storagelink-hostname
Once everything has been configured, click Next. Review your configurations and once you're finished, click Create user pool at the bottom.
Add users in Cognito
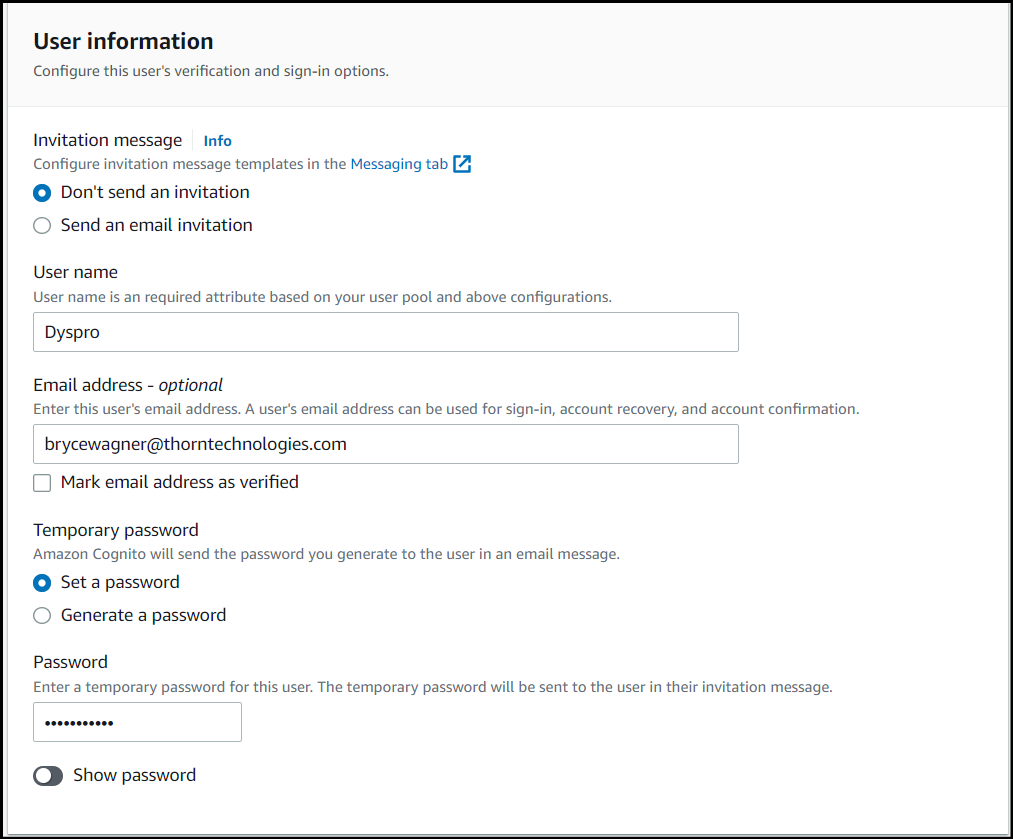
Enter into your newly created Cognito user pool and under the Users tab, click Create user.
Configure a User name and password for your user.
Once your user has been created, you will need to get the User pool IDs.
Get the User Pool IDs
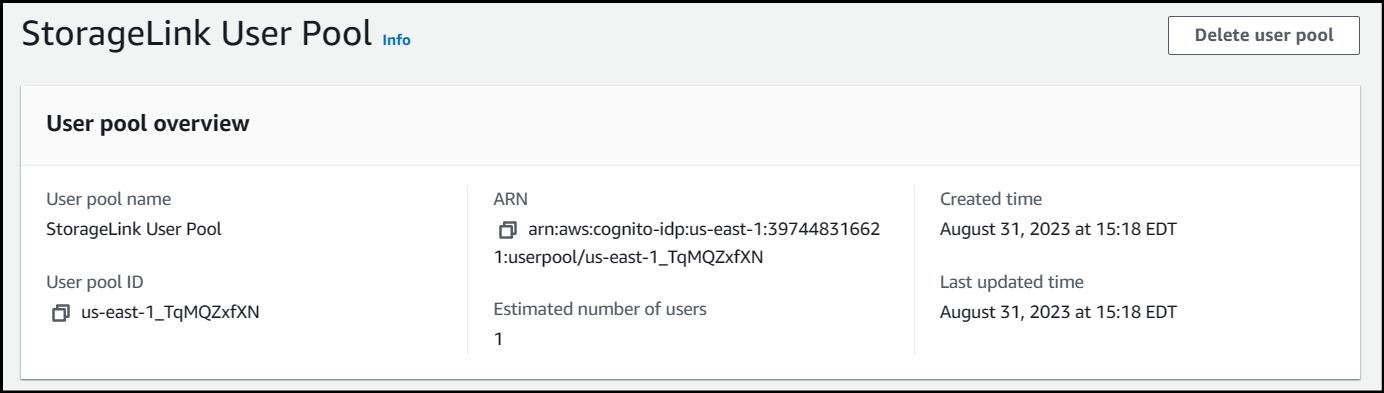
In Cognito, go to the User pool overview, then copy and store the User pool ID.
Next, under the App integration tab for the user pool, scroll down until you see your App client.
Enter into your App client, then copy and store the Client ID and Client secret.

Also, if you scroll down you will see the Hosted UI section with the callback URL you configured earlier. Copy and store the custom name you used at the end of the URL.
Configure the Identity Provider on StorageLink
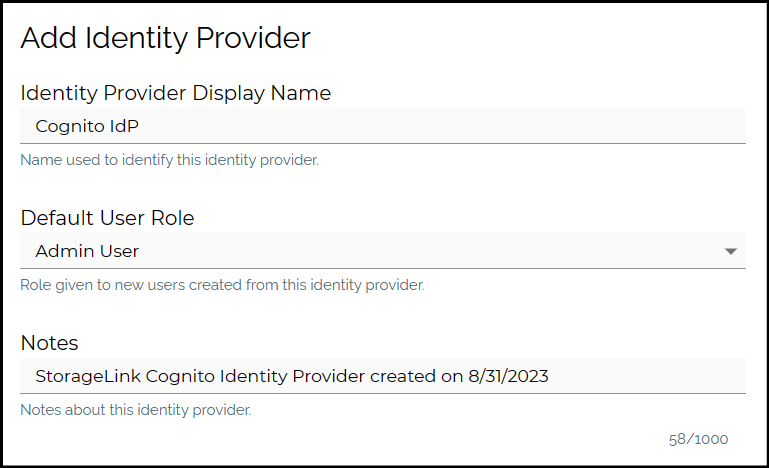
In the StorageLink Admin Interface, go to Settings. Under Identity Providers, click Add new IdP.
For the new Identity Provider, fill in the following fields:
Identity Provider Display Name: This is the name for the Identity Provider that will be displayed at the login screen.
Default User Role: Select the type of Users authenticating with this IdP. Can be configured for either
Admin UsersorWeb Usersto authenticate with.Notes (Optional): Notes or details regarding the Identity Provider.
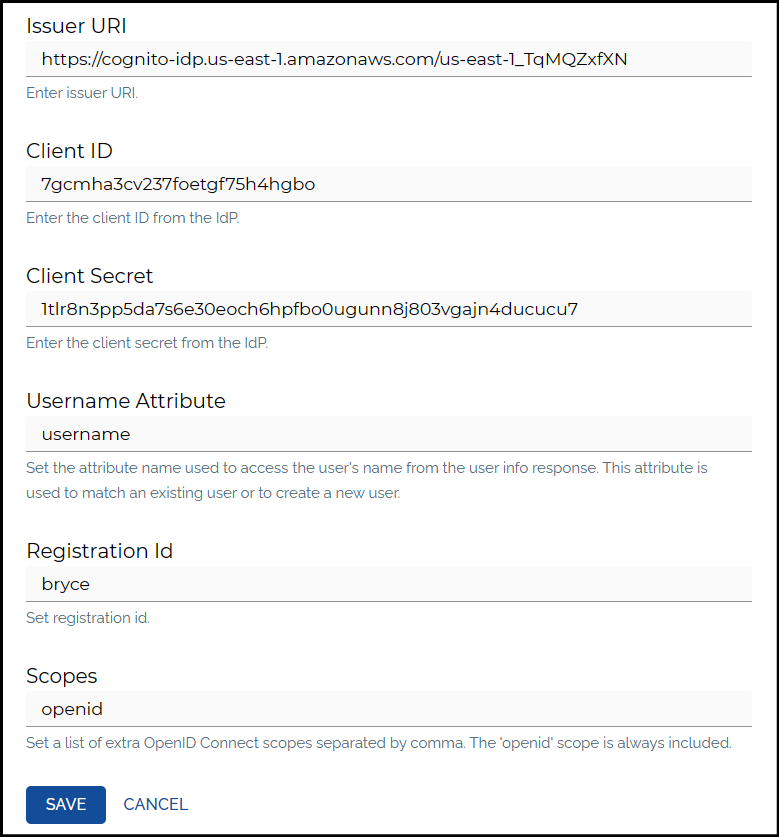
- Issuer URI: Paste in this text:
https://cognito-idp.{REGION}.amazonaws.com/{USER_POOL_ID}
Make sure to replace the first placeholder value with your AWS Region and the second placeholder value at the end with the User pool ID you copied earlier from the overview page of your user pool.
Client ID: Paste in the
client IDyou copied earlier from your app client page.Client Secret: Paste in the
client secretvalue you copied earlier from your app client page.Name Attribute: Set this value to
username.Registration ID: Use the custom name you made for the callback URL when creating the App client.
Scopes: Set this value to
openid.
Test the changes in the web browser
If you are logged into the StorageLink Interface, click the Log Out button on the top right, then refresh the browser.
On the login page, you should see the following link toward the bottom with the Display Name you configured.
Admin Users will need to change the URL to https://storagelink-hostname/admin to view the IdP login button.
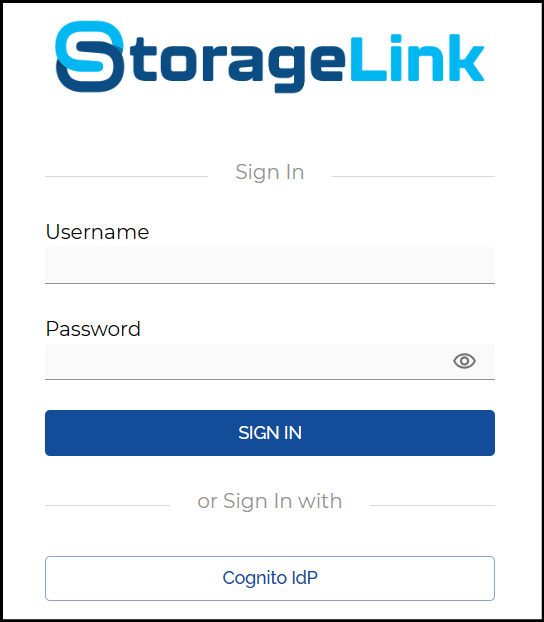
You will then be redirected to your Cognito domain to enter your Cognito credentials.
Once logged in, you will be authenticated to the StorageLink Interface.
You've now completed the process for integrating Cognito authentication with StorageLink.