Uploading Files via the API as a Web User
Purpose: Upload files to StorageLink programmatically using the REST API as a Web User (non-admin).
Authentication: OAuth 2.0 with client credentials + Web User username/password
- Get
CLIENT_IDandCLIENT_SECRETfrom admin or page source (not sensitive) - POST to
/backend/loginto obtain Bearer token
Upload Endpoint: POST https://<host>/backend/1.0.0/filesystem/<path>
- Use Bearer token in Authorization header
- Send file as
form-datawith keydata - Path is relative to Web User's chroot home directory
- Returns
204 No Contenton success
API Docs: OpenAPI/Swagger JSON
Product: StorageLink by Thorn Technologies — cloud storage gateway for secure file sharing
Overview
In this article, we'll go over the process of how to upload files to StorageLink via the API as a Web User.
In my examples, I am going to be using Postman, which you can download here: https://www.postman.com/downloads/
View the API documentation
Here is a link to the StorageLink API documentation file (it will open in your browser): https://thorntech-public-documents.s3.amazonaws.com/storagelink/KB/storagelink-api-documentation-swagger.json
This file is in OpenAPI JSON format, which is designed to be viewed using Swagger. Go to http://editor.swagger.io/, an online Swagger viewer.
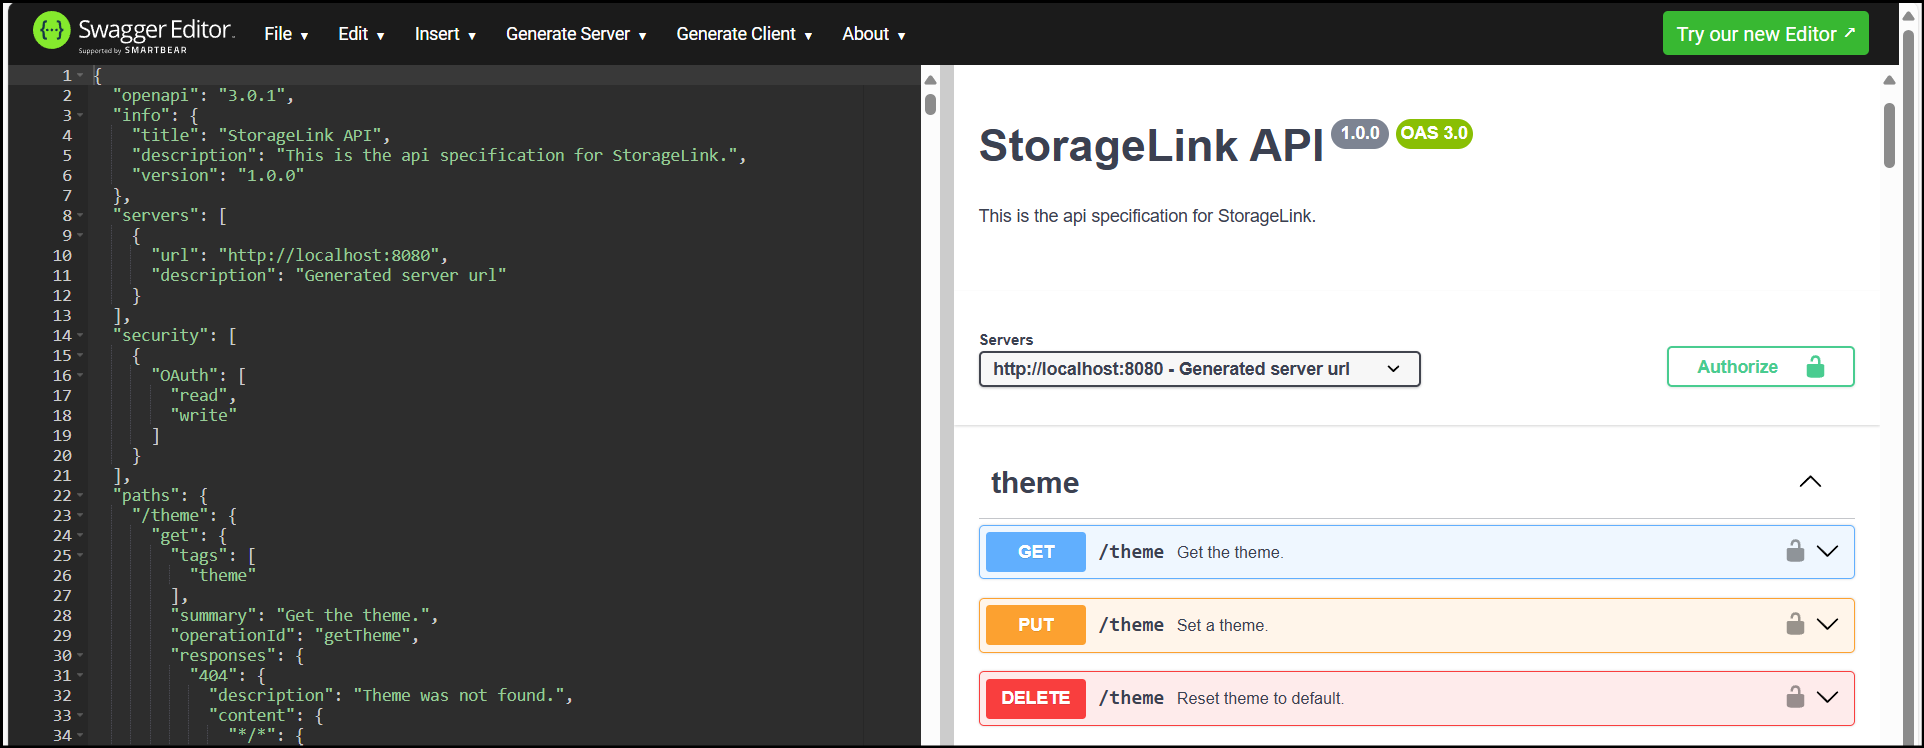
Paste in the JSON API. When prompted to convert your JSON to YAML, click OK. You will then see the API documentation for StorageLink.
When running these commands from your workstation/Postman, make sure your IP address is whitelisted for the port 443 rule in your Security Group/Firewall since that's the port we're sending the requests to.
Generating the OAuth token
In order to make the necessary API calls, we need to obtain an OAuth token, which can be generated via Postman.
To generate the OAuth token, you will need 4 values:
security.client-id
security.client-secret
Web User Username
Web User Password
To get the security client id & secret, they are located on the server at /opt/swiftgw/application.properties and to show these values you can run the command:
cat /opt/swiftgw/application.properties
![]()
Despite the name, the client-id & secret aren't sensitive information and can be found in an unauthenticated web browser visit (just go to view source, and it's there in clear text in the Javascript). The reason why we have the client-id and secret is because it's part of the OAuth spec. So, feel free to ask for these values from the admin managing the server if they haven't already been provided.
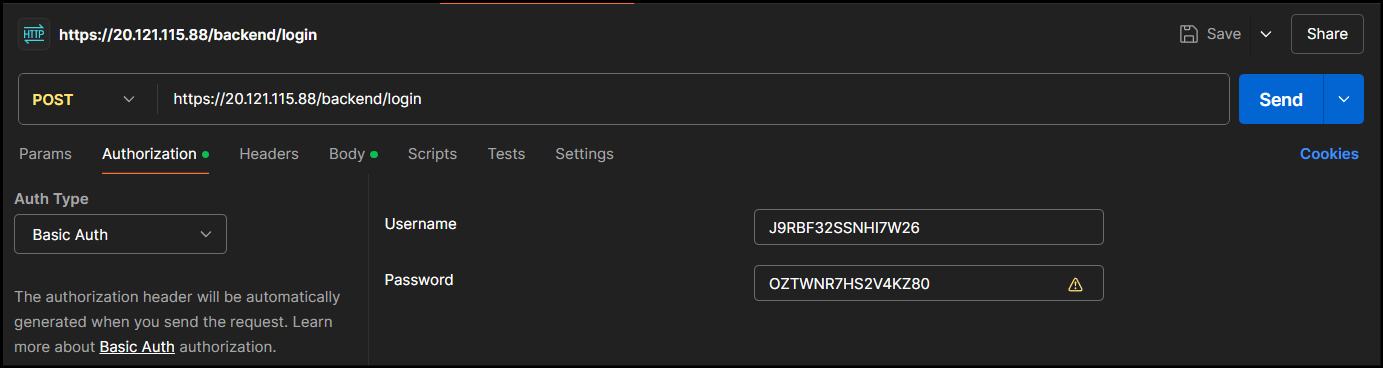
Then, in Postman, use the POST method and set the endpoint as this value (Use your own IP/Hostname):
https://20.121.115.88/backend/login
Under the Authorization tab, select Basic Auth and put your client id as the Username and client secret as the Password.
Next, go to the Body tab and use the x-www-form-urlencoded option. Then, enter in these Keys & Values:
grant_type: The literal string: password
username: The username of the web user
password: The password of the web user

If you click Send, this will then generate the OAuth access_token needed to make requests for file uploads:
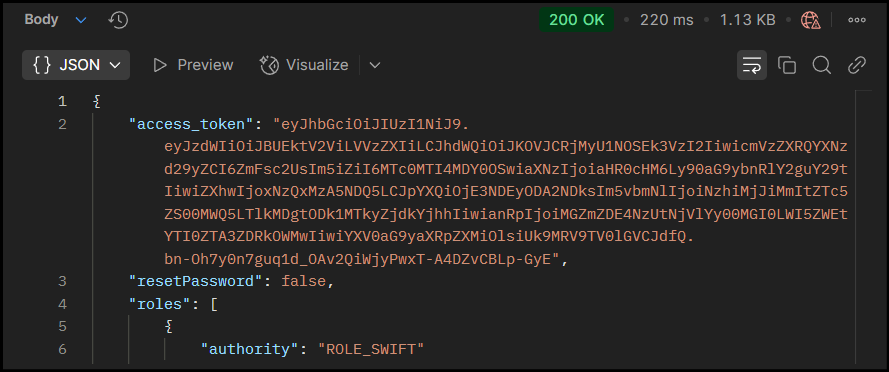
Now that we have the OAuth token, we can upload files via the API, which is the next section.
Here is the curl command for my example:
curl --location 'https://20.121.115.88/backend/login' \
--header 'Content-Type: application/x-www-form-urlencoded' \
--header 'Authorization: Basic SjlSQkYzMlNTTkhJN1cyNjpPWlRXTlI3SFMyVjRLWjgw' \
--data-urlencode 'grant_type=password' \
--data-urlencode 'username=API-Web-User' \
--data-urlencode 'password=MyPa$$word123!'
Uploading files via the API
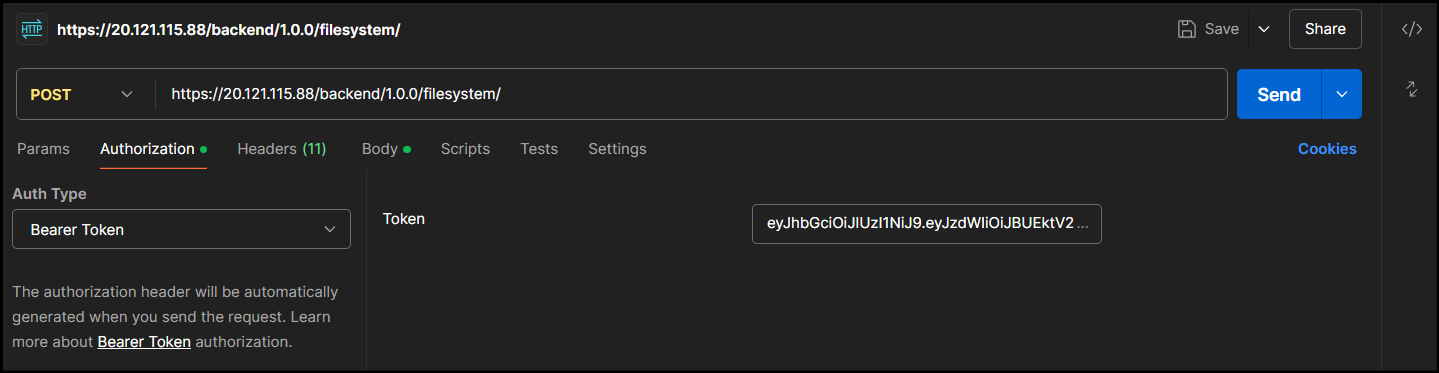
In Postman, open a new tab and use this endpoint:
https://20.121.115.88/backend/1.0.0/filesystem/
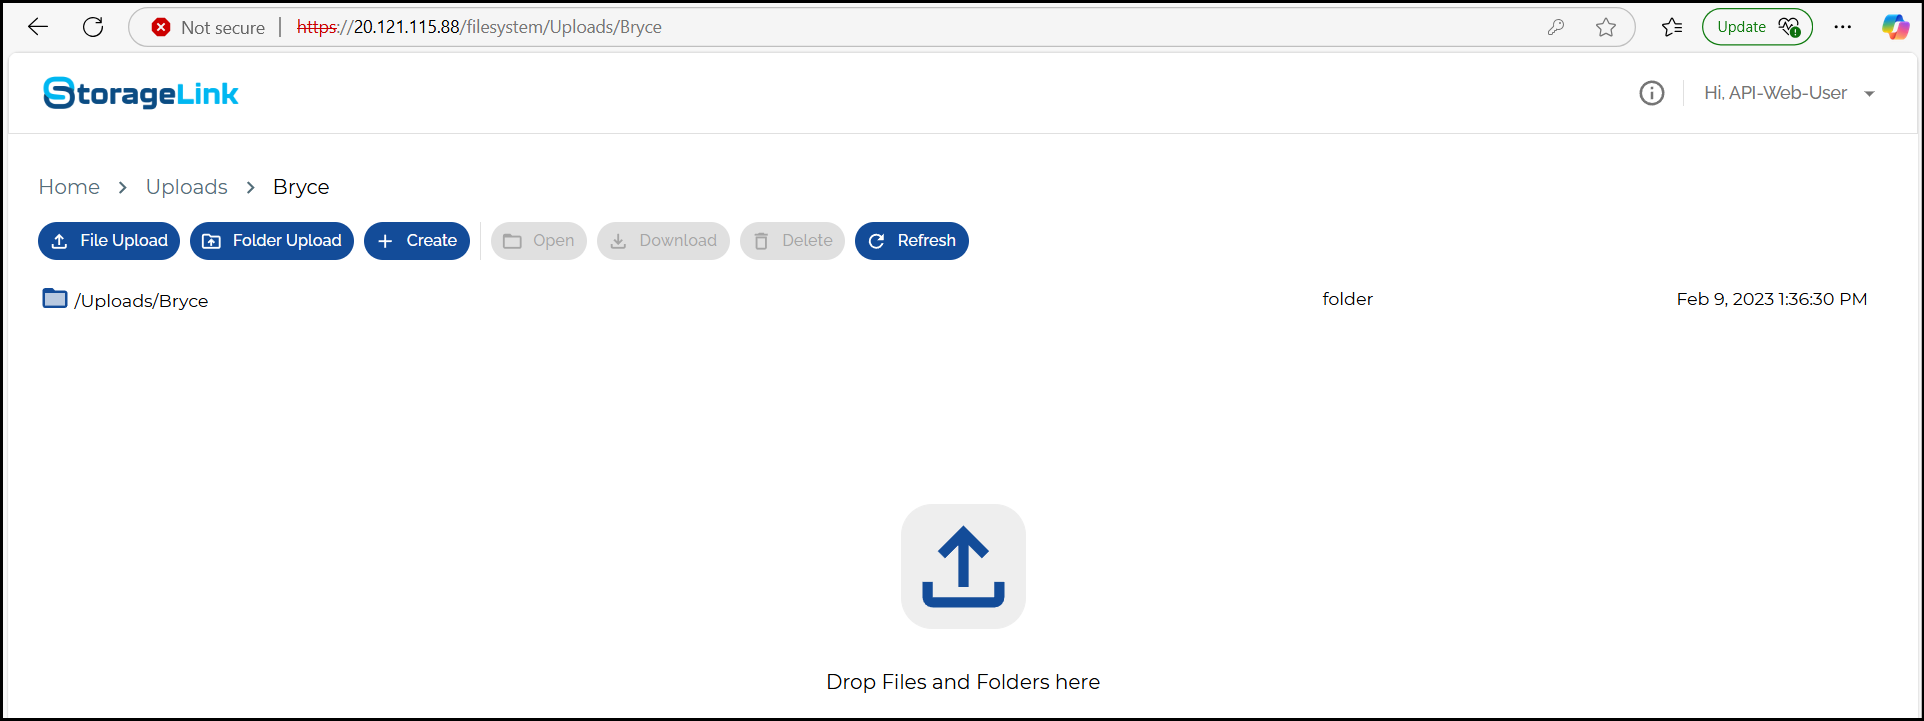
The above endpoint points to the root / directory, which is the directory you'll first see when signing in as that Web User in the UI. For example, this is what the root directory would look like for my API-Web-User account:

If you'd like to upload to a specific path, specify it after the last forward slash, for example:
https://20.121.115.88/backend/1.0.0/filesystem/Uploads/Bryce
In the new tab, set the Authorization tab to use a Bearer Token and paste in the access_token you generated in the previous section.
Next, go to the Body tab and this time we will use the form-data option.
For the Key, set this to data and change it from Text to File. This way, you're able to select a file from your local machine to upload to the server.
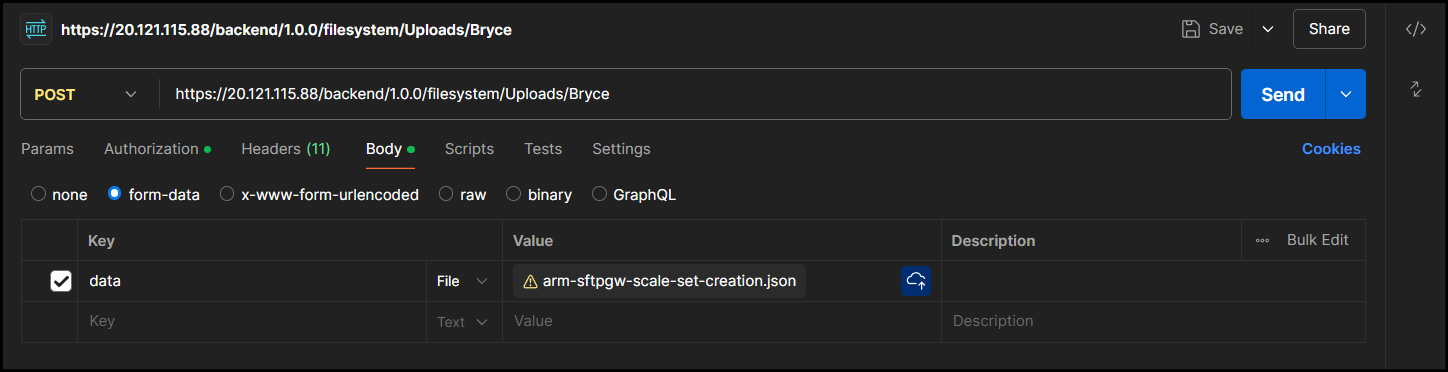
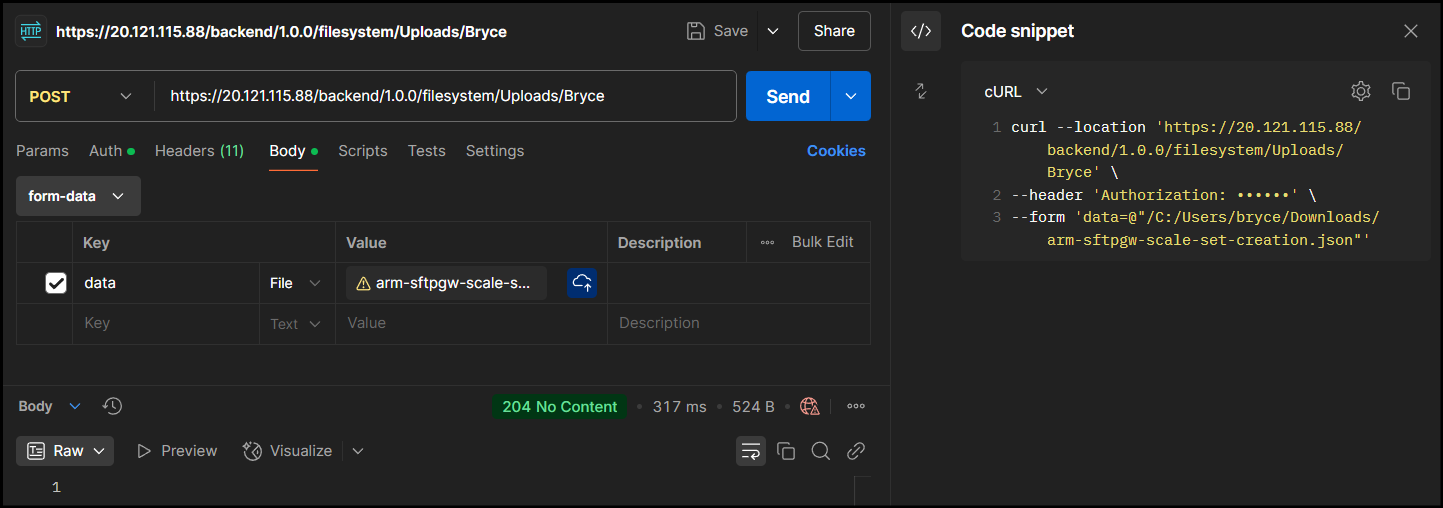
Finally, once you've selected the files from your local machine, to upload them, click Send. The server will return a 204 No Content response, but if you check StorageLink, those files will be uploaded.
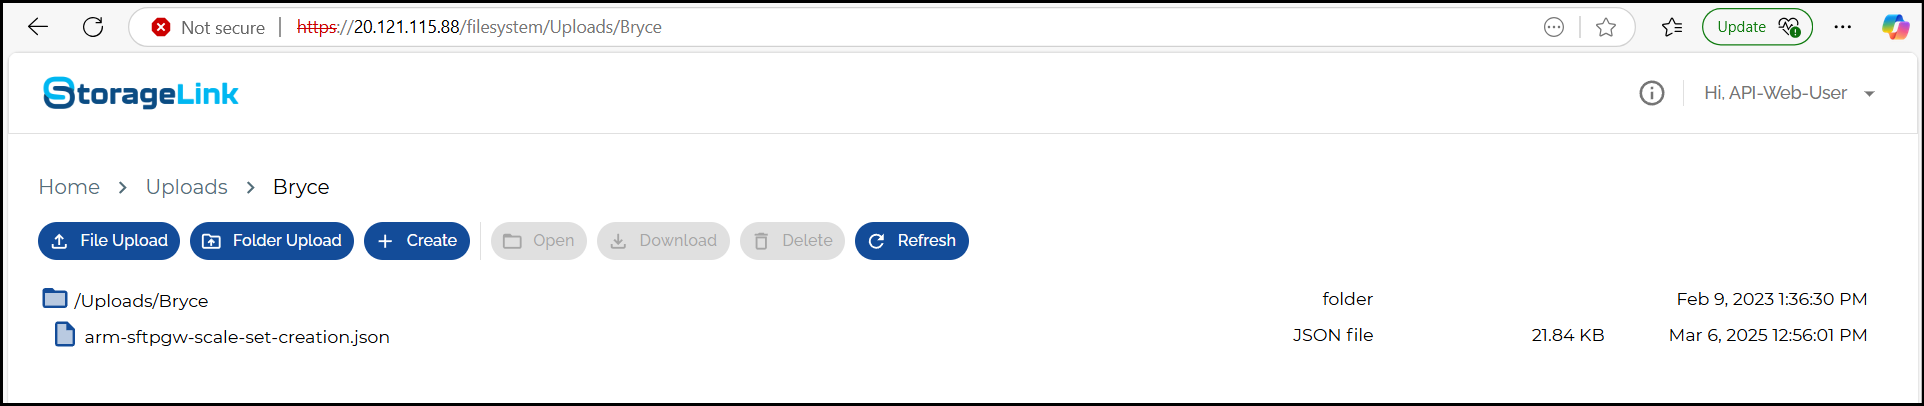
Here is an example screenshot of me uploading a file called arm-sftpgw-scale-set-creation.json to the /Uploads/Bryce directory.
View in StorageLink:
Here is the curl command for my example:
curl --location 'https://20.121.115.88/backend/1.0.0/filesystem/Uploads/Bryce' \
--header 'Authorization: Bearer eyJhbGciOiJIUzI1NiJ9.eyJzdWIiOiJBUEktV2ViLVVzZXIiLCJhdWQiOiJKOVJCRjMyU1NOSEk3VzI2IiwicmVzZXRQYXNzd29yZCI6ZmFsc2UsIm5iZiI6MTc0MTI4MDY0OSwiaXNzIjoiaHR0cHM6Ly90aG9ybnRlY2guY29tIiwiZXhwIjoxNzQxMzA5NDQ5LCJpYXQiOjE3NDEyODA2NDksIm5vbmNlIjoiNzhiMjJiMmItZTc5ZS00MWQ5LTlkMDgtODk1MTkyZjdkYjhhIiwianRpIjoiMGZmZDE4NzUtNjVlYy00MGI0LWI5ZWEtYTI0ZTA3ZDRkOWMwIiwiYXV0aG9yaXRpZXMiOlsiUk9MRV9TV0lGVCJdfQ.bn-Oh7y0n7guq1d_OAv2QiWjyPwxT-A4DZvCBLp-GyE' \
--form 'data=@"/C:/Users/bryce/Downloads/arm-sftpgw-scale-set-creation.json"'