Creating a High-Availability Deployment
Purpose: Deploy StorageLink BYOL in a highly available configuration on AWS with the High Availability - New Network CloudFormation template
Architecture: New VPC + Network Load Balancer + Auto Scaling group (2–10 instances, 2 by default) in private subnets + shared Amazon RDS for PostgreSQL 18 database
Steps:
- Subscribe to StorageLink BYOL on AWS Marketplace (free)
- Launch the StorageLink (High Availability - New Network) CloudFormation template
- Set the parameters, acknowledge IAM resource creation, and submit
- Open the Hostname output, sign in, and start the free 30-day trial
Key Parameters: DesiredCapacity (default 2, minimum 2), VPCIPRange (default 192.168.1.0/24), DBClass (default db.t3.micro), WebAdminPassword (12 or more characters)
Product: StorageLink by Thorn Technologies — cloud storage gateway for secure file sharing
Overview
A high-availability (HA) deployment runs several StorageLink instances in an Auto Scaling group behind a Network Load Balancer. The instances share one Amazon RDS for PostgreSQL database, so every instance serves the same users, folders, and settings, and the Auto Scaling group replaces an instance that fails.
This article deploys the StorageLink (High Availability - New Network) CloudFormation template from the StorageLink BYOL listing, which creates a new VPC for the deployment. To deploy into a VPC you already have, choose StorageLink (High Availability - Existing Network) instead; its parameters are described in StorageLink CloudFormation Usage Instructions.
The Standard (pay-as-you-go) StorageLink listing offers the same HA templates and the same steps. It bills a $0.08 USD/hour software fee for each running instance and is licensed for up to 10 StorageLink users. See StorageLink Standard vs BYOL.
Subscribe on AWS Marketplace
You first need to subscribe to the StorageLink BYOL listing. Subscribing is free — there is no software charge — and it allows your AWS account to use the StorageLink BYOL AMI.
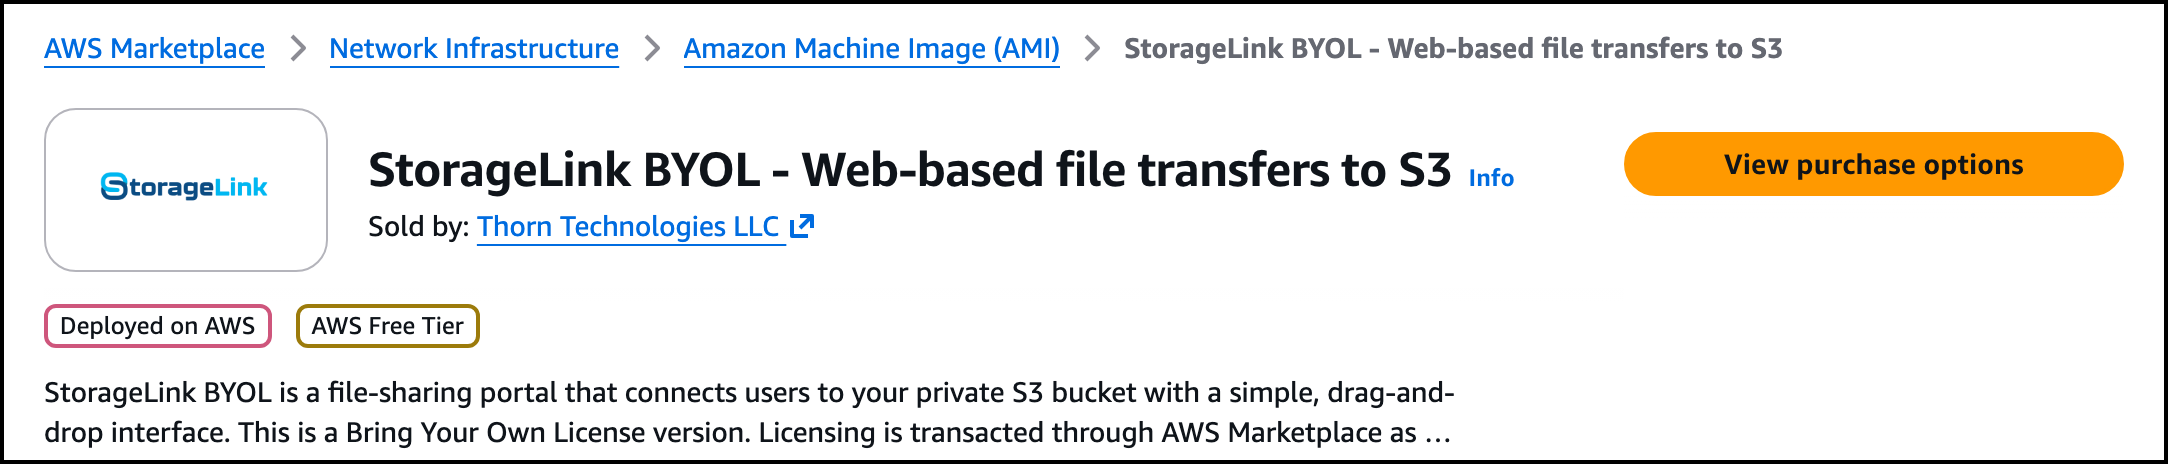
Open the StorageLink BYOL listing on AWS Marketplace (StorageLink BYOL - Web-based file transfers to S3) and click View purchase options.
The public offer on this listing is free of charge. Under Pricing details, select the Unit dimension (License units, $0.00) and leave Number of units at
1; the Subscribe button stays disabled until a dimension is selected. Review the offer terms, then click Subscribe at the bottom of the page.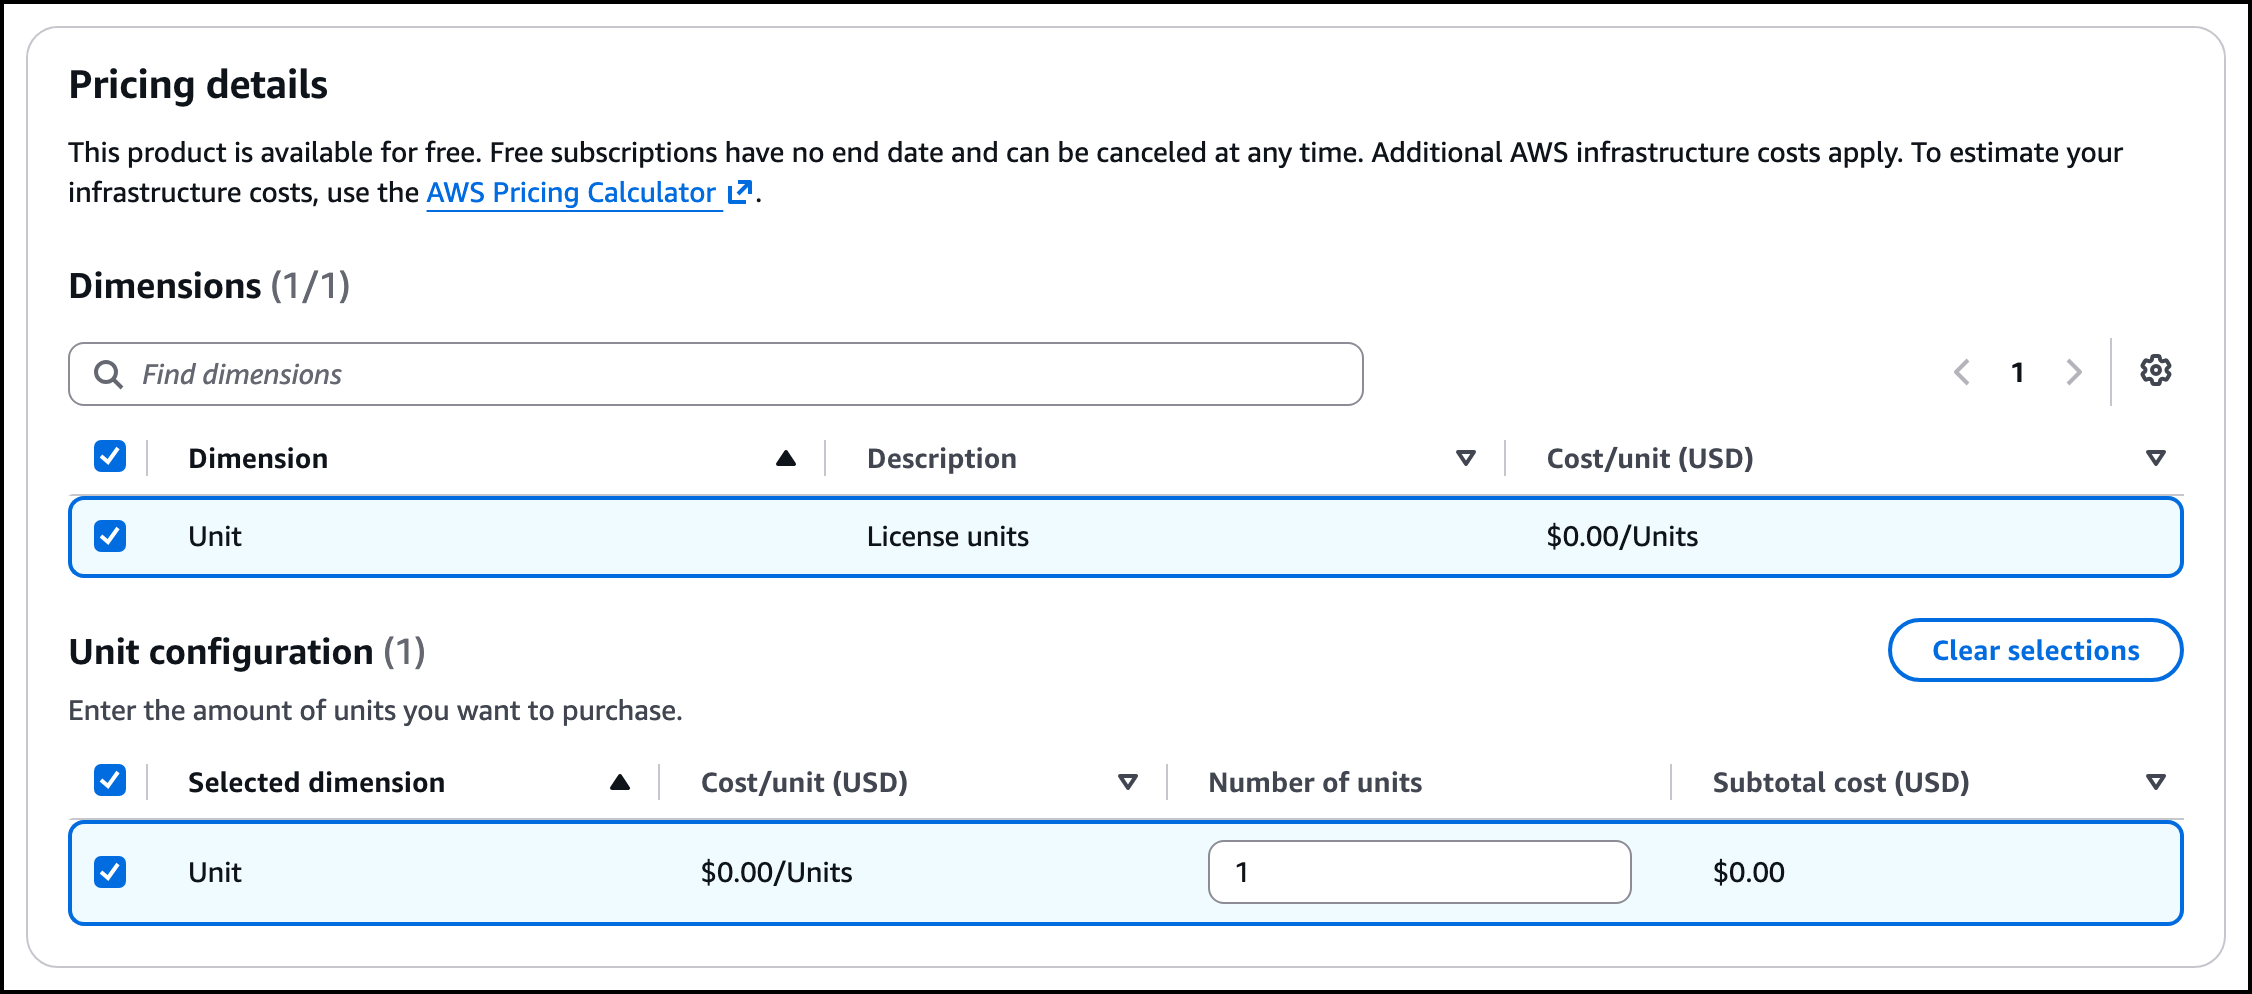
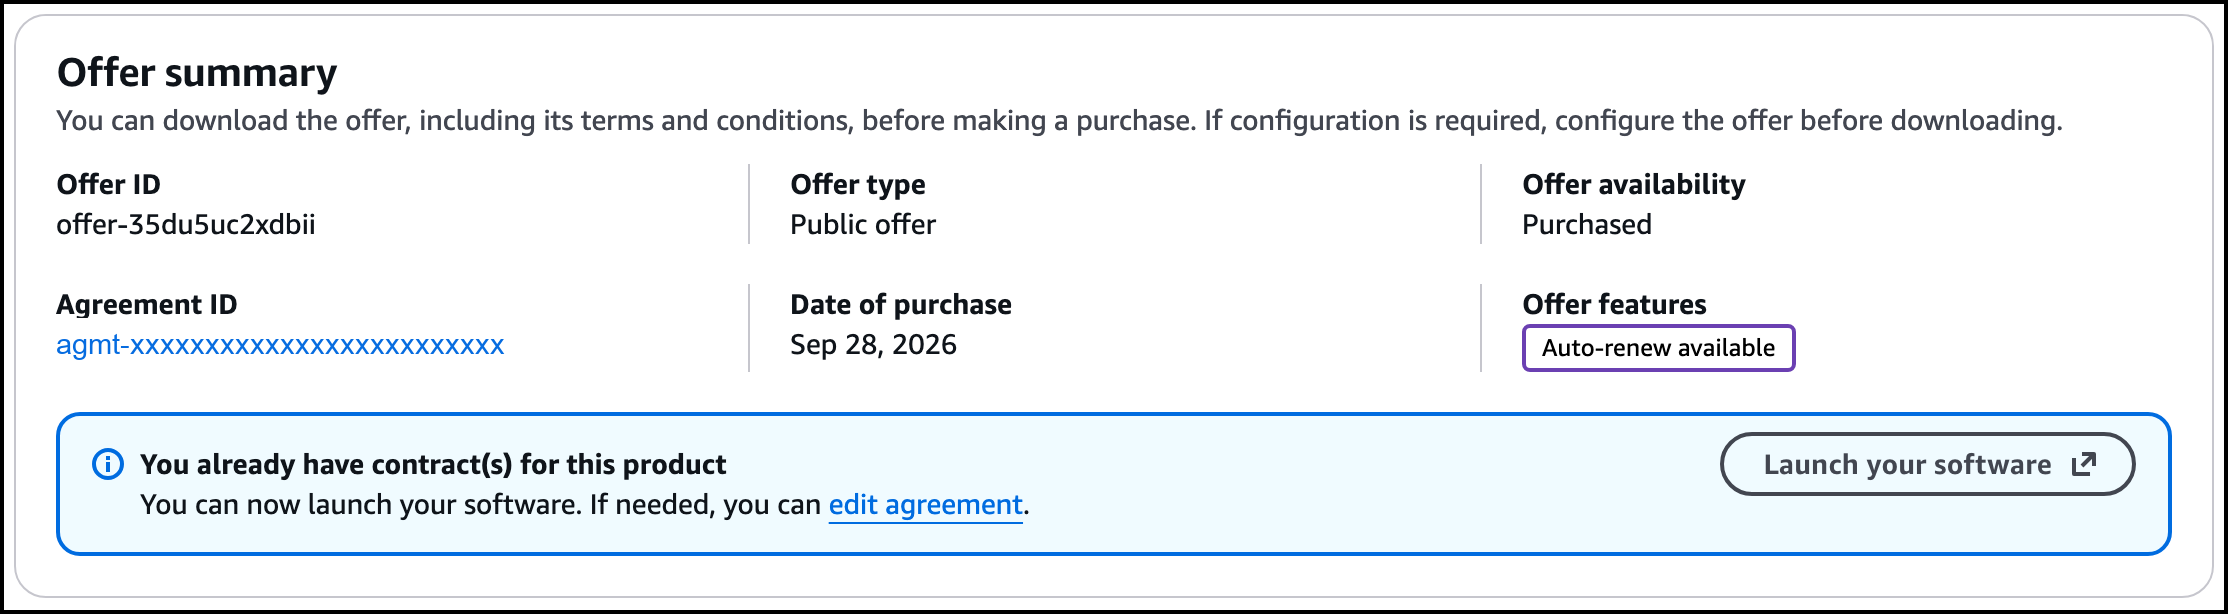
The subscription takes a few minutes. When it completes, the Offer summary shows the offer as Purchased. Click Launch your software; the launch page opens in a new browser tab.
Under Setup, select AWS CloudFormation, then choose:
- CloudFormation template: StorageLink (High Availability - New Network)
- Version: check that it shows the latest version
- Region: the region to deploy into
Click Launch with CloudFormation.
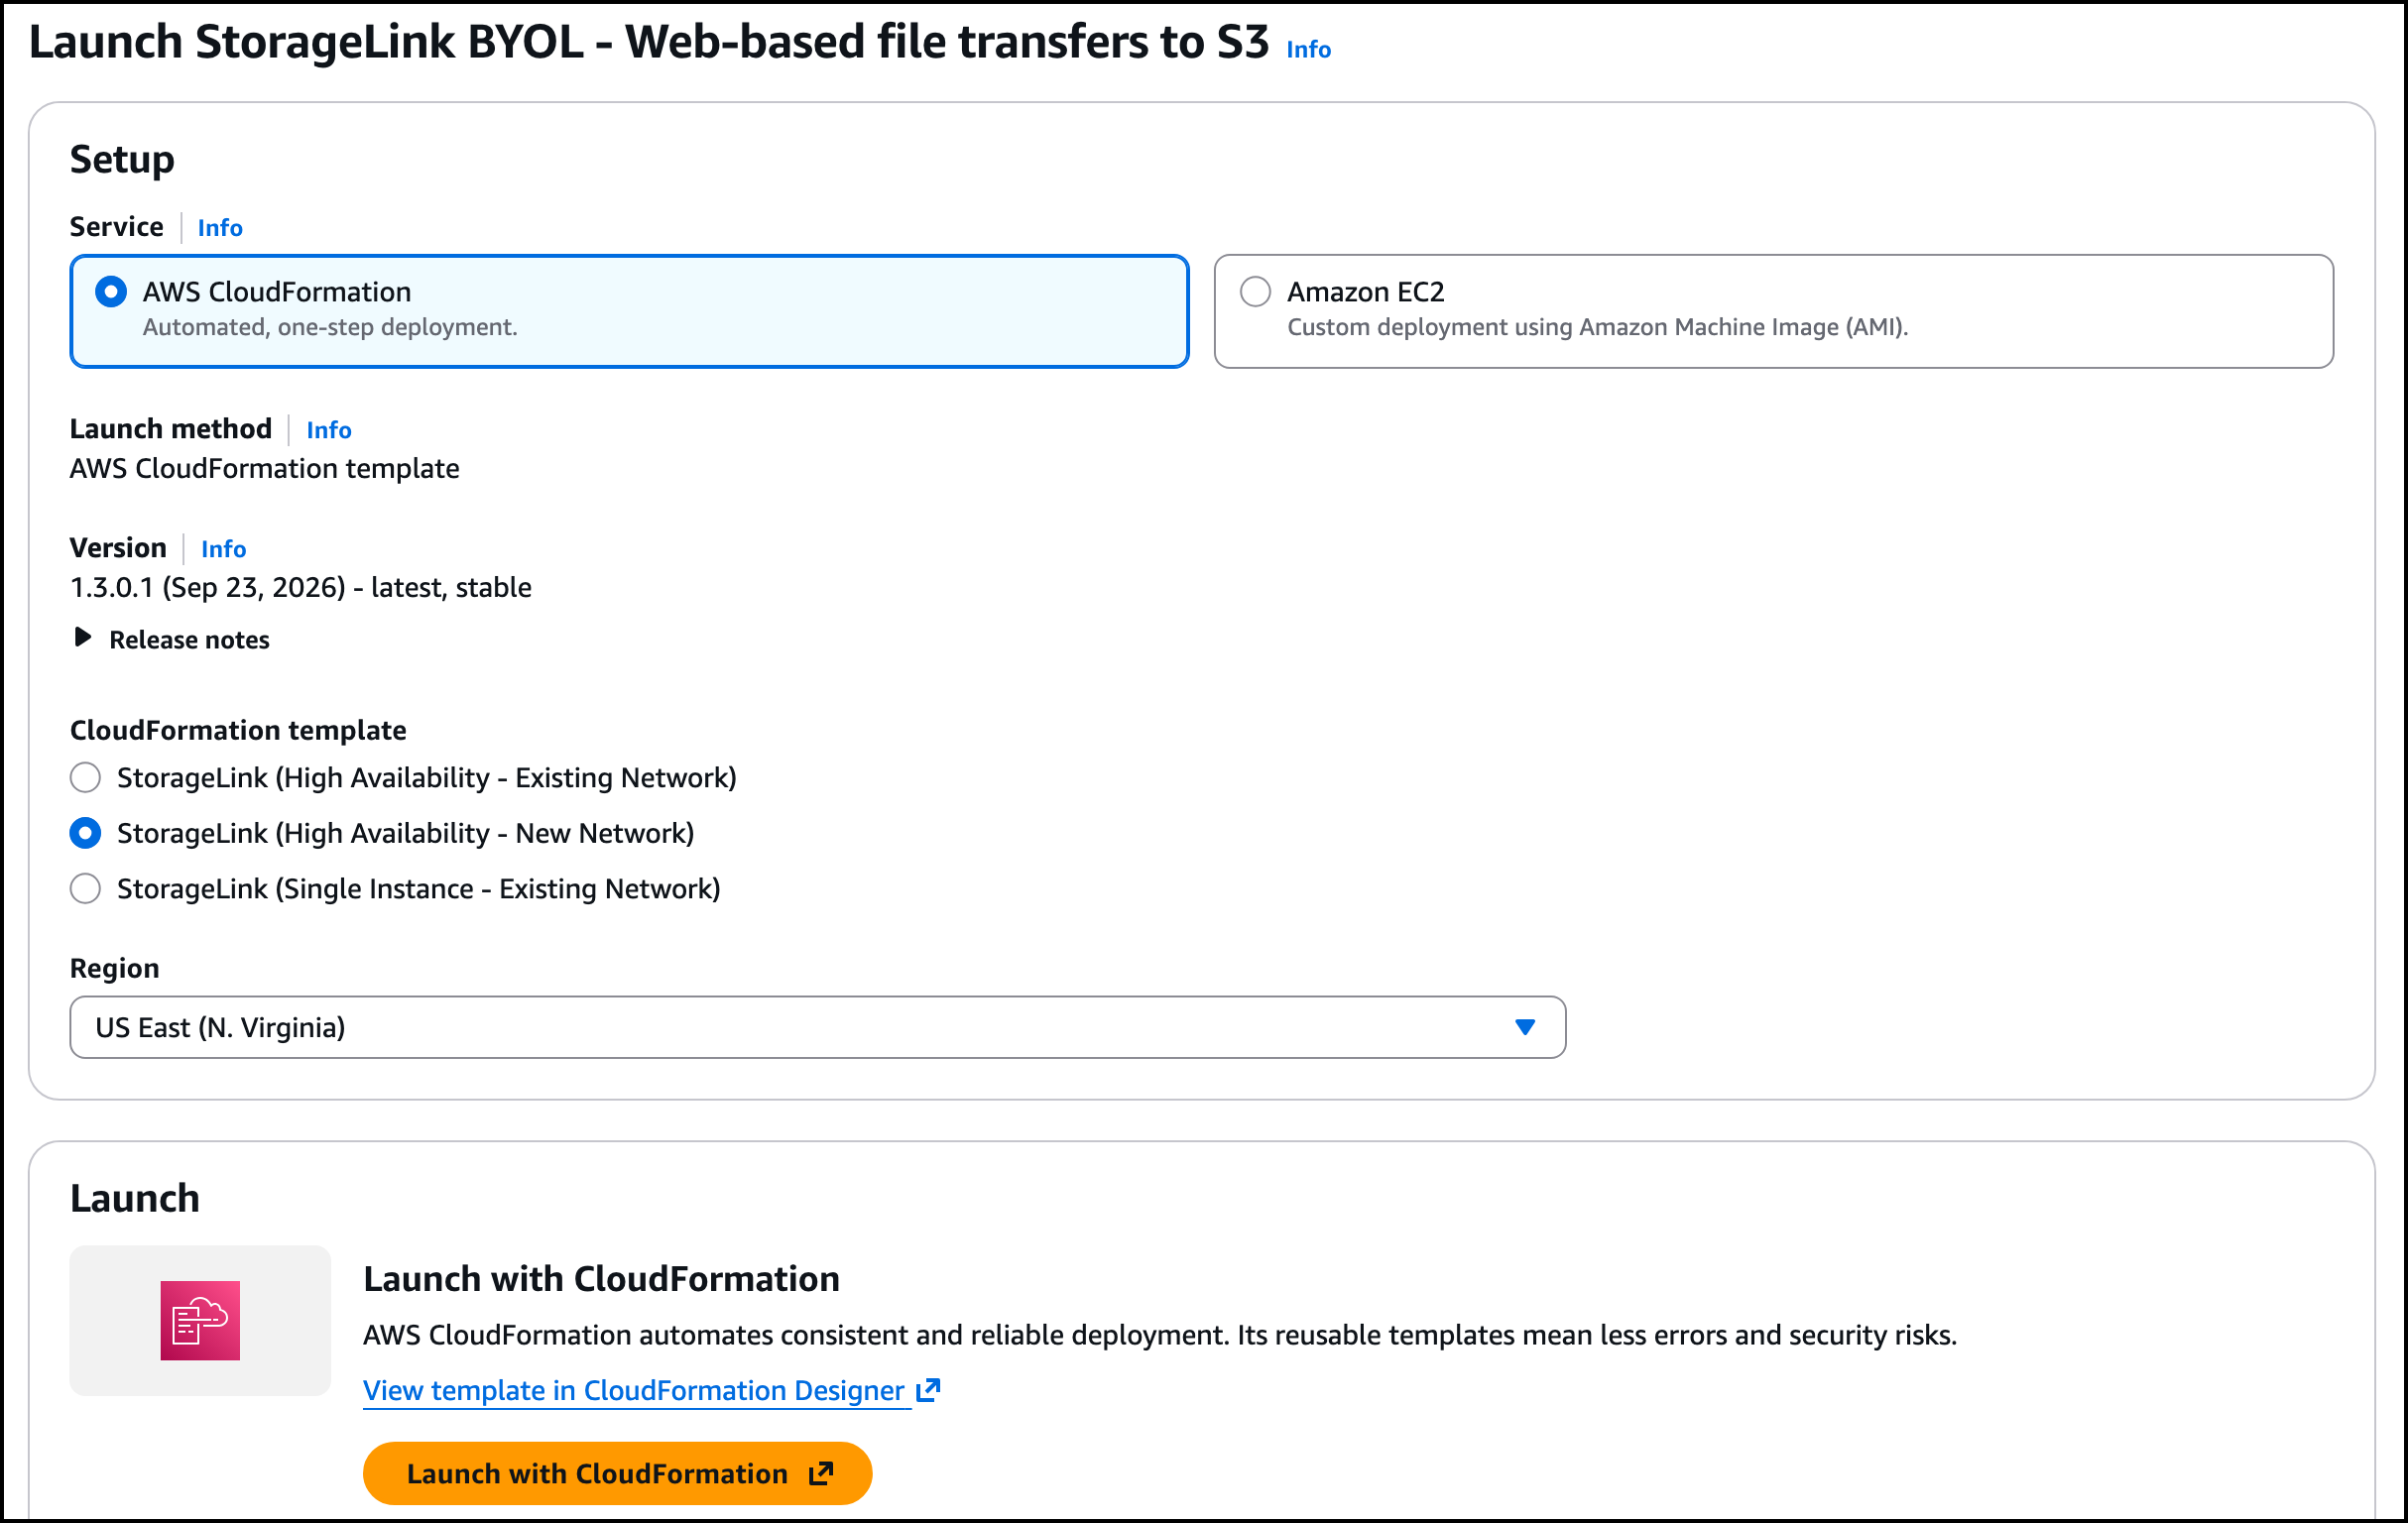
This opens the CloudFormation Create stack page in the AWS console with the template already selected.
Create the HA CloudFormation stack
The Template source points to the template on Amazon S3. You can review the template before you launch.
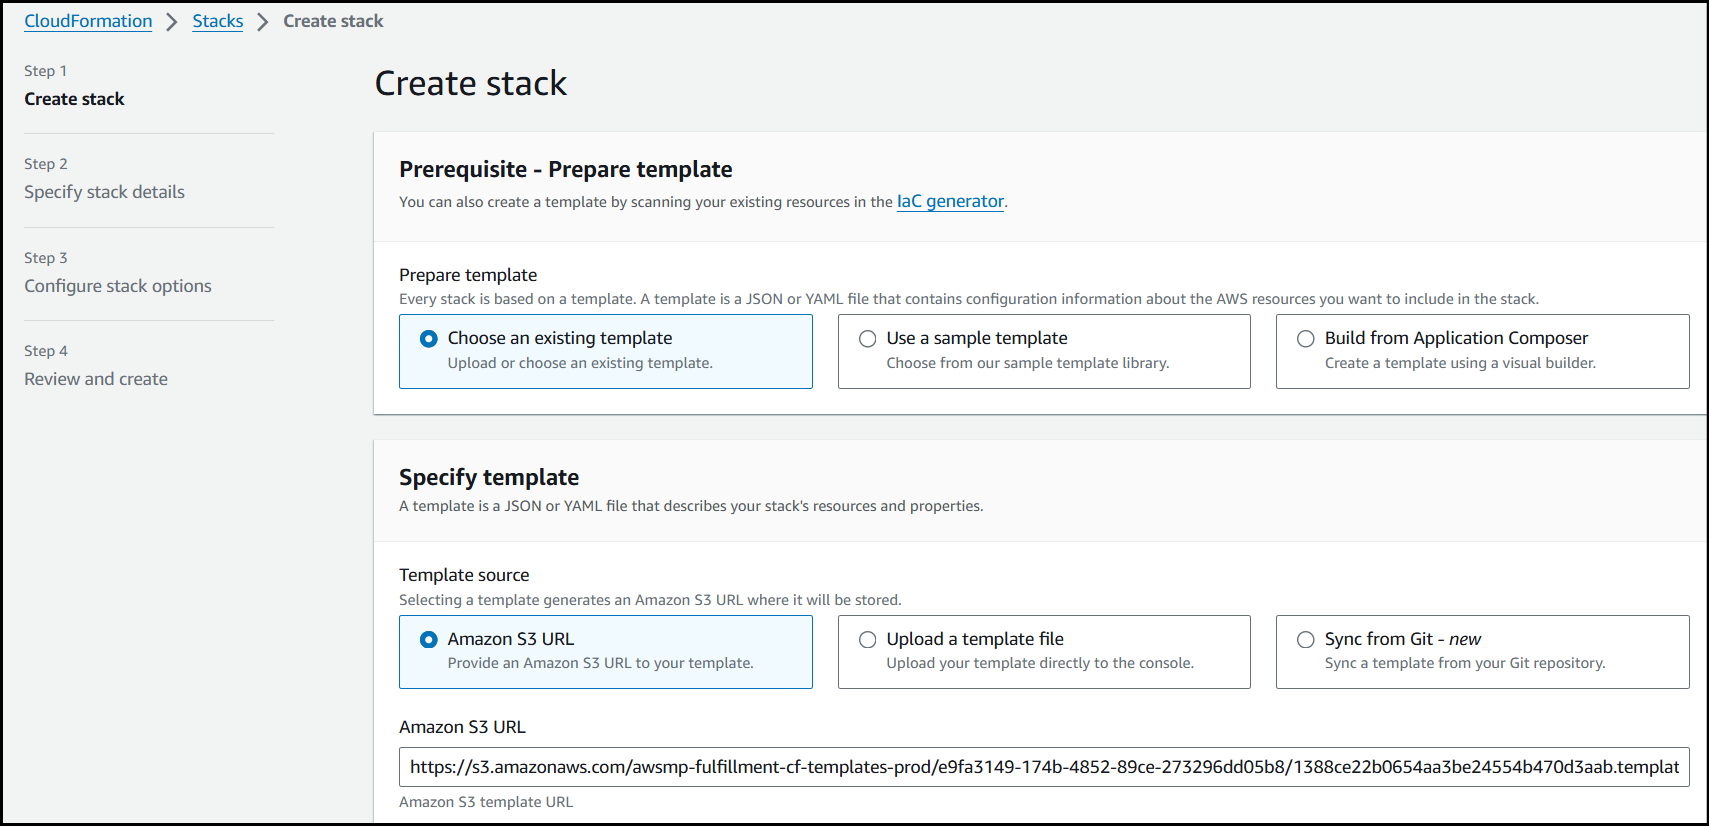
To create the High Availability (New Network) stack:
The template is already selected, so click Next.
Enter a Stack name, then fill in the parameters. The console groups them as follows.
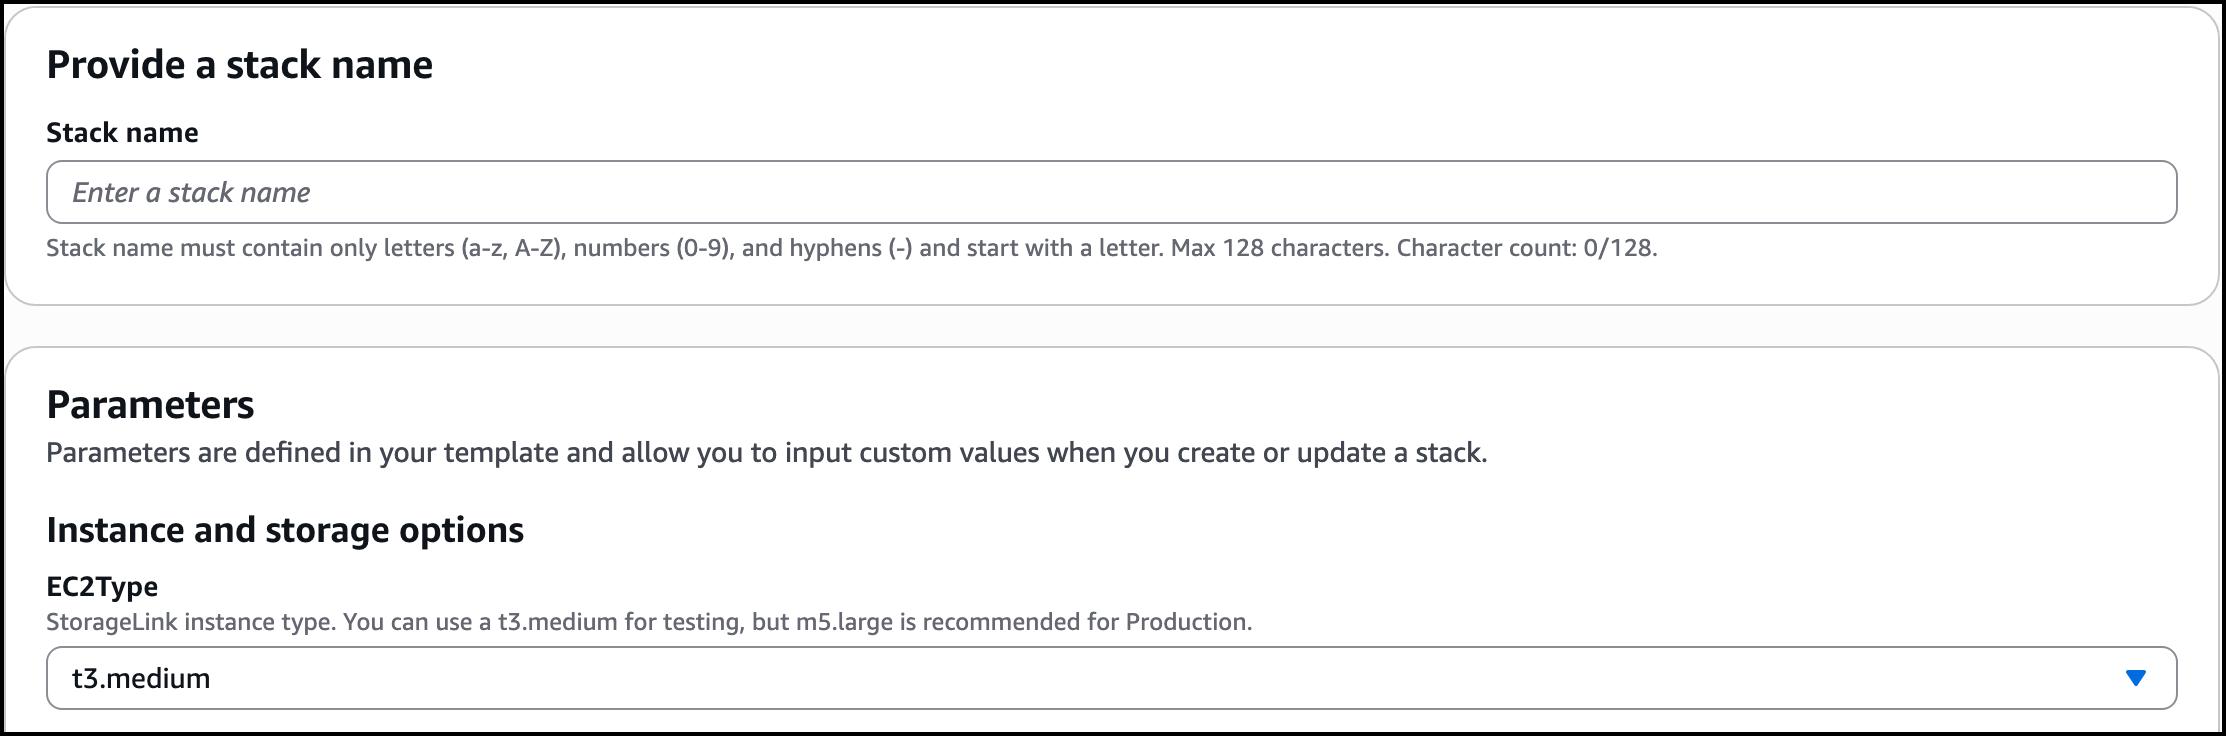
Instance and storage options
- EC2Type: Defaults to
t3.medium, which is fine for testing. We recommendm5.largeor larger for production workloads. - DiskVolumeSize: Defaults to
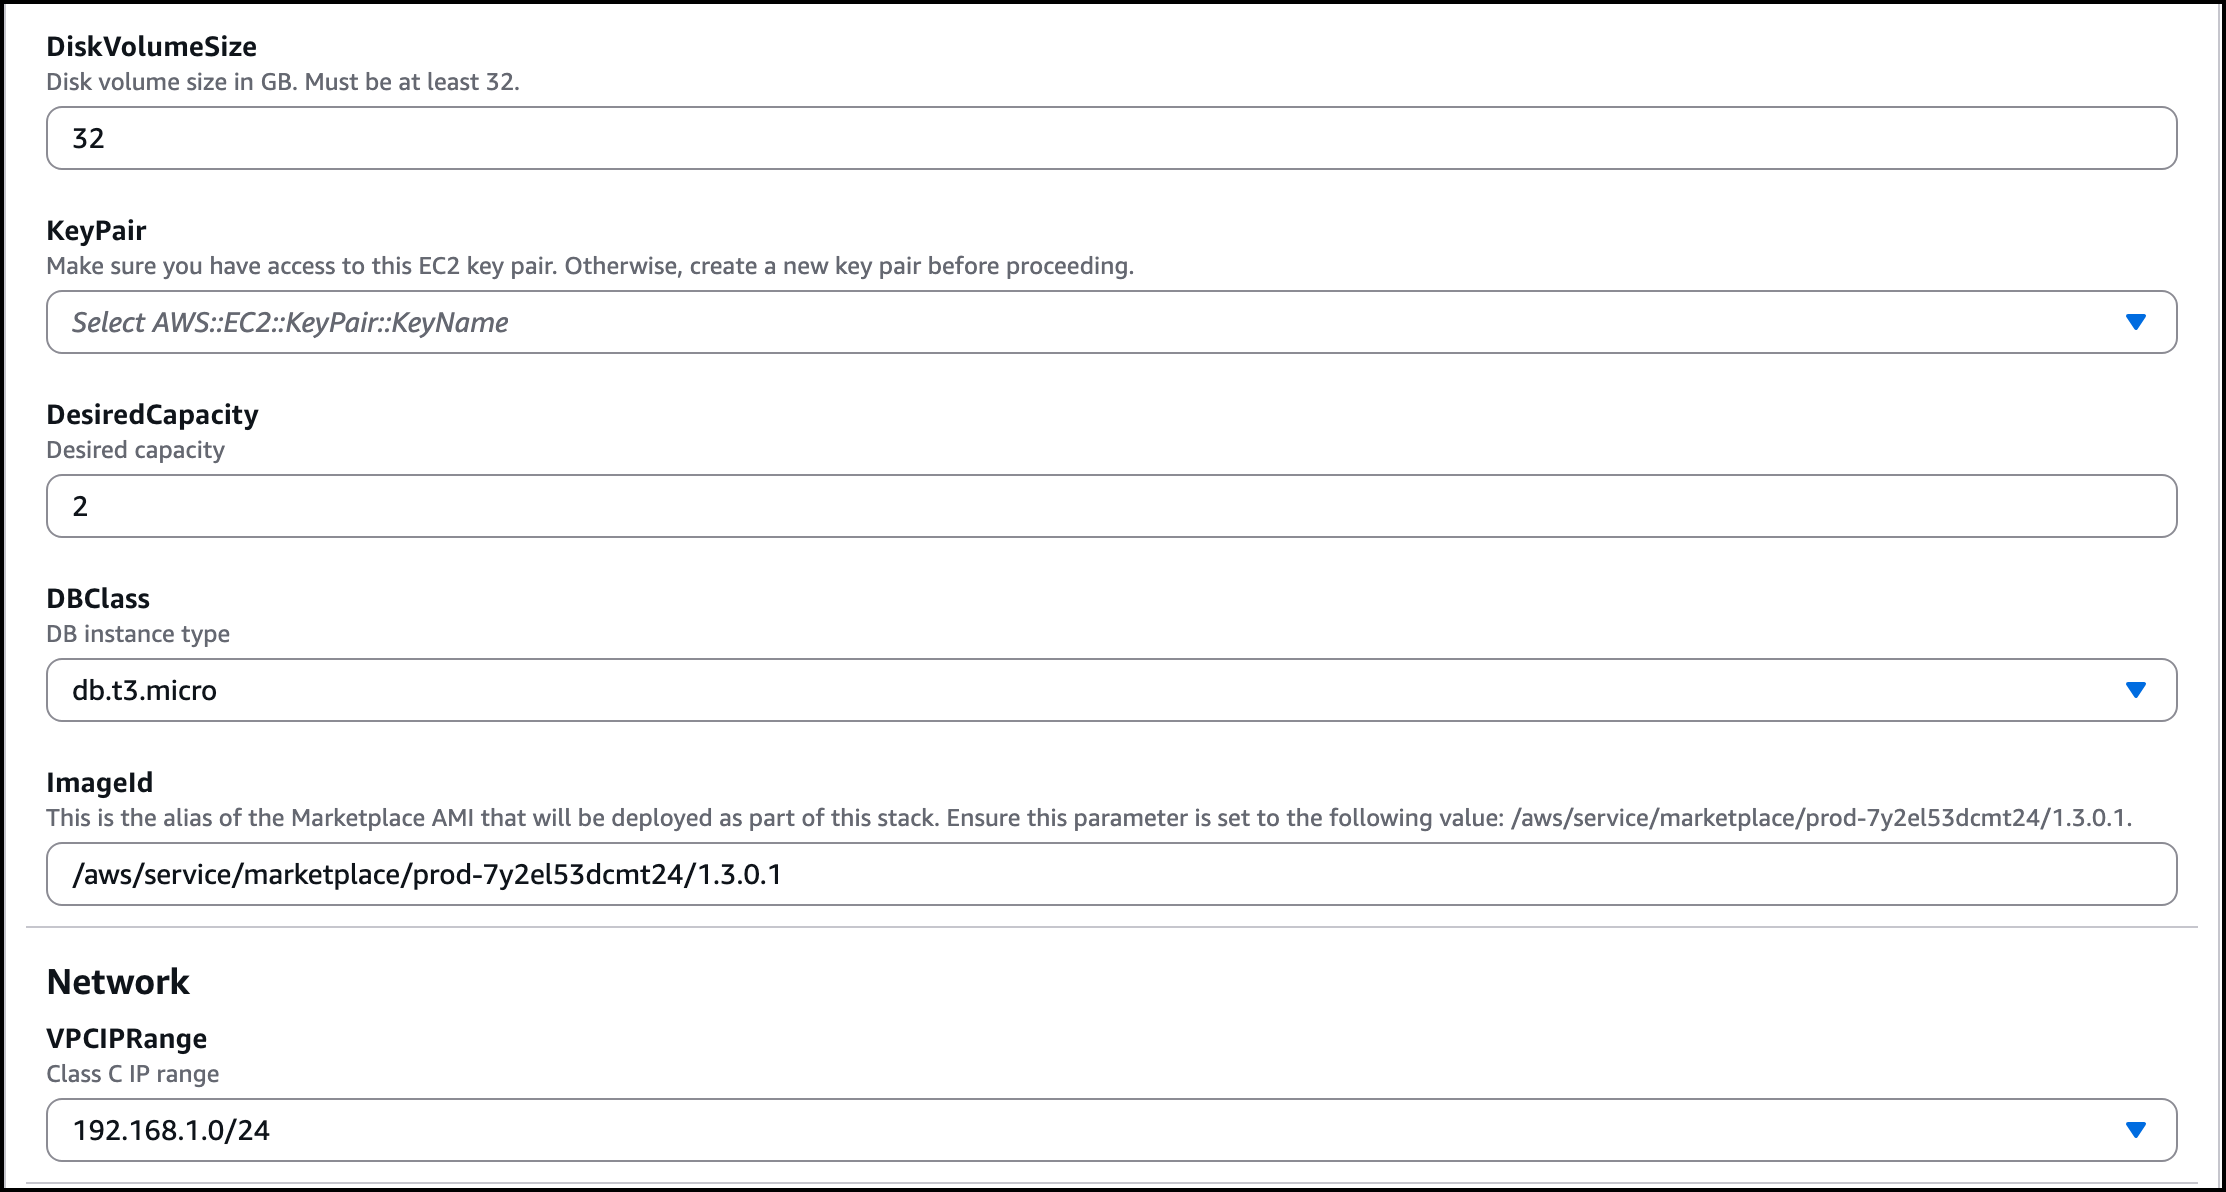
32GB, the minimum. Files are stored in S3, so the disk only needs room for the operating system and rotated logs. - KeyPair: An EC2 key pair whose private key you have. You need it to SSH into the instances.
- DesiredCapacity: How many instances to run. Defaults to
2, which is also the minimum; the Auto Scaling group allows up to 10. - DBClass: The database instance class. Defaults to
db.t3.micro, since StorageLink is not database-heavy. - ImageId: Pre-filled with the AWS Marketplace SSM parameter for the StorageLink BYOL AMI (
/aws/service/marketplace/prod-7y2el53dcmt24/1.3.0.1for version 1.3.0.1), which resolves to the AMI in the region you deploy to. The template accepts only this value, so leave it as is.
Network
- VPCIPRange: The Class C IP range for the new VPC, from
192.168.1.0/24(the default) to192.168.20.0/24. Choose one that does not overlap networks you connect to this VPC.
Access and authentication
- WebInputCIDR: The IP range allowed to reach the web interface on ports 80 and 443. If you support many users, it may be practical to open this to
0.0.0.0/0; otherwise, start with your own IP address followed by/32(for example,1.2.3.4/32). - SshInputCIDR: The IP range allowed to SSH to the instances on port 22. Use your own IP address followed by
/32. The template does not accept0.0.0.0/0. - WebAdminUsername: The username for the first web admin account.
- WebAdminPassword: The password for that account. It must be 12 or more characters long, which matches StorageLink's default password policy. The value can appear in the instances' cloud-init logs, so change the password after you first sign in.
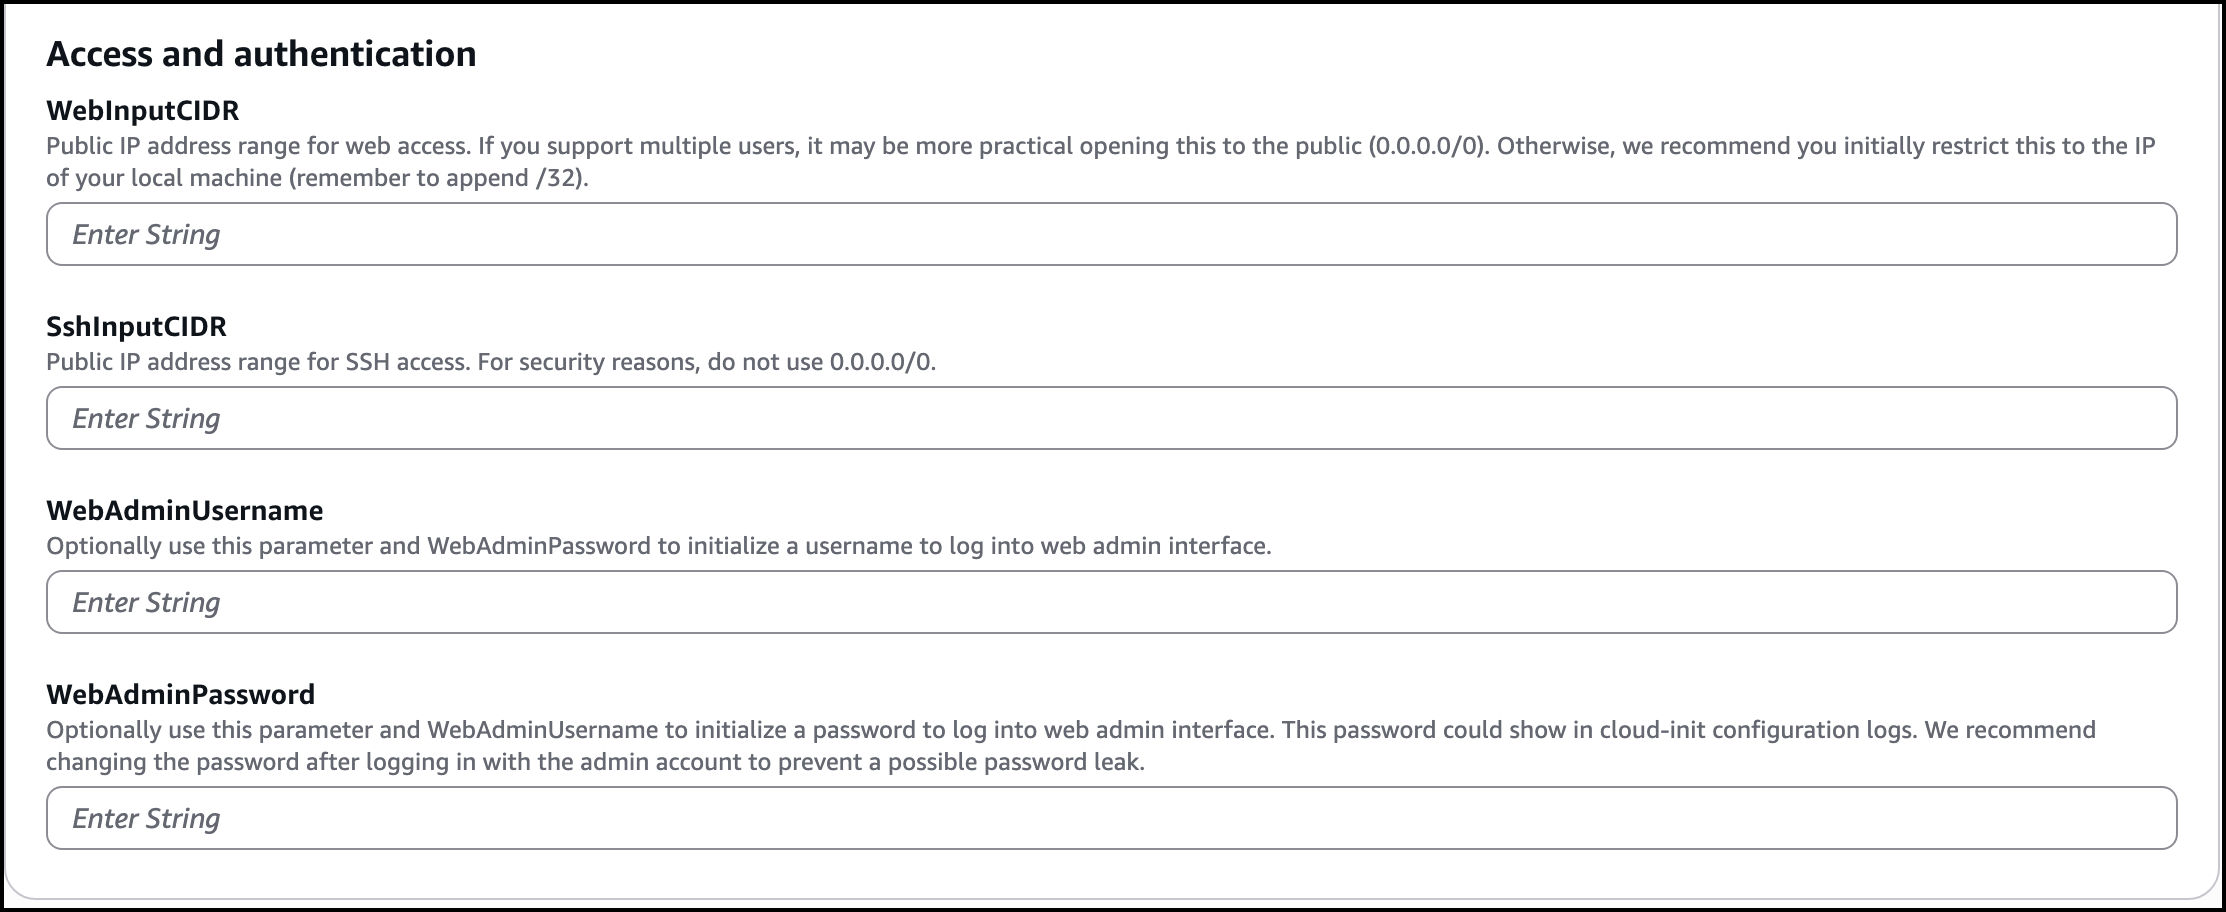
- EC2Type: Defaults to
Configure stack options: The options on this page can be left as they are. Scroll to the bottom and click Next.
Review and create: Check the box that reads I acknowledge that AWS CloudFormation might create IAM resources, then click Submit.
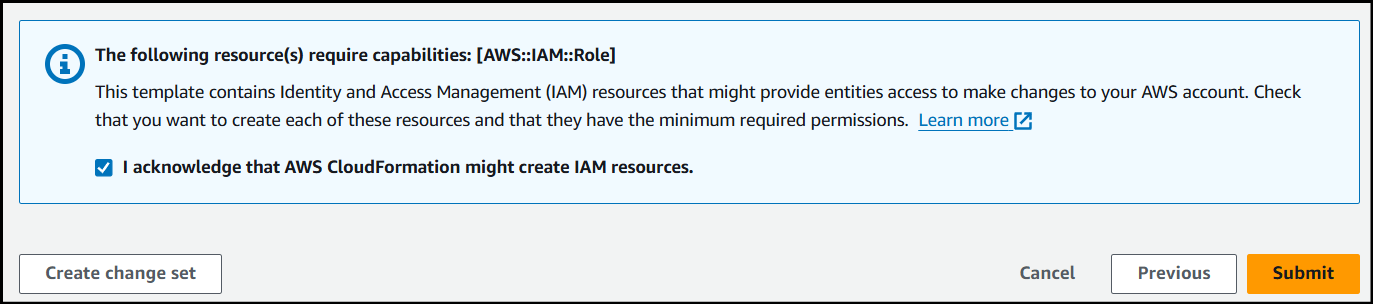
You can follow the progress on the stack's Events tab; any errors during creation appear there. Creating the stack takes about 20 minutes, most of it spent on the database.
Sign in and start your free trial
When the stack status is CREATE_COMPLETE, open the Outputs tab. The Hostname value is the DNS name of the Network Load Balancer.
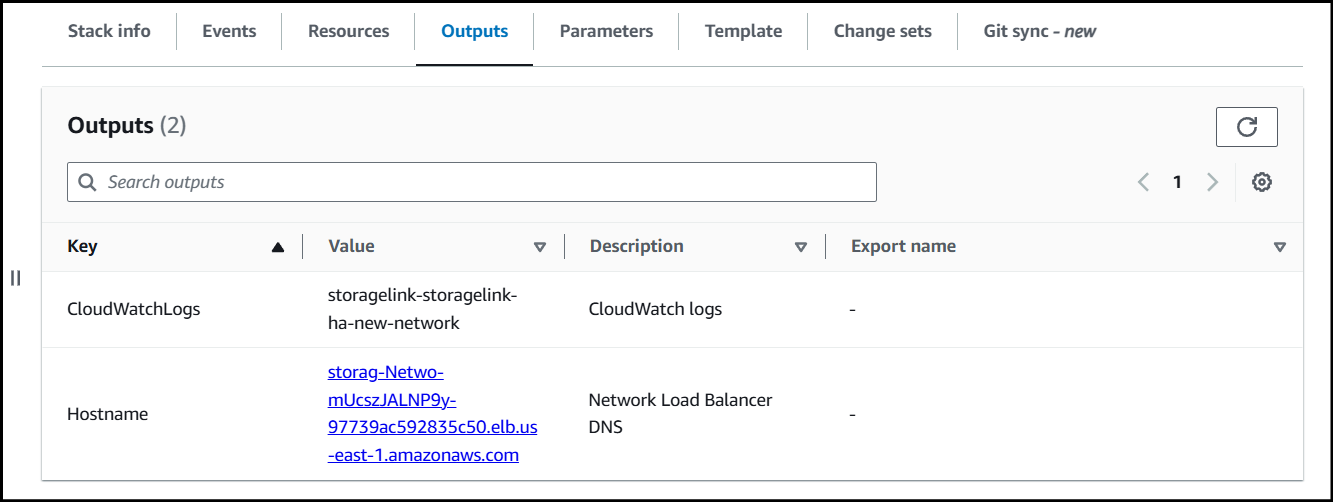
- Open
https://<Hostname>in your browser. The web interface uses a self-signed certificate at first, so accept the browser warning to continue. - Sign in with the WebAdminUsername and WebAdminPassword you set on the stack.
- A StorageLink BYOL deployment starts unlicensed: administrators can sign in and configure everything, but non-administrator users cannot sign in and file transfers are blocked. Use the Start a 30-day free trial card at the top of the admin UI to start your trial, as described in First Launch Experience. The trial covers up to 10 StorageLink users.
You only need to start the trial once. It is stored in the shared database, and the other instances pick it up within about a minute. Until they do, a request that the load balancer sends to one of them is still treated as unlicensed — for example, adding a user fails with A valid license is required before users can be created — so wait a minute after starting the trial before you add users. Instances that the Auto Scaling group launches later, for example to replace a failed instance, start with the trial already active.
When you are ready to license the deployment, book a 15-minute call with our Sales team. On AWS, the license is purchased through AWS Marketplace as a private offer on the StorageLink BYOL listing. See Purchasing a License.
What the stack creates
- A new VPC with two public subnets (for the load balancer and a NAT gateway) and four private subnets (two for the database, two for the StorageLink instances), plus an internet gateway, a NAT gateway, and route tables.
- A Network Load Balancer with an Elastic IP address, listening on ports 22, 80, and 443.
- An Auto Scaling group of StorageLink instances in the private subnets.
- An Amazon RDS for PostgreSQL 18 database (Multi-AZ, encrypted), with its credentials generated and stored in AWS Secrets Manager.
- An IAM role that lets the instances use S3 buckets whose names start with
storagelink-i-in your account, write to the CloudWatch log groupstoragelink-<stack name>, and read the database secret.
StorageLink itself creates one S3 bucket for the root folder, named storagelink-i-<instance-id> after the instance that set up the deployment. The other instances, and any instances that replace them later, use the same bucket, including after the instance it is named after has been terminated.
Deleting the deployment
Delete the stack in the CloudFormation console. Keep in mind:
- CloudFormation takes a final snapshot of the database when it deletes the stack. Delete the snapshot in the RDS console (Snapshots) once you no longer need it.
- The S3 bucket StorageLink created is not part of the stack. Empty and delete it if you no longer need the files.