Creating a High-Availability Deployment
Purpose: Deploy StorageLink in a highly available configuration on AWS with auto-scaling and load balancing.
Architecture: Auto-scaling group (1-4 instances) + Network Load Balancer + RDS database + New VPC
Deployment:
- Subscribe to StorageLink on AWS Marketplace
- Select "High Availability - New Network" CloudFormation template
- Configure parameters (instance type, capacity, VPC range, credentials)
- Acknowledge IAM permissions and submit
Key Parameters:
- Desired Capacity: Number of instances (default: 2)
- VPC IP Range: Class C range (default:
192.168.1.0/24) - DB Class: RDS instance type (default:
db.t3.micro)
Access: Hostname URL in CloudFormation Outputs tab after deployment
Product: StorageLink by Thorn Technologies — cloud storage gateway for secure file sharing
Overview
StorageLink versions 1.000.01 and later have a high availability (HA) feature.
This article shows you how to deploy StorageLink with an HA configuration into a new VPC network.
CloudFormation AWS Marketplace deployment instructions
To deploy the HA New Network CloudFormation template, go to the AWS Marketplace.
You first need to subscribe to the StorageLink product. Doing so allows your AWS account to use the StorageLink AMI.
Click here to open the AWS Marketplace page for StorageLink.
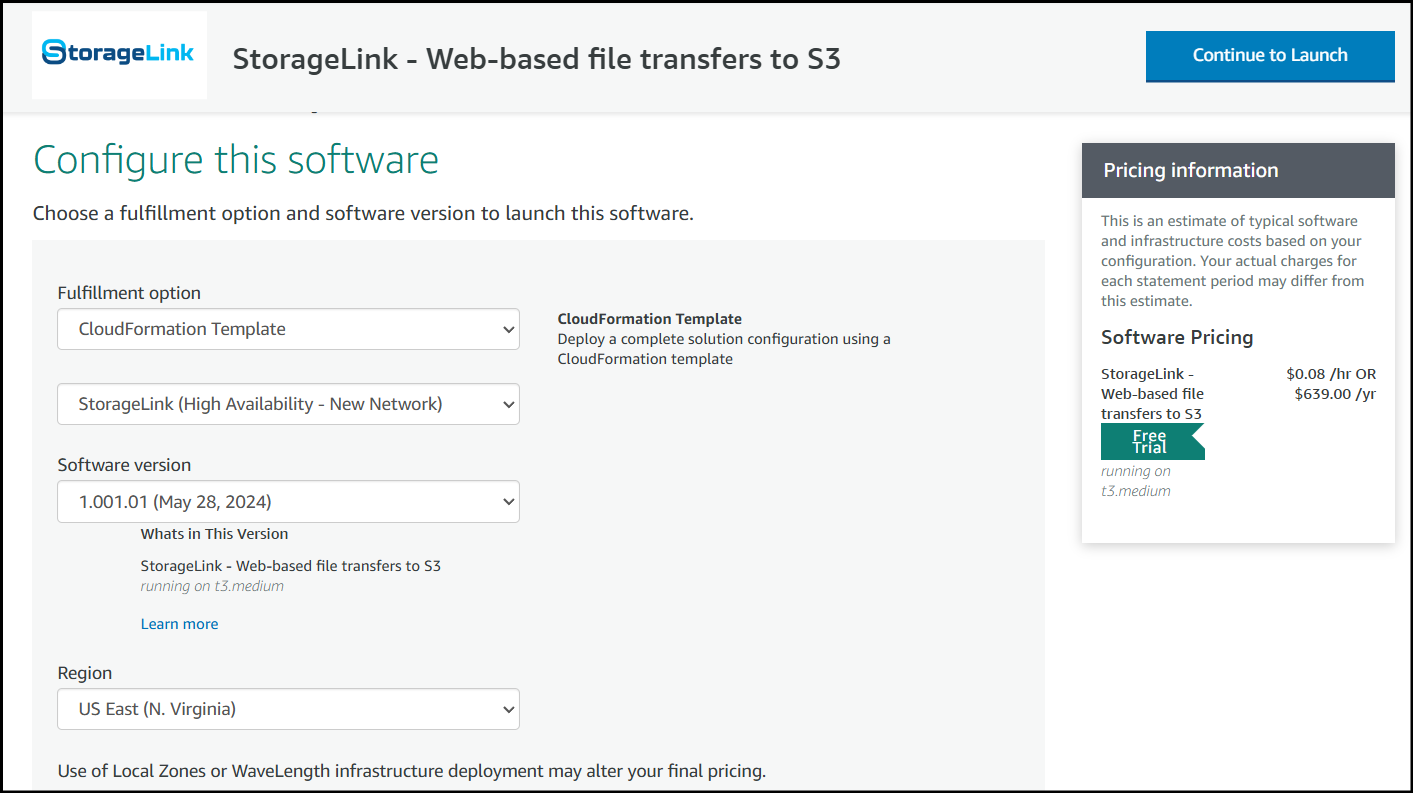
Click the Continue to Subscribe button.

Once you are subscribed, click Continue to Configuration.
Under the Fulfillment Option, choose CloudFormation Template and pick the following option:
- StorageLink (High Availability - New Network)
Under the Software version, select the latest version.
Under Region, select the appropriate region.
Once you are finished click the Continue to Launch button.
On the Launch this software page, under Choose Action, select Launch CloudFormation.
Click Launch.
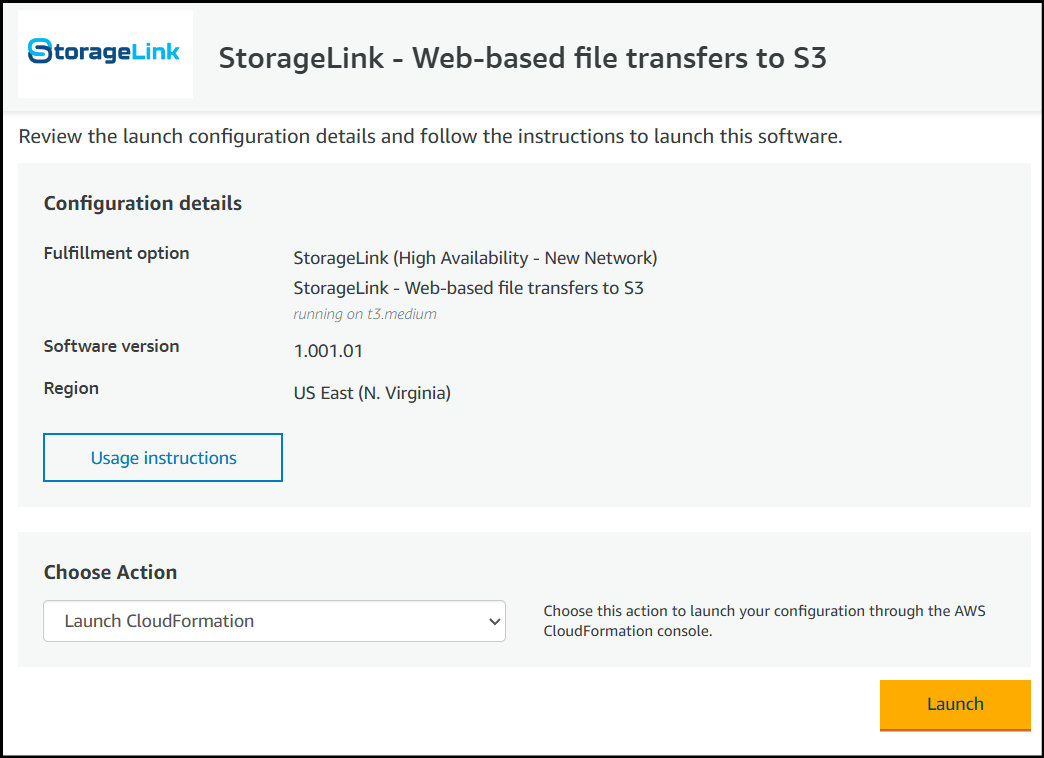
This will take you to the CloudFormation service in the AWS console.
Spinning up an HA CloudFormation stack
If you followed the instructions in the previous section, you should now be in the CloudFormation service within the AWS console.
The Template source should be pointing to a location on S3 corresponding to the CloudFormation template you specified.
You also have the ability to download the CloudFormation template via this link.
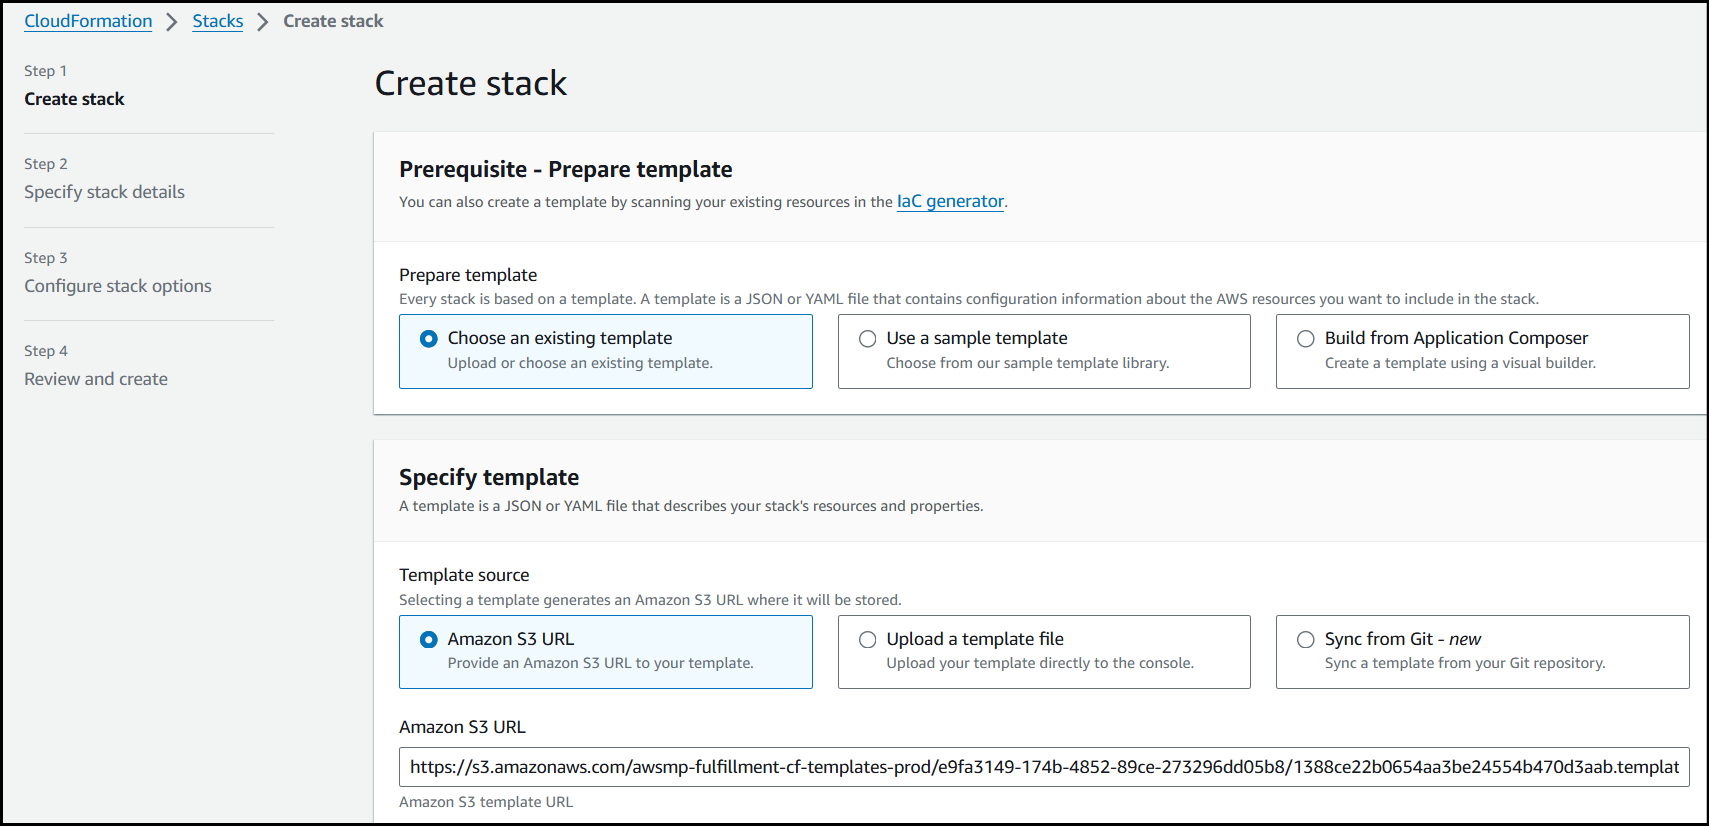
To spin up a High Availability (New Network) CloudFormation stack of StorageLink:
The Template source is already selected, so click Next to continue.
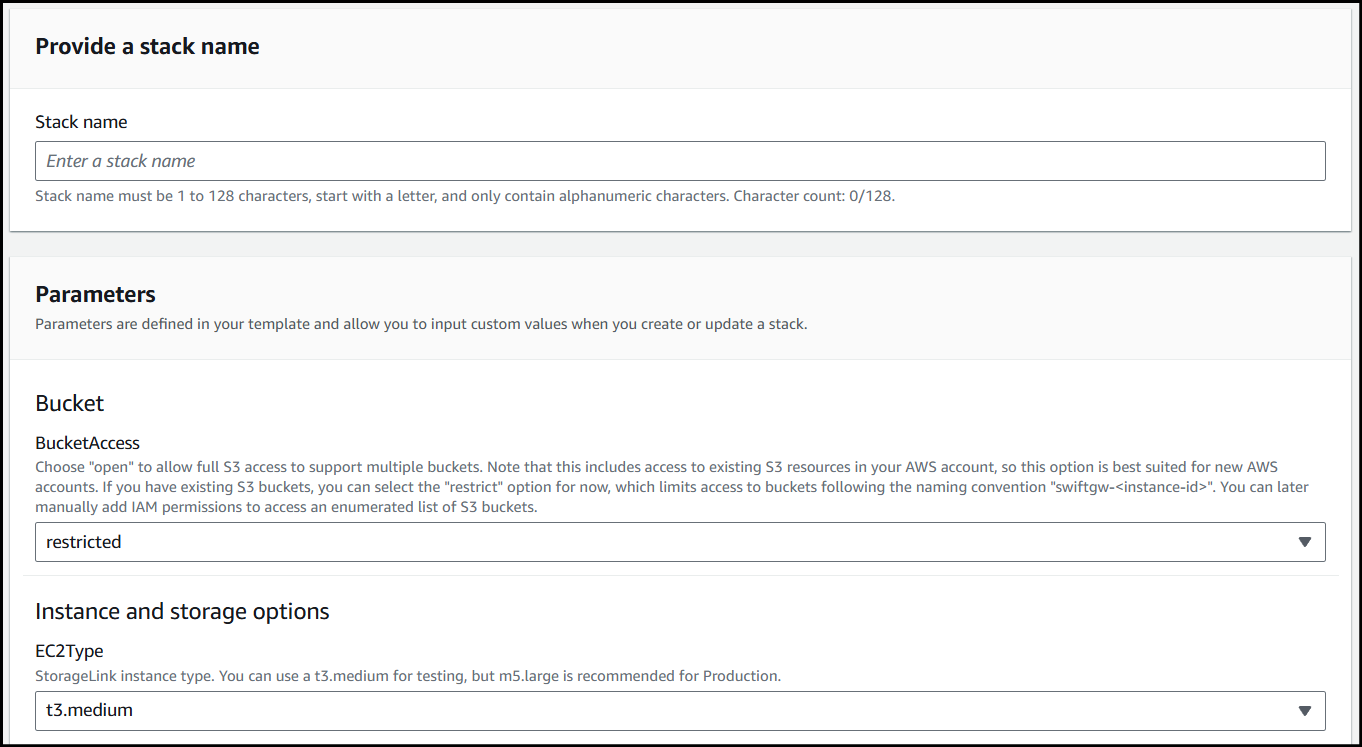
Enter the details for the stack:
Stack name: The name of your CloudFormation stack.
Bucket Access: The default is
restricted, which limits access to S3 buckets following a naming convention. Chooseopento allow access to all S3 buckets.EC2 Type: Defaults to
t3.medium. We recommend usingm5.largefor production workloads.
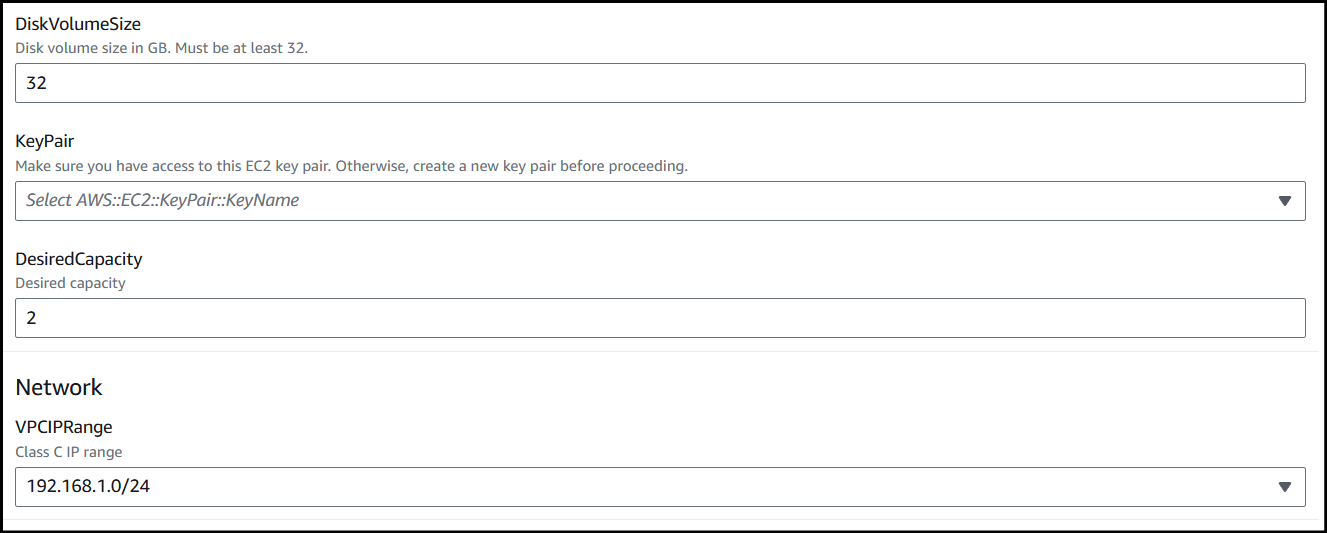
Disk Volume Size: Defaults to
32 GB. We use S3 as the file system, so this should be enough to accommodate the OS and rotated logs.Key Pair: Choose a
Key Pairthat you have access to.Desired Capacity: Defaults to
2. This determines how many instances you want to run.VPC IP Range: Select a Class C IP range for your VPC. Defaults to
192.168.1.0/24.
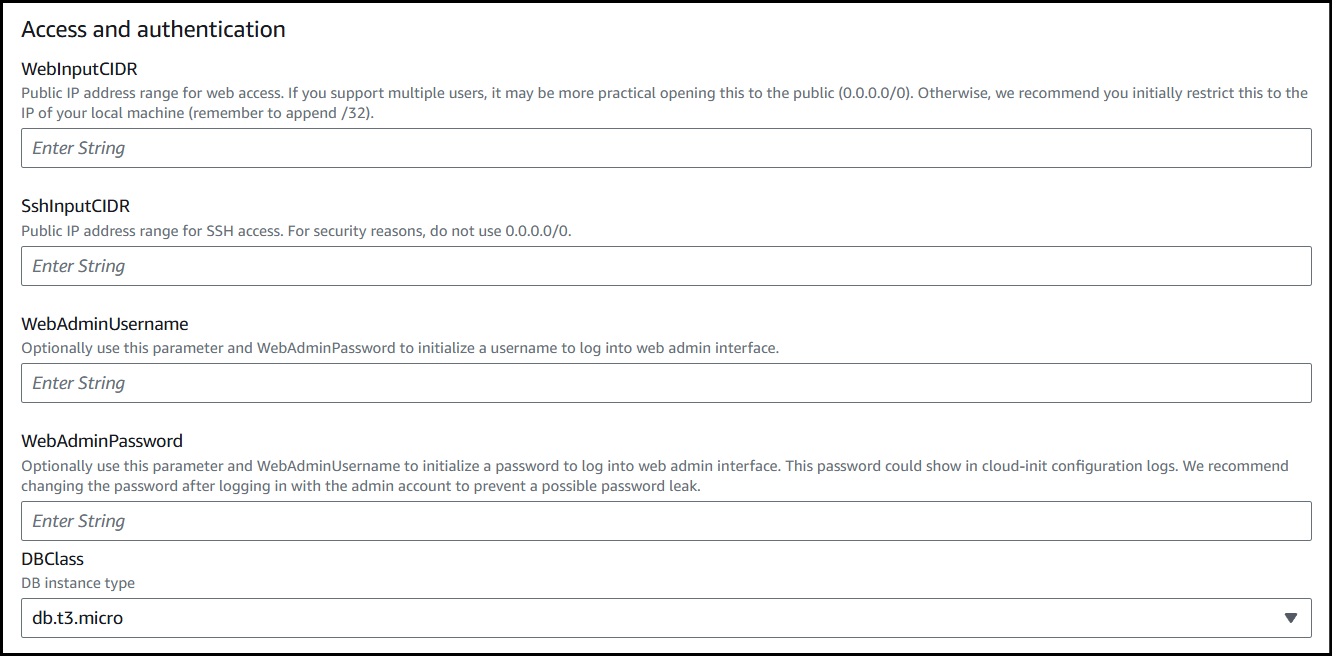
Web Input CIDR: Enter a CIDR range (e.g.
1.2.3.4/32) that represents the IP address your workstation. This opens an ingress rule for sysadmin use.SSH Input CIDR: Enter a CIDR range for the SSH service. Defaults to
0.0.0.0/0.Web Admin Username: Configure a username for the initial Web Admin account.
Web Admin Password Configure a password for the initial Web Admin account. Password must contain 1 or more uppercase characters, digit characters, special characters and must be 8 or more characters in length.
DB Class: This is the database service instance class. Defaults to
db.t3.micro, since StorageLink is not database-heavy.
Stack Options: The stack options page can be left as is. Scroll to the bottom of the page and click Next.
Review and create stack.
You must check the box that reads I acknowledge that AWS CloudFormation might create IAM resources to give CloudFormation permission to create IAM resources.
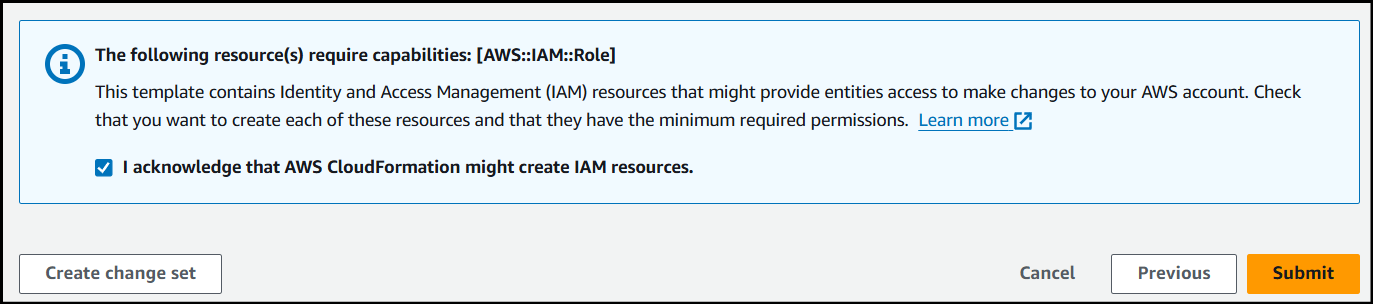
After checking the box, select Submit to create your deployment.
The stack creation progress can be monitored by selecting the stack and viewing the Events tab. Any errors that occur during creation will appear in the event log.
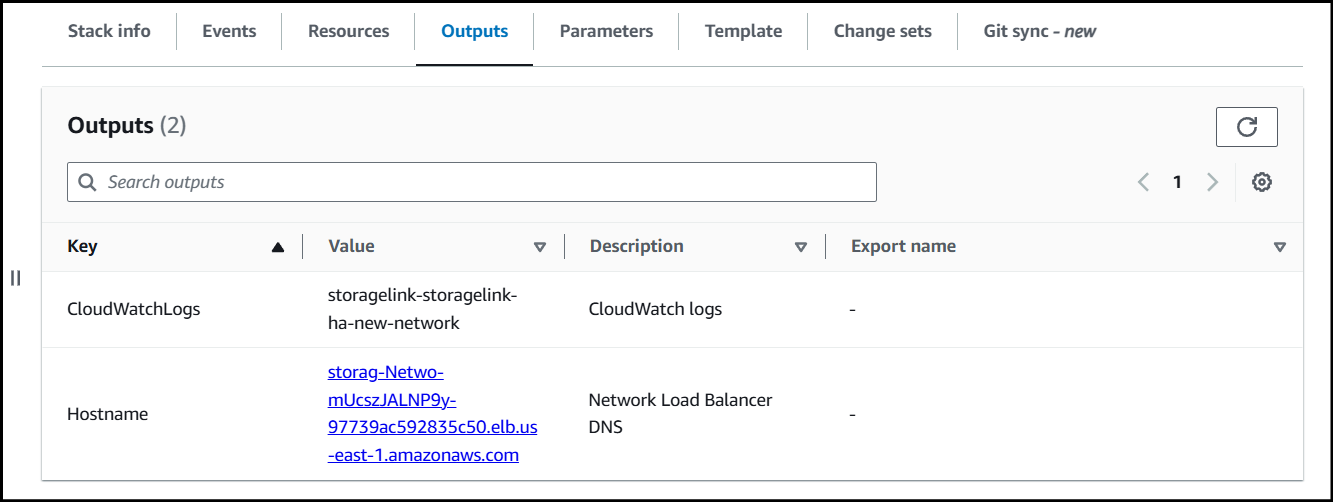
When the CloudFormation stack is created, go to the Outputs tab.
For the Hostname field, there will be a link to the Network Load Balancer's DNS hostname. Click this link, and it will take you to the web admin portal.