Integrating Google Authentication for StorageLink
Purpose: Enable SSO for StorageLink using Google Workspace as an identity provider.
Steps:
- Create OAuth 2.0 client in Google Cloud Console (API & Services → Credentials)
- Set redirect URI:
https://<host>/backend/login/oauth2/code/<custom-name> - Get Client ID and Client Secret
- In StorageLink Settings → Identity Providers, add new IdP with Google details
Required Settings:
- Issuer URI:
https://accounts.google.com - Scopes:
openid - Name Attribute:
sub
Supports: Both Admin Users and Web Users can authenticate via Google
Product: StorageLink by Thorn Technologies — cloud storage gateway for secure file sharing
With StorageLink, you can now integrate Google Authentication for Admin & Web Users.
In other words, Admin & Web Users can leverage their existing Google credentials instead of managing another account just for StorageLink.
Configuring Google Authentication is a process. At a high level, you will be performing two steps:
- Create and configure an OAuth 2.0 client in Google Cloud
- Point StorageLink to the OAuth 2.0 client
How to Create OAuth 2.0 Client IDs
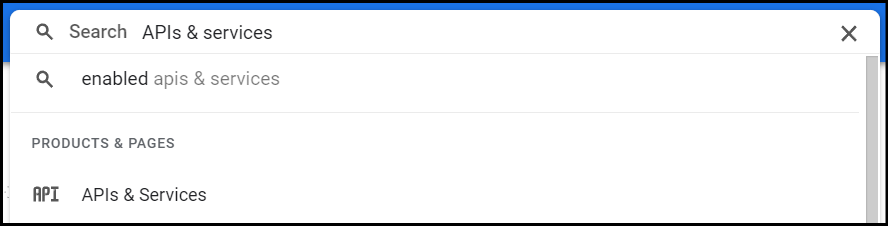
Open the Google Cloud Console and search for API & Services.
Before creating an OAuth 2.0 client, you need to have first configured a hostname for your StorageLink VM.
Once you are in API & Services, go to Credentials on the left-side menu.
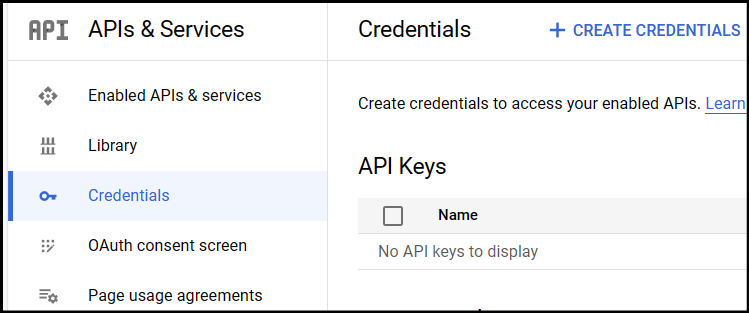
Click + Create Credentials and select OAuth client ID.
Under the Application type, select Web application, and configure a name for your OAuth 2.0 client.
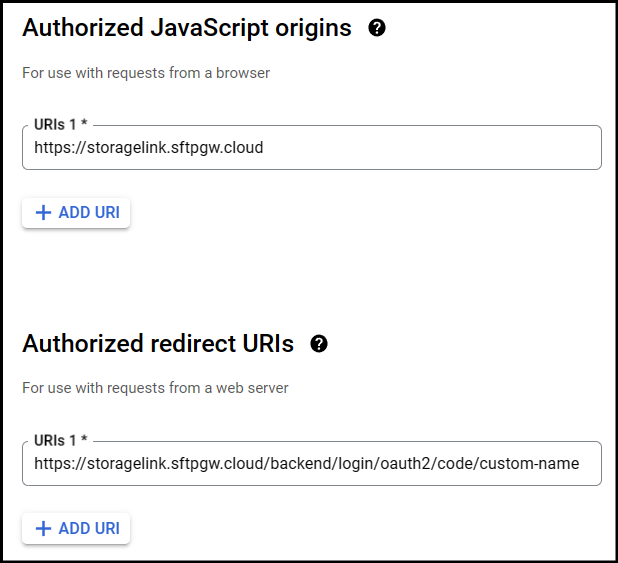
Next, configure the URIs you will be using for the JavaScript origin and redirect URI.
For the JavaScript Origin URI enter in this value:
https://storagelink-hostname
For the redirect URI enter in this value:
https://storagelink-hostname/backend/login/oauth2/code/custom-name
The custom-name can be any value you’d like, but make sure to remember it, as you’ll need it later on. Once everything has been configured, click Create at the bottom.
Once your OAuth 2.0 client has been created, enter into it and you should see this screen:
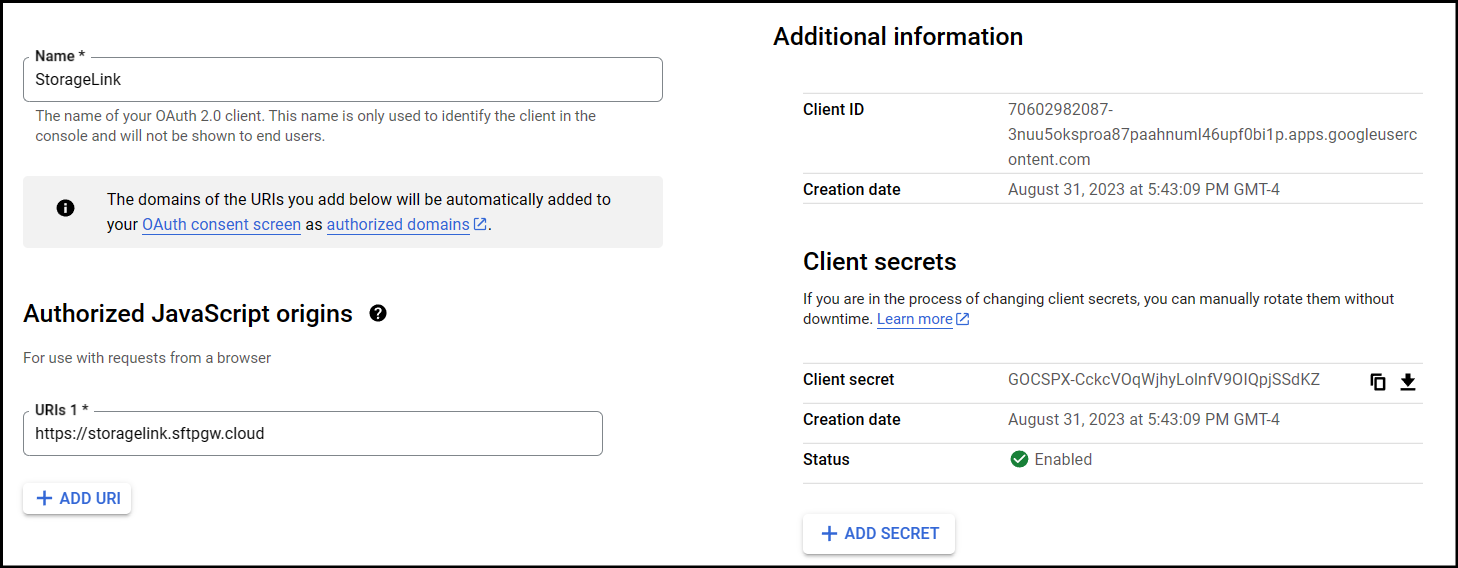
Keep this page open as you will need the Client ID and Client secret when you configure the Identity provider in StorageLink.
Configure the Identity Provider on StorageLink
In the StorageLink web admin portal, go to Settings. Under Identity Providers, click Add new IdP.
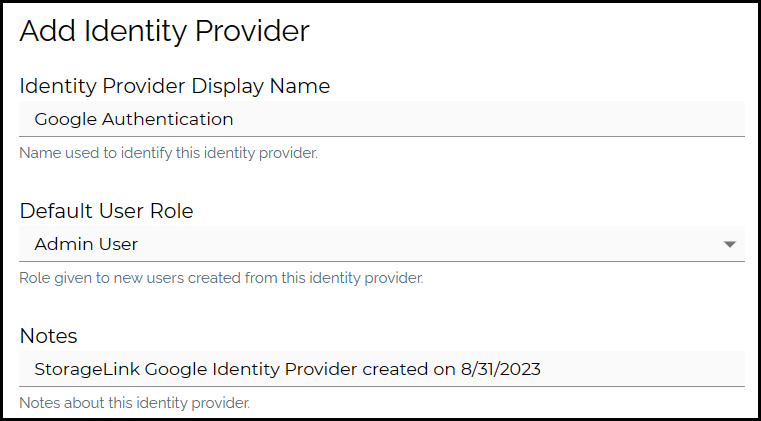
For the new Identity Provider, fill in the following fields:
Identity Provider Display Name: This is the name for the Identity Provider that will be displayed at the login screen.
Default User Role: Select the type of Users authenticating with this IdP. Can be configured for either
Admin UsersorWeb Usersto authenticate with.Notes (Optional): Notes or details regarding the Identity Provider.
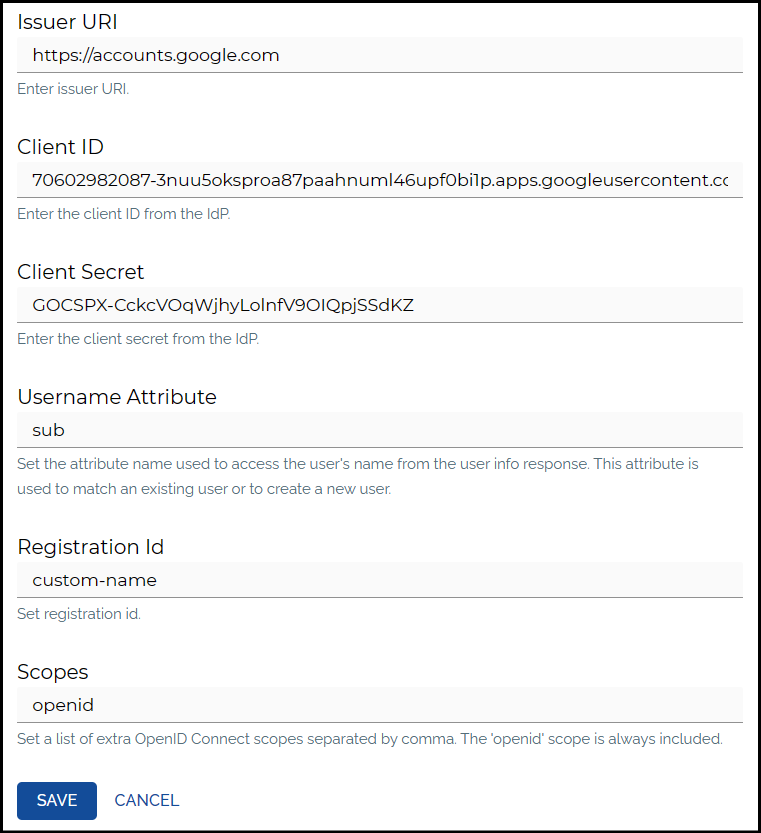
- Issuer URI: For the Issuer URI, paste in the below value:
https://accounts.google.com
Client ID: Paste in the
Client IDfrom OAuth 2.0 client overview page.Client Secret: Paste in the
Client secretfrom OAuth 2.0 client overview page.Name Attribute: Set this value to
sub.Registration ID: Use the custom name you made for the callback URI when creating the OAuth 2.0 client.
Scopes: Set this value to
openid.
Test the changes in the web browser
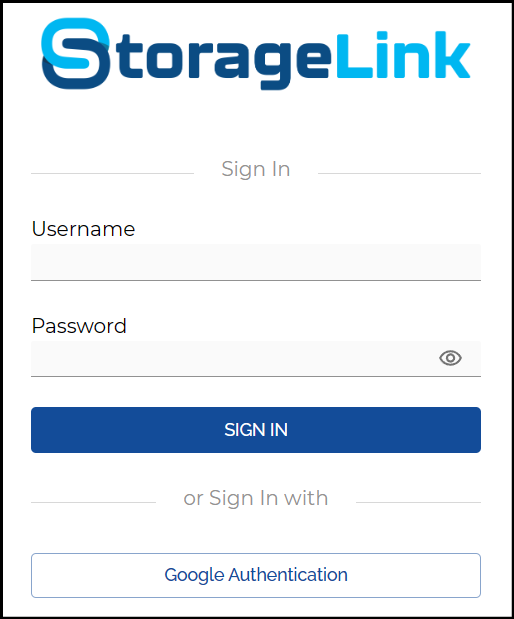
If you are logged into the web admin UI, click the Log Out button on the top right, then refresh the browser.
On the login page, you should see the Display name for your Identity Provider.
Admin Users will need to change the URL to https://storagelink-hostname/admin to view the IdP login button.
You will then be redirected to enter your Google credentials.
Once logged in, you will be authenticated to the StorageLink web admin portal.
You’ve now successfully integrated Google Authentication with StorageLink.