Configure a Service Account
Purpose: Create a Service Account with JSON key for StorageLink to access Google Cloud Storage.
Steps:
- Create Service Account: IAM & Admin → Service Accounts → +Create
- Grant bucket access: Cloud Storage → Bucket → Permissions → +Grant Access → Add Service Account email with
Storage Adminrole - Create JSON key: Service Account → Keys → Add Key → Create New Key → JSON
- Import into StorageLink: Settings → Cloud Credentials → Add New → Google Cloud Services → Upload JSON
Use Case: Per-bucket permissions or cross-project access (alternative to Instance Identity)
Product: StorageLink by Thorn Technologies — cloud storage gateway for secure file sharing
Overview
In order to function properly, StorageLink needs permission to Google Storage. This is accomplished through a Service Account:
- Grant permissions to a Service Account
- Export the Service Account credentials to a JSON key
- Import the JSON key into an StorageLink Cloud Credential
Through the use of the JSON key, StorageLink has the same level of access to Google Storage as the Service Account.
Create a Service Account
First, you will create a Service Account.
Go to IAM & Admin --> Service Accounts --> +Create Service Account
There is no need to configure any Roles at this point (permissions will be configured at a later step). Keep accepting the defaults until the Service Account is created.
Make sure to copy the Email of your newly created Service Account as it is needed in a later step.
For example, the email of my Service Account was:
bryce-account@sftp-gateway.iam.gserviceaccount.com
Configure permissions for your bucket
There are two approaches for assigning permissions to a Service Account.
- You can grant access directly to a Service Account. This approach works well for granting broad access, such as permission to all Google Storage buckets.
- From an individual bucket, you can add the Service Account as a principal. This approach works if you want to limit permissions to a single bucket.
In this scenario, we will use the latter approach.
First, navigate to Cloud Storage and find your bucket.
Then, click on the Permissions tab.
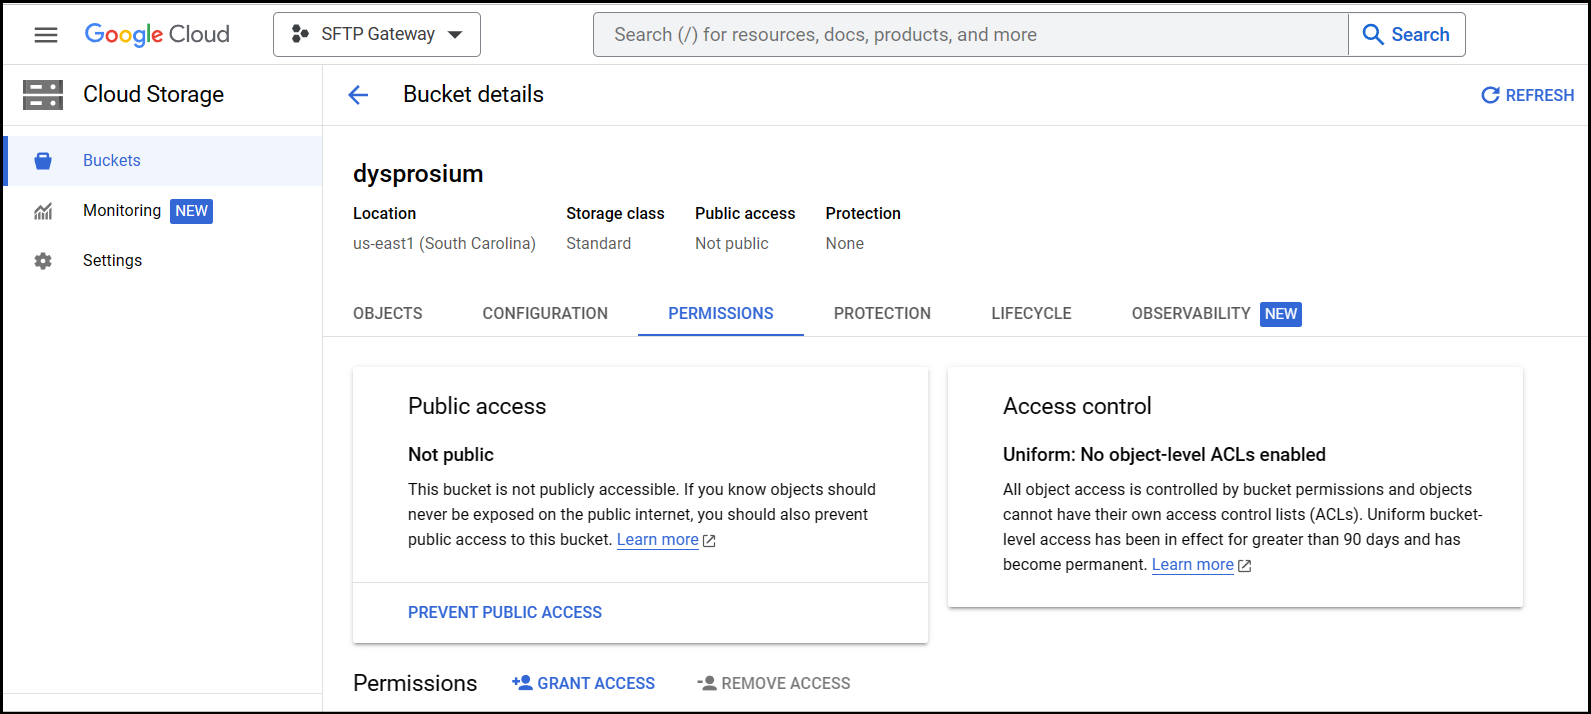
Click + Grant Access. You will see the following pane open on the right.
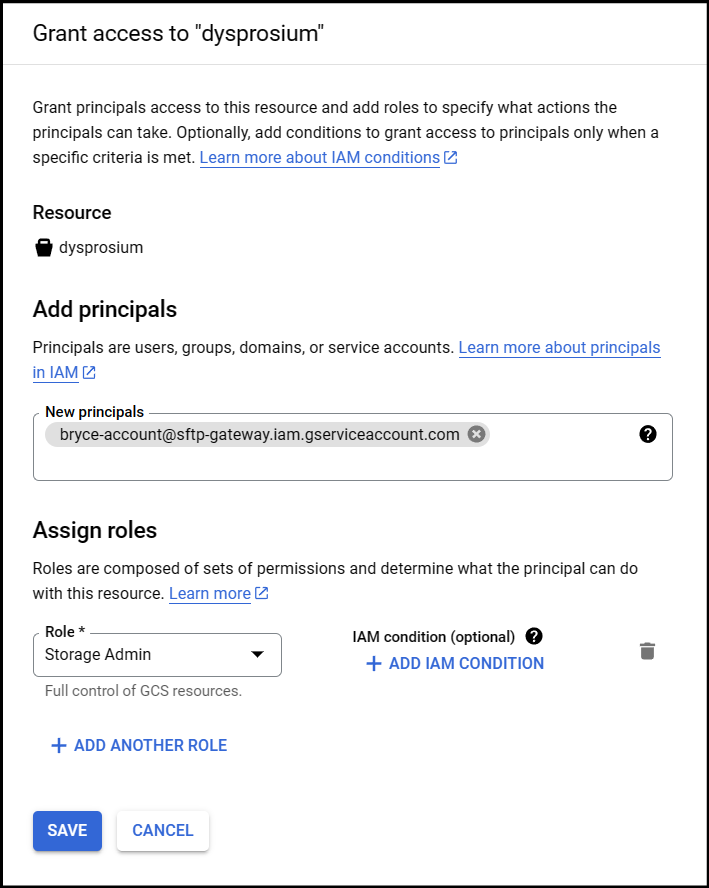
Under New principles, enter the Email of the Service Account you created earlier.
Under Role, select Storage Admin. This grants Storage Admin access to that specific bucket.
Click Save after configuring the principle and role.
Download the credentials (JSON key file)
In this section, you will download credentials for your Service Account in the form of a JSON key.
Navigate back to your Service Account by going to: IAM & Admin --> Service Accounts --> Your Service Account.
Once you have entered into your Service Account, go to the Keys tab and click Add Key --> Create New Key.
When prompted, choose JSON as the Key type, and click Create.
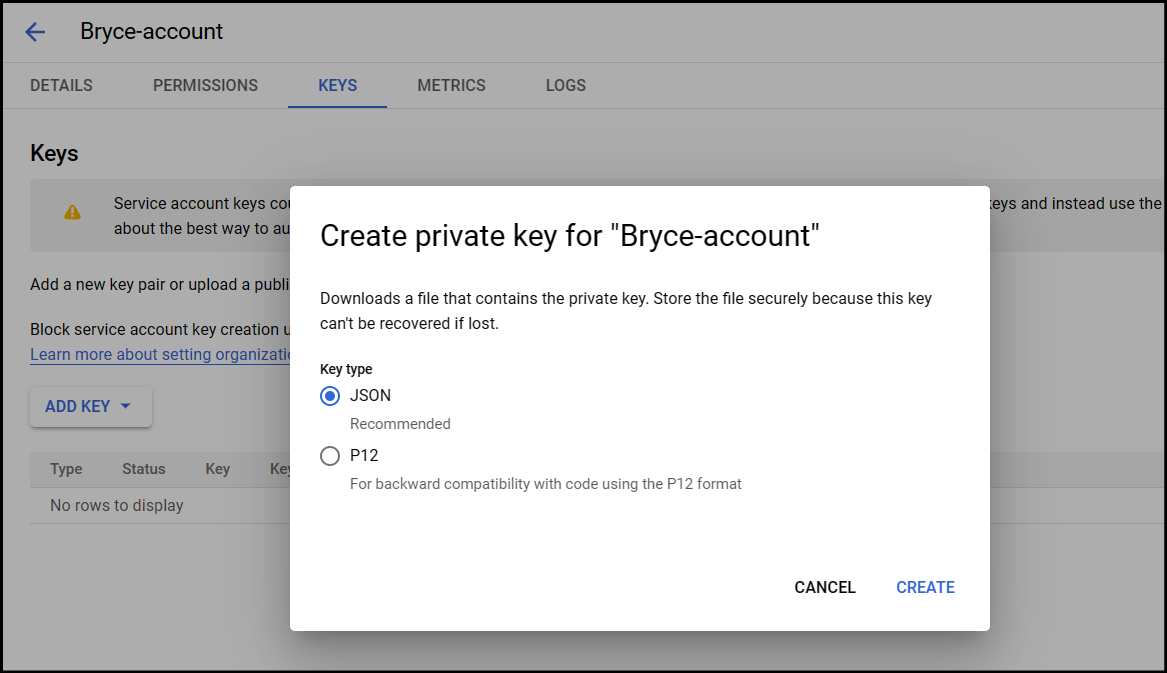
You should now have the JSON key saved to your local filesystem.
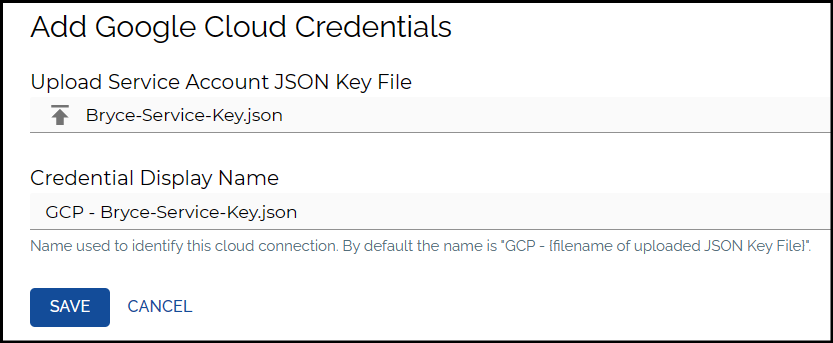
Import the JSON key file into StorageLink
Log into the web admin portal of StorageLink.
On the Settings page, you will see a section for Cloud Credentials.
Click Add New Cloud Credential, and select Google Cloud Services.
On this page, you can upload a credential file. This is where you will upload the JSON key you created earlier.
You can then use this credential in the future for any folders you connect to Google Cloud Storage.