SFTP Gateway 2.0 Update Process
Note: This page applies to SFTP Gateway version 2.x. Visit Here for documentation on version 3.x.
BEFORE YOU BEGIN!
This article is for updating version 2.x instances only. If you are currently on version 1.x, please refer to one of the following articles:
There are a couple of things to consider before upgrading your existing SFTP Gateway instance(s).
Make a snap shot of your existing EC2 instance as a backup in the event that something should go wrong during the update process. For more information on creating a snapshot, see this AWS EC2 documentation.
If you have made any modifications to the server, such as the
/usr/local/bin/movetos3.shor the/etc/ssh/sshd_config, make a backup of these files. These backups can be used for reference should these files be modified during the update process.We recommend that you perform the update process in a test environment to verify continued functionality before applying changes to production environments. This can be done using the snapshot image suggested above.
We recommend backing up your user configurations with the standard backup and recovery solution found on our Backup and Recovery page.
Updating a single instance
For 2.000.04
To update a single instance stack of SFTP Gateway to version 2.000.04
- Connect to the server over SSH with the ec2-user
ssh -i /path/to/private/key ec2-user@ip_address
- Run the update command
sudo UPDATE_TO_VERSION=2.000.04 sftpgw update 2.000.04
The update package will download and install automatically
For 2.000.03 and earlier
If you are running a single instance stack of SFTP Gateway, you can update it by the conventional means.
- Log into the server over SSH with the ec2-user
ssh -i /path/to/private/key ec2-user@ip_address
- run the update command
sudo sftpgw update
The SFTP Gateway packages will be downloaded and installed automatically.
Updating a High Availability stack of SFTP Gateway
For 2.000.04
SFTP Gateway version 2.0 High Availability uses an auto-scaling group to keep the desired number of the instance running at all times. The auto-scaling group uses a launch configuration generated by the CloudFormation stack as a base configuration for all new instances that are launched into that auto-scaling group. For this reason, the conventional method of updating an instance in the manner of connecting over SSH and running the update command does not work. If an instance was to go down for some reason, the instance that is brought up to replace it would be at the state of the original launch configuration that is behind a version. So to update any existing instances and any new instances created in case of failure or termination, you must update the launch configurations by editing the CloudFormation template.
Go to the CloudFormation console and select your SFTP Gateway stack

Click Update

Select replace current template
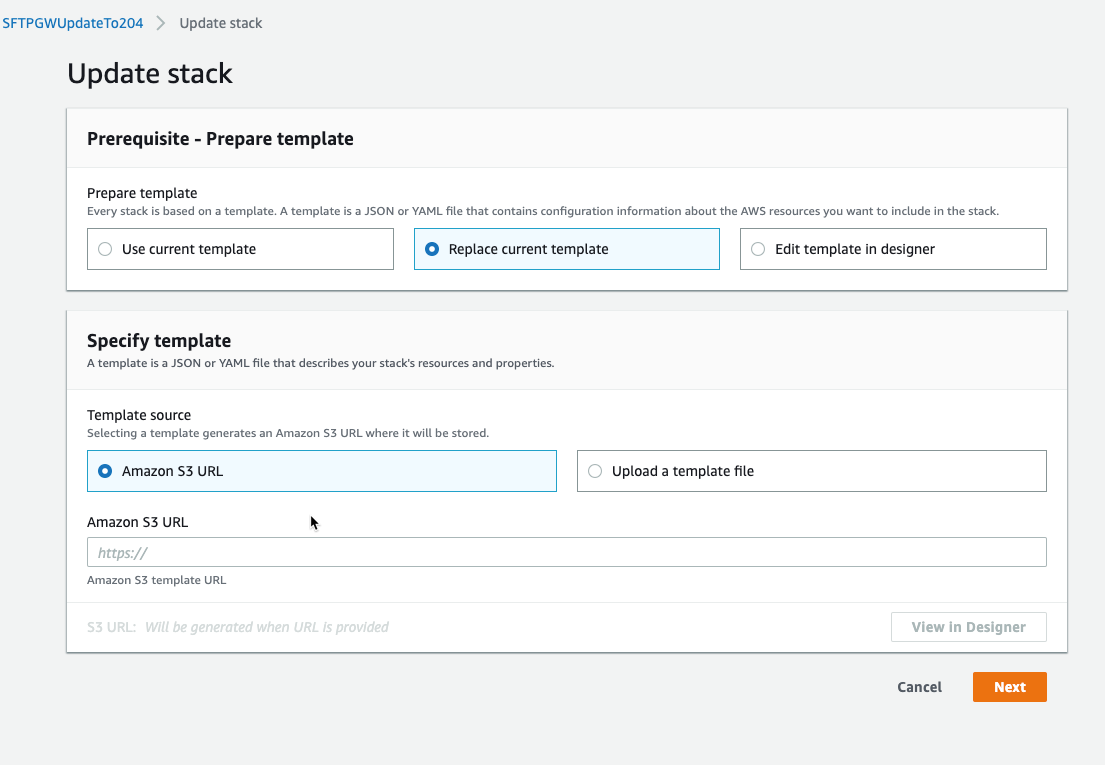
Enter the 2.000.04 template S3 URL that matches your current setup
- https://thorntech-public-documents.s3.amazonaws.com/cf-templates/2.000.04/sftp-gateway-high-availability-existing-network.template
- https://thorntech-public-documents.s3.amazonaws.com/cf-templates/2.000.04/sftp-gateway-high-vailability.template
- https://thorntech-public-documents.s3.amazonaws.com/cf-templates/2.000.04/sftp-gateway-single-instance.template
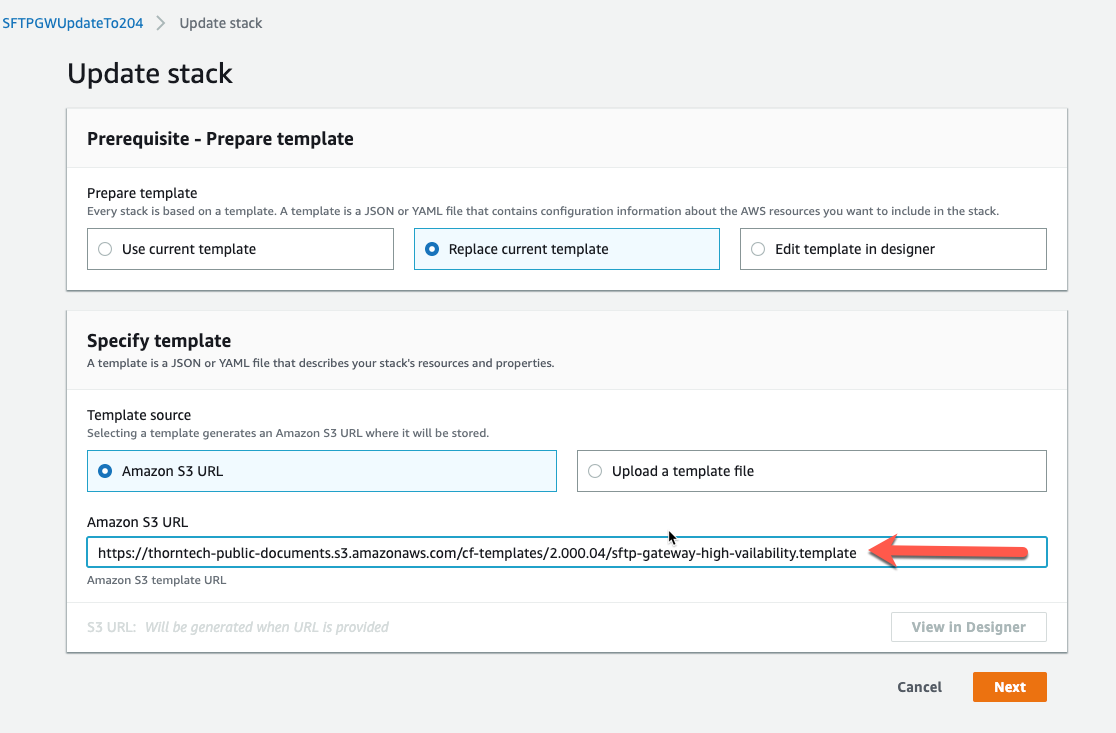
Click Next until you get to the review page

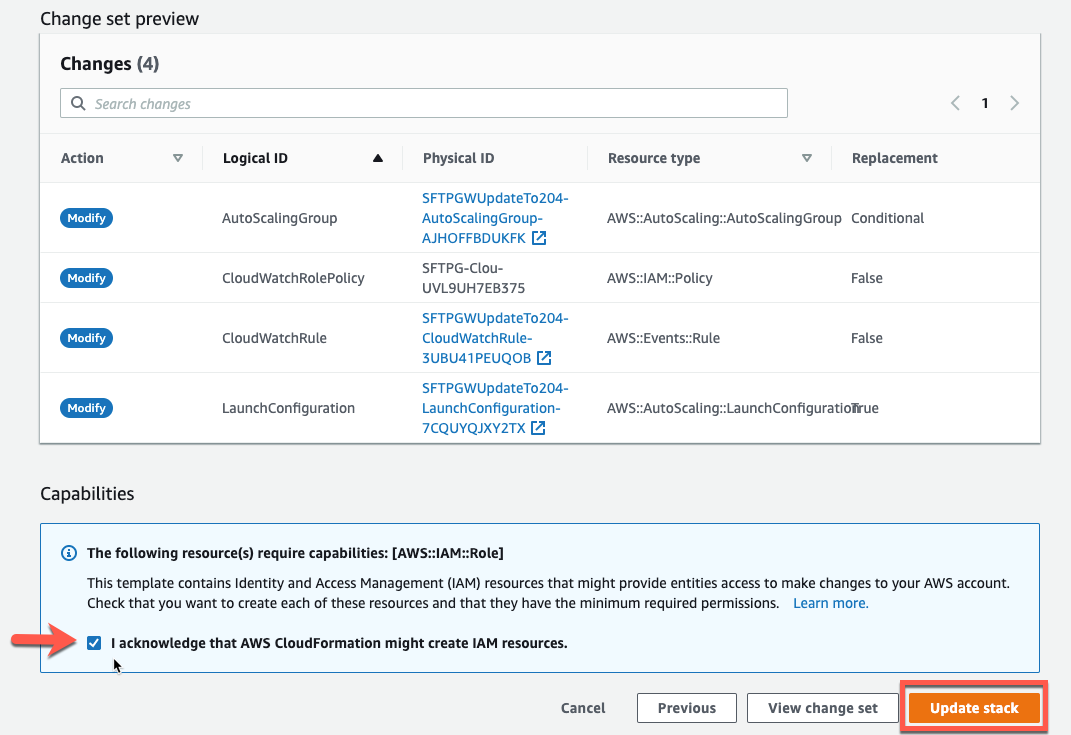
At the bottom of the Review page, tick the IAM capabilities checkbox and click Update and click Update
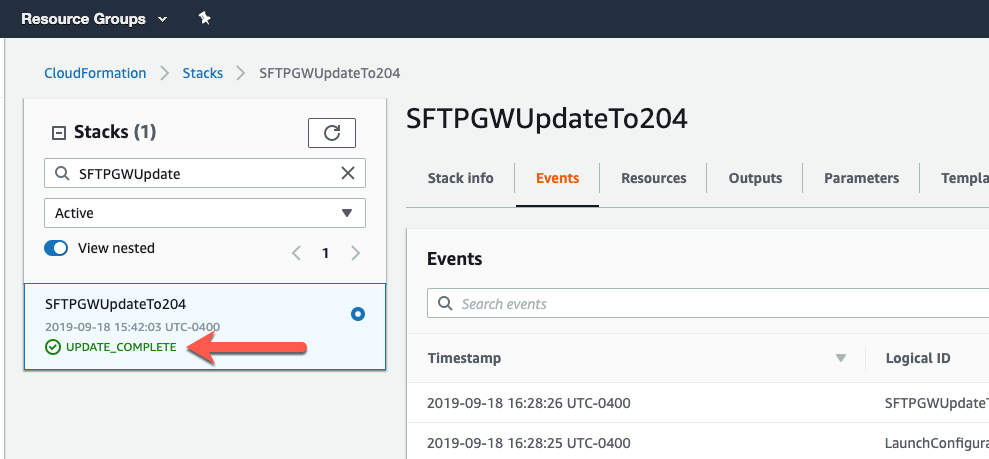
Once the stack status reads update complete, proceed to the next step involving auto-scaling groups.
Go to the EC2 console -> Auto Scaling Groups
Select your SFTP Gateway Auto Scaling Group
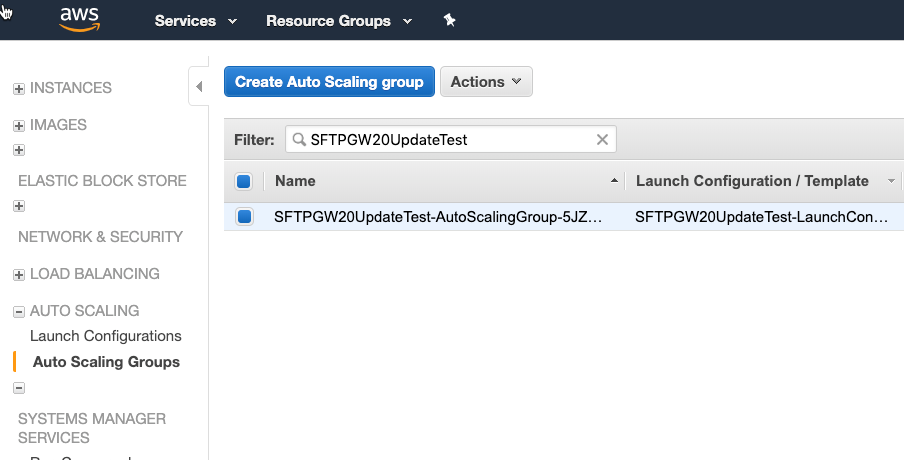
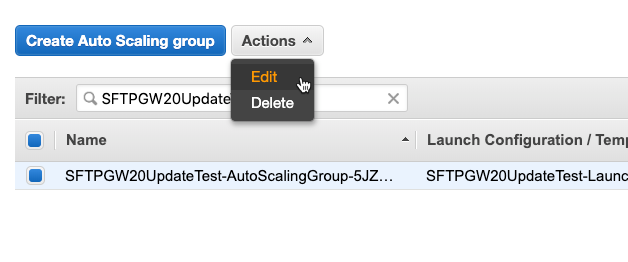
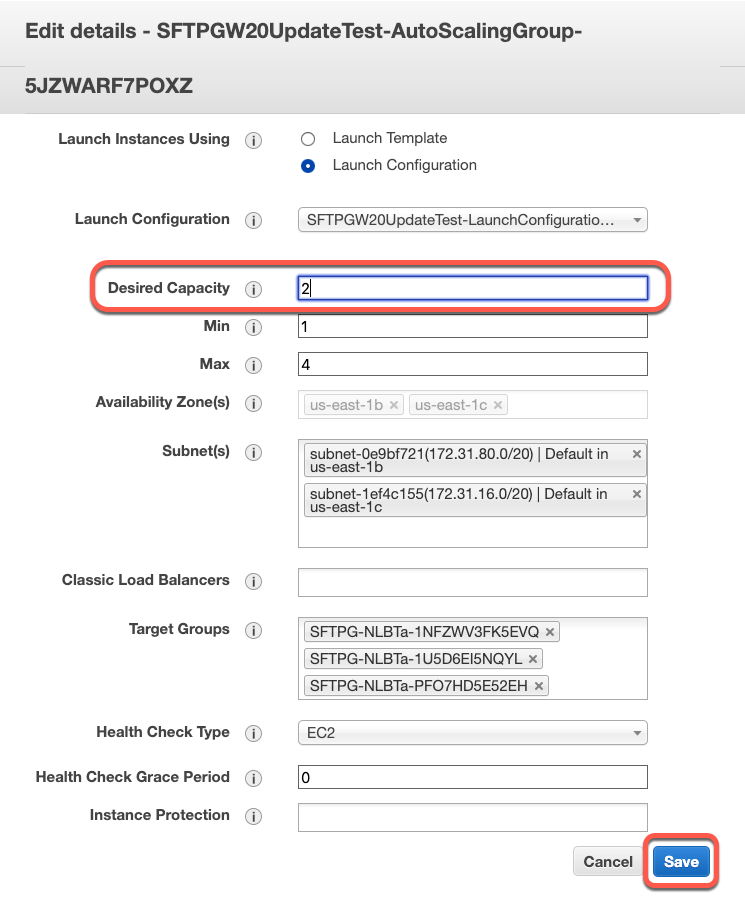
Click Actions -> Edit
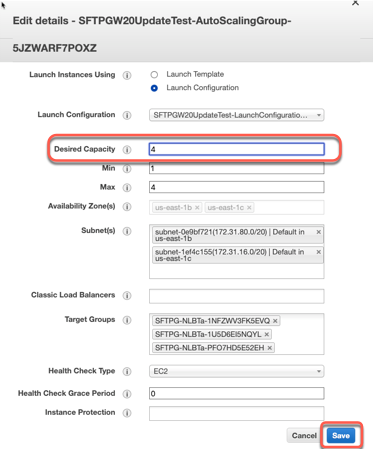
In the Desired Capacity field, enter 4 (if your desired capacity is already at 4 you will have to drop it down to 2, let 2 instances terminate then go back to 4) and Save
Wait for the additional instances to enter “InService”
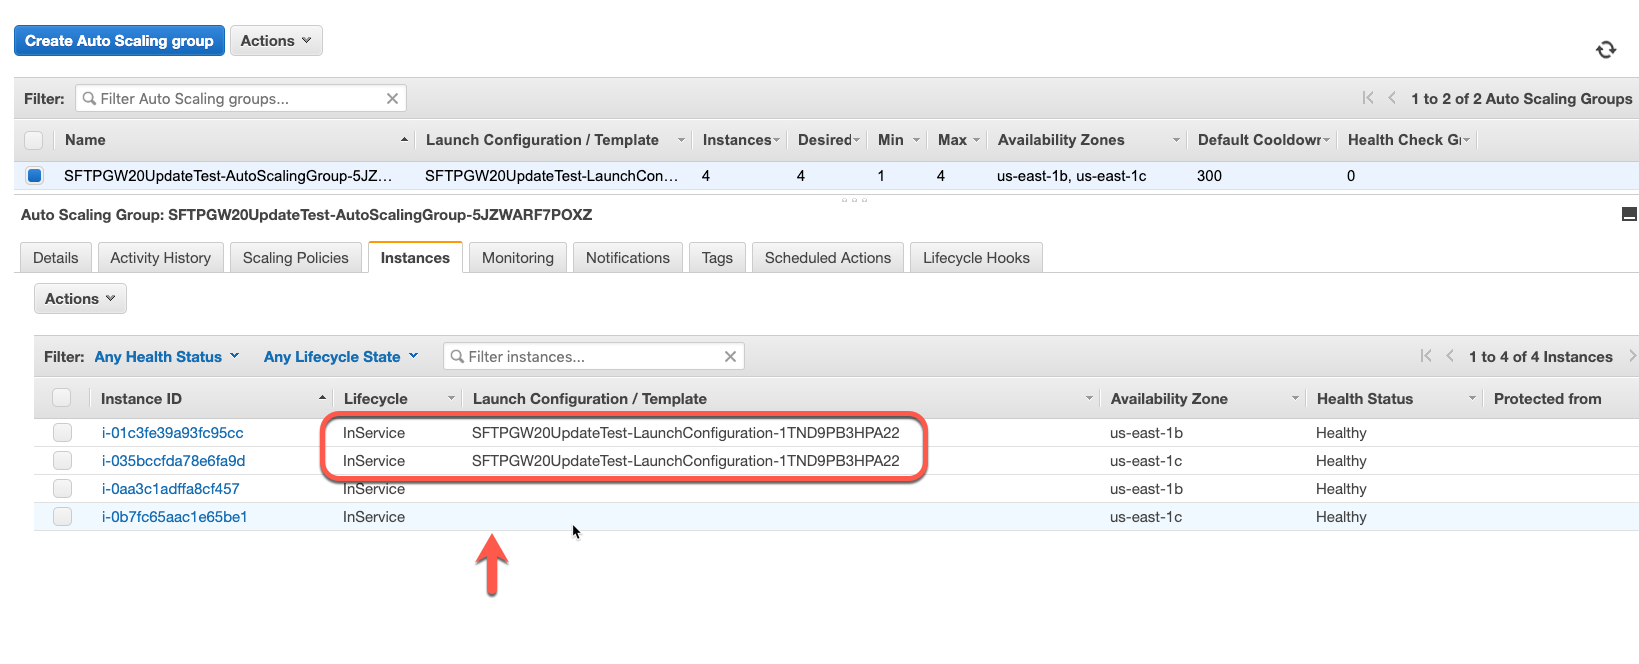 Note: that the instances without launch configurations are the older instances that will eventually be terminated.
You should let the new instances run for a couple of minutes to allow the older instances to transfer their existing
data to the new instances (about 5 minutes to be on the safe side).
Note: that the instances without launch configurations are the older instances that will eventually be terminated.
You should let the new instances run for a couple of minutes to allow the older instances to transfer their existing
data to the new instances (about 5 minutes to be on the safe side).SSH to one of the new server through the public IP address as the ec2-user
Edit the /opt/sftpgw/application.properties file
sudo nano /opt/sftpgw/application.propertiesAdd the following line to the end of the file
admin.connect.string=cn=adminSave the file with ctrl-o +
Exit the nano text editor with ctrl-x
Rename the SFTP Gateway Admin API configuration file
sudo mv /opt/sftpgw/sftpgateway-admin-api-2.000.0X.conf /opt/sftpgw/sftpgateway-admin-api-2.000.04.confUse SSM to send a restart SFTP Gateway Admin API command to all of the servers. (See SFTP Gateway 2.0 send SSM commands to multiple instances for instructions)
sudo service sftpgw-admin-api restartAfter SFTP Gateway Admin API is restarted on the new servers, edit the auto-scaling group again to set the desired capacity back to 2 and save.
Using this upgrade technique, if a server happens to be terminated in the future, any new servers instantiated to replace it will be of the 2.000.04 version.
For 2.000.03 and earlier
SFTP Gateway version 2.0 High Availability uses an auto scaling group to keep the desired number of instance running at all times. The auto scaling group uses a launch configuration generated by the CloudFormation stack as a base configuration for all new instances that are launched into that auto scaling group. For this reason, the conventional method of updating an instance in the manner of connecting over SSH and running the update command does not work. If an instance was to go down for some reason, the instance that is brought up to replace it would be at the state of the original launch configuration that is behind a version. So to update any existing instances and any new instances created in case of failure or termination, you must update the launch configurations by editing the CloudFormation template.
To update your instances you must update the CloudFormation template then perform a scale out scale in process to maintain instance data:
Update the CloudFormation stack:
Go to the CloudFormation console
Select your SFTP Gateway stack

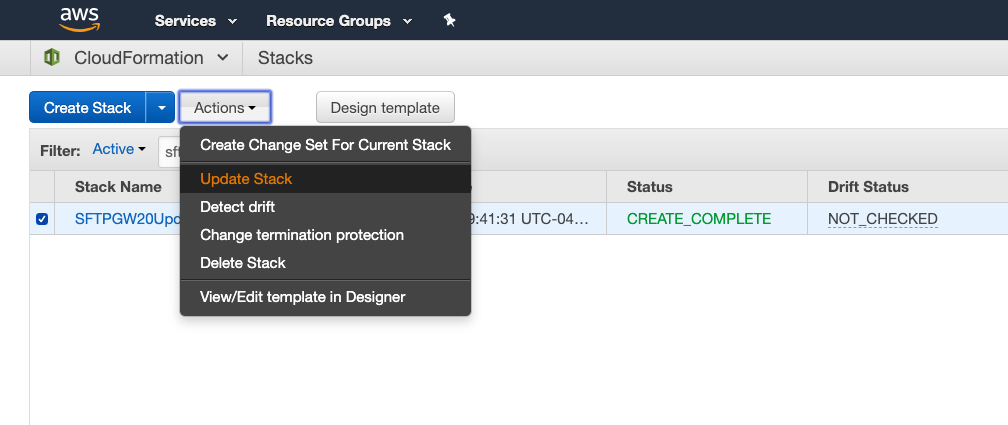
Click Actions -> Update Stack
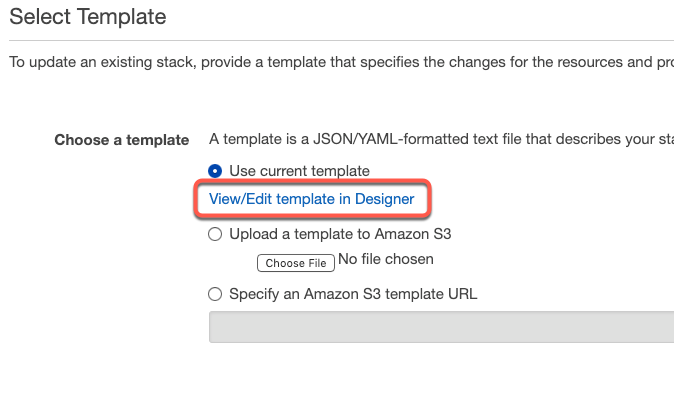
Click View/Edit template in Designer
In the text editor of Designer, find the userdata Property of LaunchConfiguration and add the update command
sudo sftpgw update. Note: You can specify which version number you would like to keep your instances at by supplying the
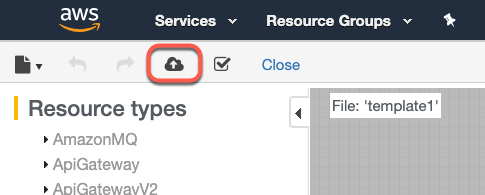
UPDATE_TO_VERSION=<version_number>channel to the update command.Click the create stack icon at the top of the Designer
Click Next through all of the configuration pages
On the Review page, tick the IAM capabilities check box and click Update and click Update
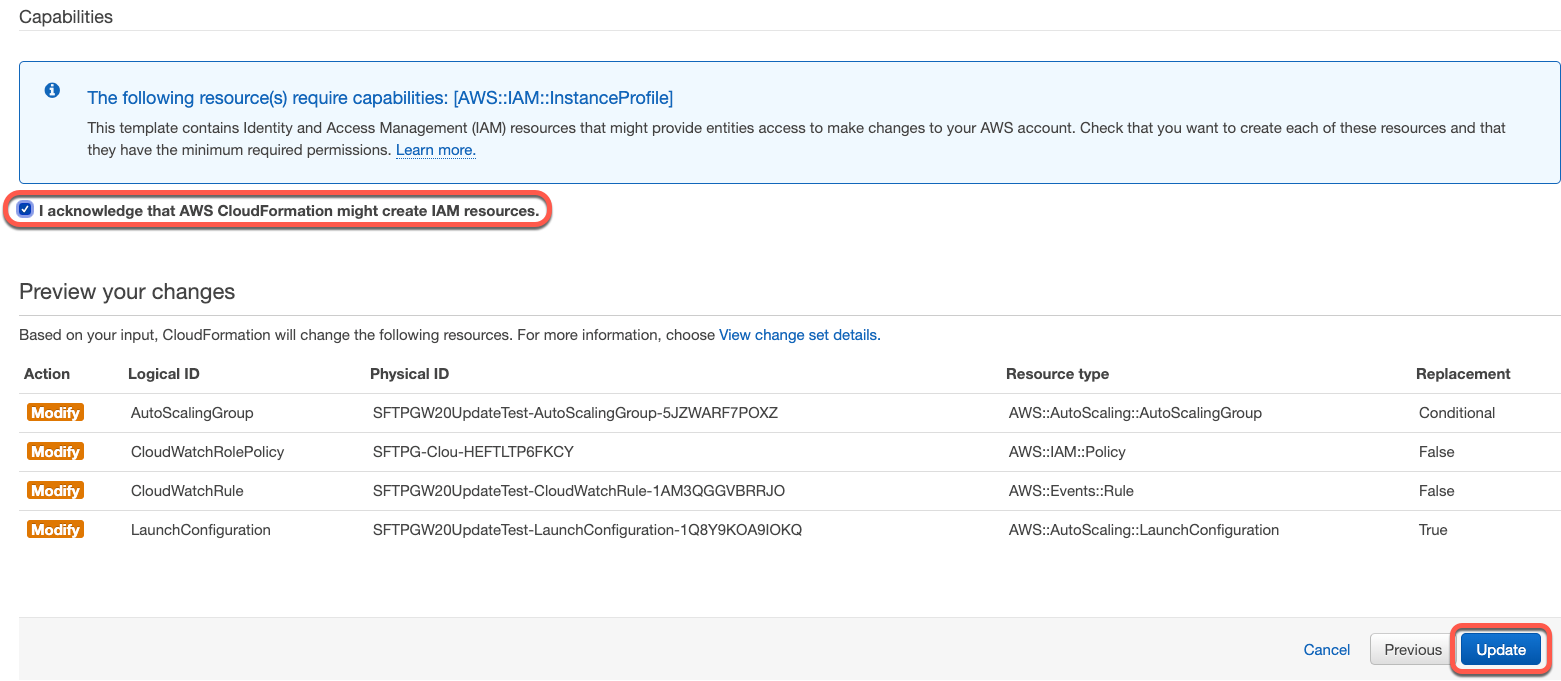
Once the stack says that the update is complete, proceed to the next step involving auto-scaling groups.

Scale out/in your auto-scaling group:
Go to the EC2 console -> Auto Scaling Groups
Select your SFTP Gateway Auto Scaling Group

Click Actions -> Edit

In the Desired Capacity field, enter 4 (if your desired capacity is already at 4 you will have to drop it down to 2, let 2 instances terminate then go back to 4) and Save

Wait for the additional instances to enter "InService".

Note: that the instances without launch configurations are the older instances that will eventually be terminated. You should let the new instances run for a couple minutes to allow the older instances to transfer their existing data to the new instances.
After a couple minutes of the new instances in the “InService” state, edit the auto scaling group again to set the desired capacity back to 2 and save.

Using this upgrade technique, if a server happens to be terminated in the future, any new servers instantiated to replace it will update to the most recent compatible version automatically before going into service.