StorageLink Installation
Purpose: Deploy StorageLink BYOL, the recommended listing, from the AWS, Azure, or Google Cloud marketplace
Deployment Options:
- AWS — Subscribe to StorageLink BYOL (free) → Launch your software → CloudFormation (Single Instance or High Availability)
- Azure — Get It Now → StorageLink BYOL plan → Create → VM wizard
- Google Cloud — Get Started → Agree → configure the VM in the deployment wizard → Deploy
Requirements:
- AWS: EC2 key pair, VPC with a public subnet
- Azure: SSH public key or password, resource group
- Google Cloud:
e2-mediumor larger, your public IP for the SSH rule
License: No marketplace software fee — start the free 30-day trial in the admin UI, then book a 15-minute call to purchase
Next Step: First Launch Experience — sign in, start your trial, and configure default storage
Product: StorageLink by Thorn Technologies — cloud storage gateway for secure file sharing
Introduction
StorageLink is a pre-configured server that transfers files to Cloud Storage (S3, Blob Storage & Google Cloud Storage).
This guide deploys StorageLink from the StorageLink BYOL (Bring Your Own License) listing on your cloud marketplace — the recommended listing for new deployments. The listing is free to deploy: there is no marketplace software fee, so your cloud invoice shows only the VM and storage costs. After you deploy, you start a 30-day free trial directly from the admin UI. When you're ready to license your deployment, book a 15-minute call with our Sales team and we'll match you with a license for 10, 100 or 1,000 users (Standard, Professional or Enterprise tier).
To start, you provision StorageLink BYOL from the Cloud Marketplace. This takes you to the VM creation wizard in your respective marketplace.
This guide will focus on getting started with a Single Instance StorageLink setup for testing.
StorageLink is also published on each marketplace as a pay-as-you-go listing, named StorageLink (without "BYOL"). It bills a $0.08 USD/hour software fee through the marketplace, licenses itself automatically, and supports up to 10 StorageLink users (administrators are not counted). StorageLink Standard vs BYOL compares the two listings, and Purchasing a License covers subscribing to the pay-as-you-go listing.
- AWS
- Azure
Before you begin
You will need to create an EC2 Key Pair in order to SSH into your instances. Although most StorageLink configuration is via the web interface, there may be times when you need command line access.
To create an EC2 key pair:
Log into AWS and go to the EC2 console.
In the navigation panel, under the Network & Security section, go to Key Pairs.
Click Create Key Pair.
Enter a name for the new key pair and click Create.
Note: When you click Create, your browser will download a private key file. This must be kept secure in a place where you can always find it. If this file is lost or deleted, it is difficult to regain access to your EC2 instance.
Subscribe
You first need to subscribe to the StorageLink BYOL listing. Subscribing is free — there is no software charge — and it allows your AWS account to use the StorageLink BYOL AMI.
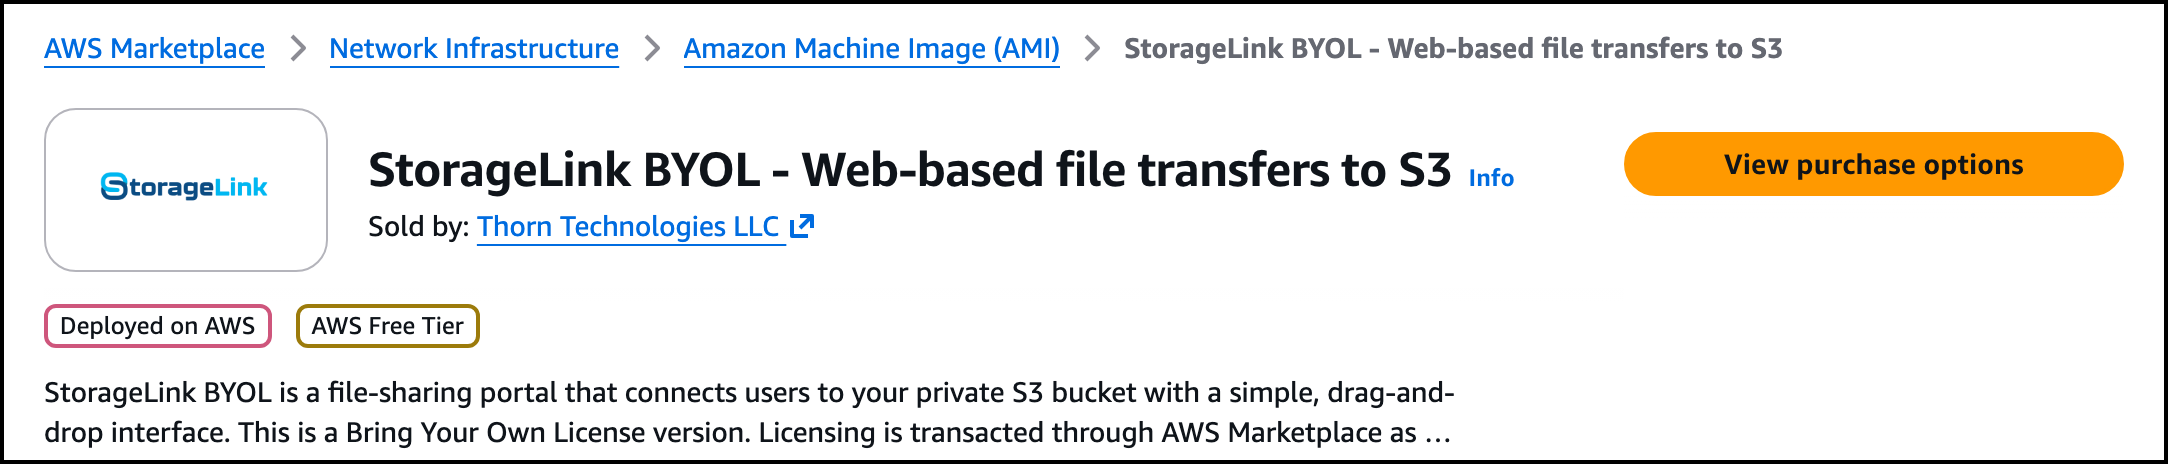
Click here to open the StorageLink BYOL - Web-based file transfers to S3 listing on AWS Marketplace.
Click the View purchase options button.
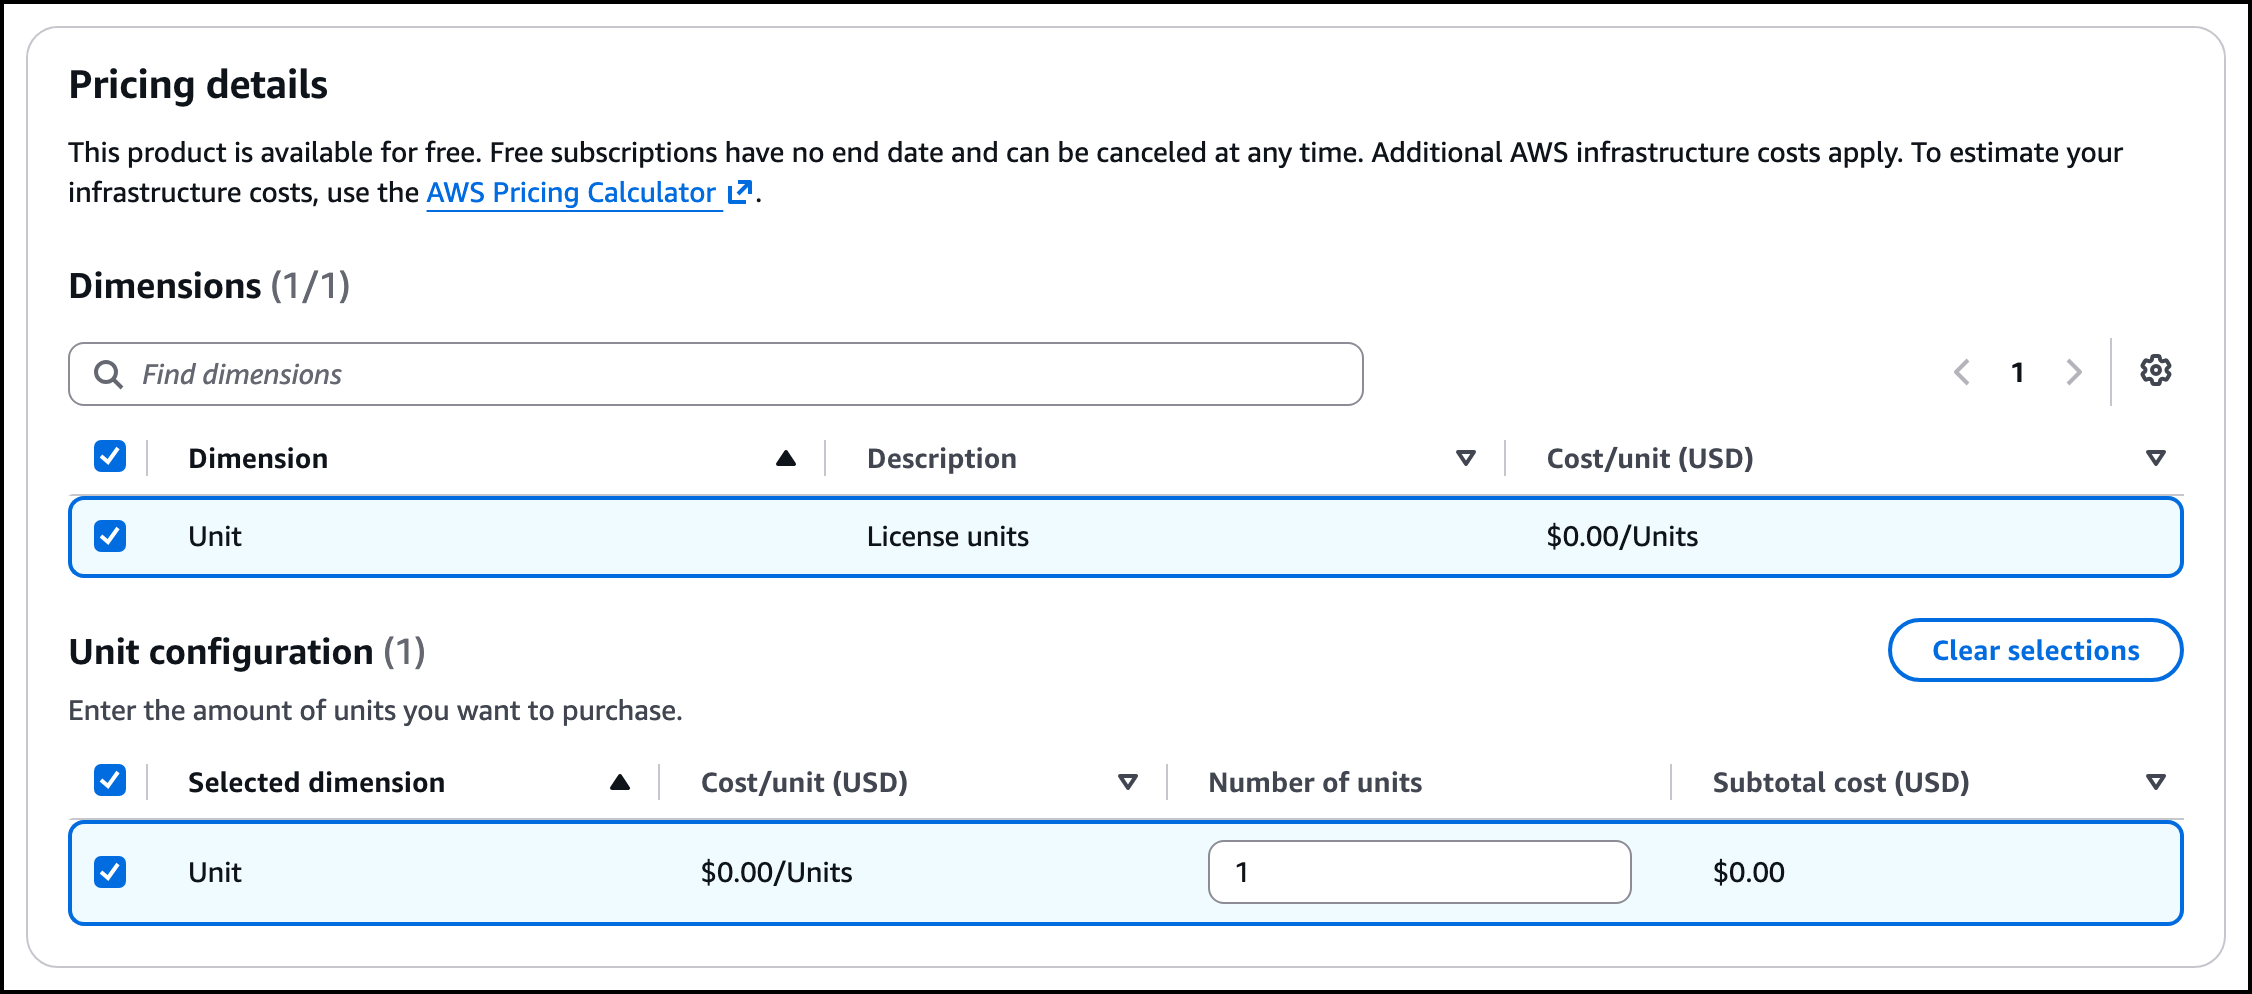
The public offer on this listing is free of charge. Under Pricing details, select the Unit dimension (License units, $0.00) and leave Number of units at 1. The Subscribe button stays disabled until a dimension is selected.
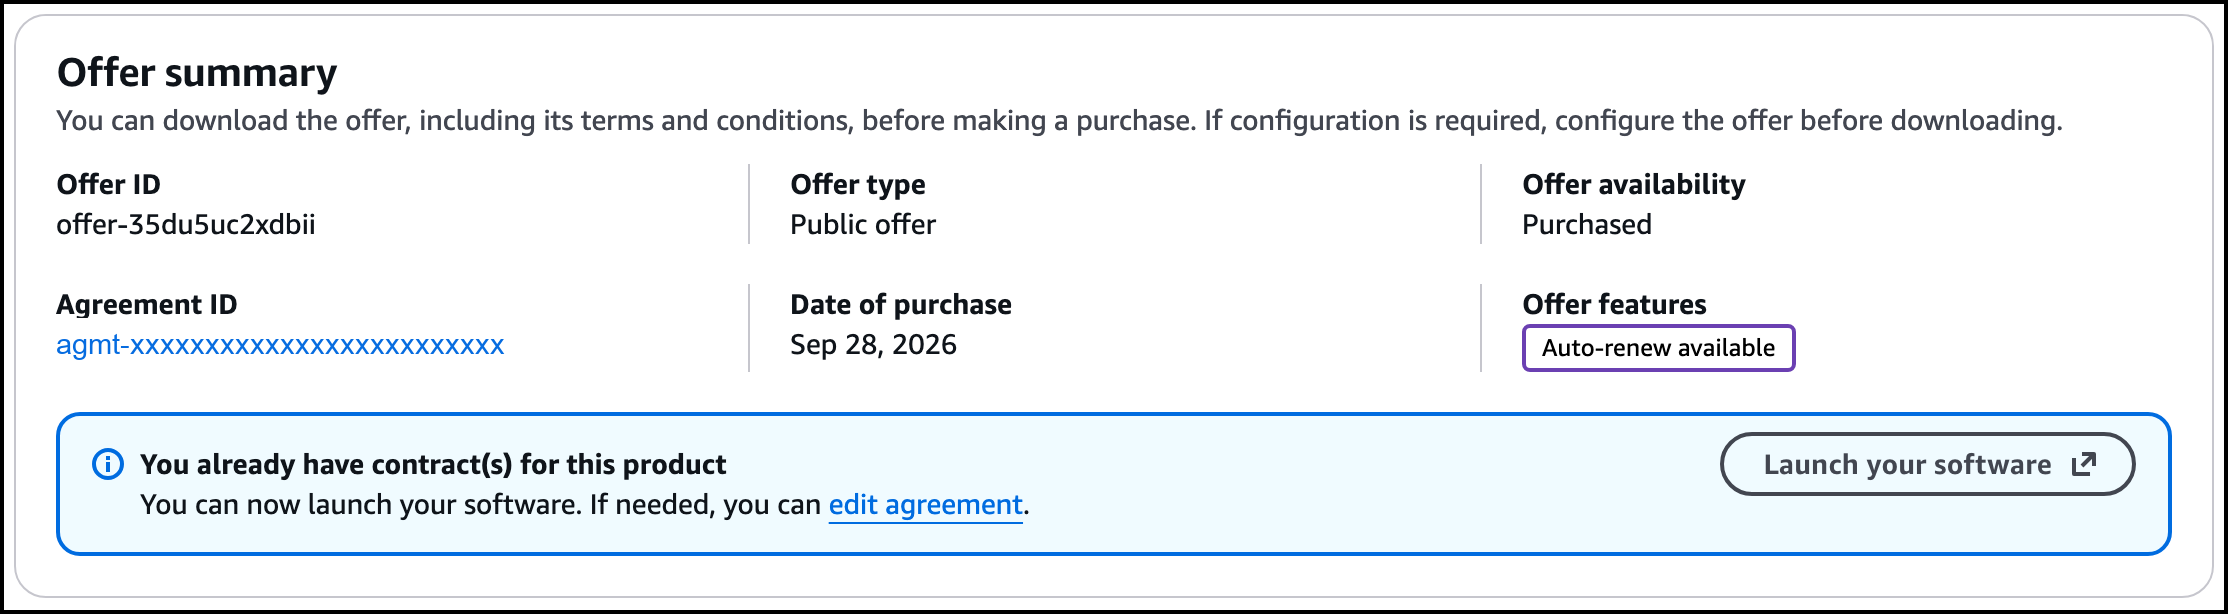
Review the offer terms, scroll to the bottom of the page, and click Subscribe. The free offer is set up as a 12-month contract for $0.00 that renews automatically.
The subscription process will take a few minutes. Keep the page open until it finishes.
Once you are subscribed, the Offer summary shows the offer as Purchased. Click Launch your software; the launch page opens in a new browser tab.
Under Setup, select AWS CloudFormation.
Under CloudFormation template, select an option:
- StorageLink (High Availability - Existing Network)
- StorageLink (High Availability - New Network)
- StorageLink (Single Instance - Existing Network)
Check that Version shows the latest version, choose your Region, and click Launch with CloudFormation.
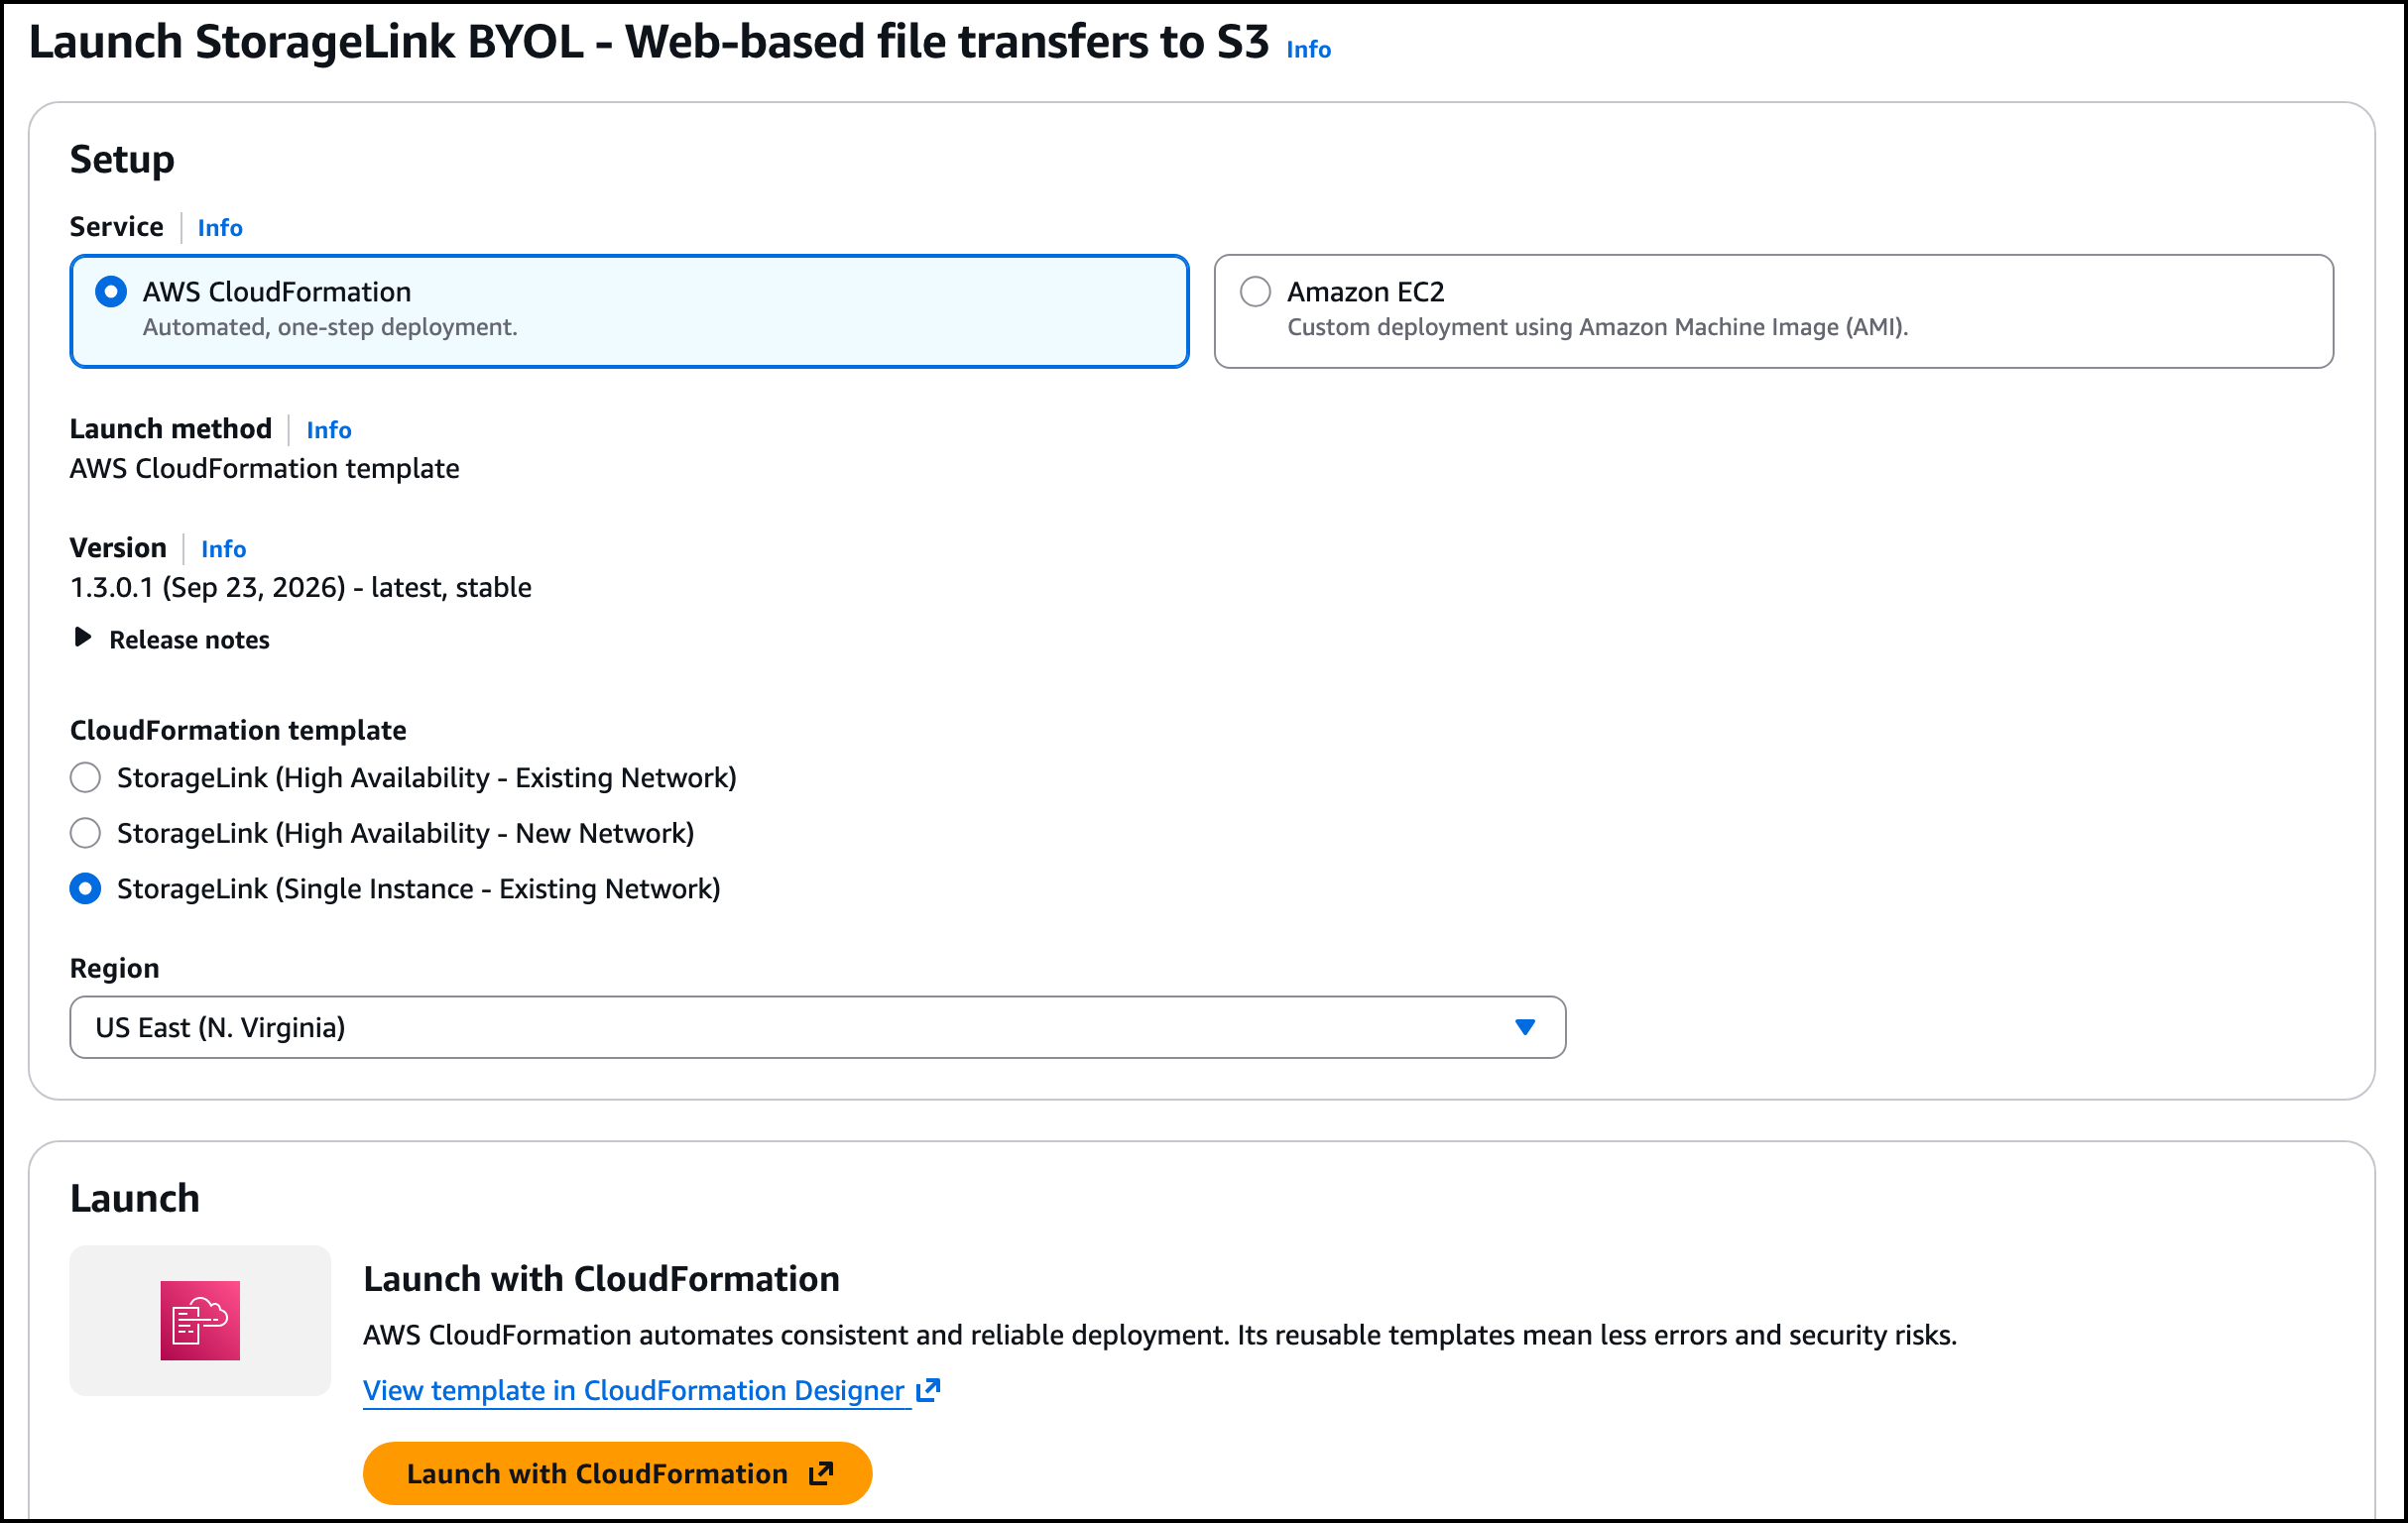
This will take you to the CloudFormation service in the AWS console.
On AWS, the license for StorageLink BYOL is purchased through AWS Marketplace itself: our Sales team prepares a private offer on the StorageLink BYOL listing, which you accept and pay for in AWS Marketplace, billed to your AWS account. You don't need a license to deploy — start with the free trial, and book a 15-minute call when you're ready.
Spinning up an StorageLink CloudFormation stack
If you followed the instructions in the previous section, you should now be in the CloudFormation service within the AWS console.
The Template source should be pointing to a location on S3 corresponding to the CloudFormation template you specified.
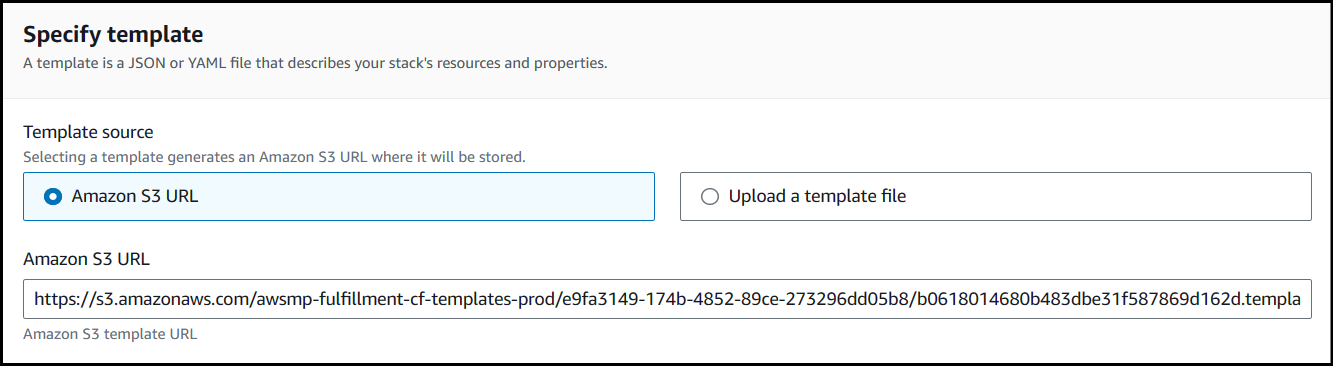
To spin up a Single Instance (Existing Network) CloudFormation stack of StorageLink:
The Template source is already selected, so click Next to continue.
Enter the details for the stack:
Stack name: The name of your CloudFormation stack.
EC2 Type: Defaults to t3.medium. We recommend using m5.large for production workloads.
Disk Volume Size (GB): This must be 32 (the volume size of the AMI) or higher. You can always increase this at a later time.
Key Pair. Choose the EC2 key pair you created in the Before you begin section. You will need the private key in order to SSH into the server.
VPC: Select a VPC that has a public subnet.
Subnet ID: Select a public subnet in the above VPC.
Web Input CIDR: An IP range that allows inbound HTTP and HTTPS traffic to your EC2 instance. If you support multiple users, it may be more practical opening this to the public (0.0.0.0/0).
Ssh Input CIDR: An IP range that allows inbound SSH traffic to your EC2 instance. We recommend obtaining your computer's public IP from http://checkip.dyndns.org/ and then appending /32 (a CIDR range of a single address).
Web Admin Username: The Web Admin Username you'll use to sign into the StorageLink UI with.
Web Admin Password: The Web Admin Password you'll use to sign into the StorageLink UI with. It must be 12 or more characters long.
Stack Options: Scroll to the bottom of the page and select the checkbox, then click Next.
You must check the box that reads I acknowledge that AWS CloudFormation might create IAM resources to give CloudFormation permission to create IAM resources.
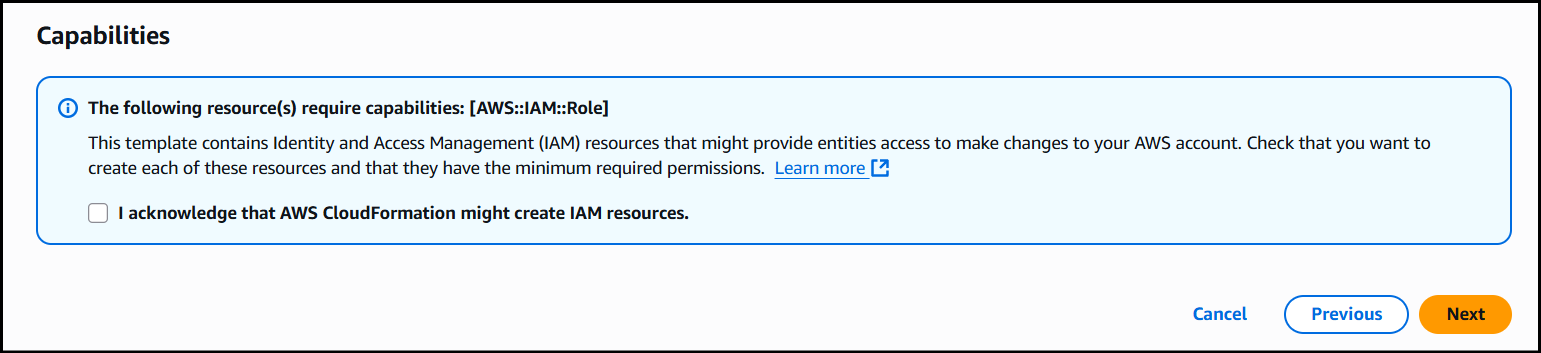
Review and create stack.
Click Submit to create the stack.
The stack creation progress can be monitored by selecting the stack and viewing the Events tab. Any errors that occur during creation will appear in the event log.
The stack gives the instance an IAM role that can use S3 buckets whose names start with storagelink-i-. On first boot, StorageLink creates a bucket named storagelink-i-<instance-id> and uses it as the default storage location. To connect a bucket with a different name, see Cloud Connections.
Azure Marketplace Steps
Navigate to the StorageLink BYOL product on the Azure Marketplace. The listing uses Bring your own license pricing: there is no software charge on the plan, so your Azure invoice shows only the VM, disk, and storage costs.
You should see the following screen:
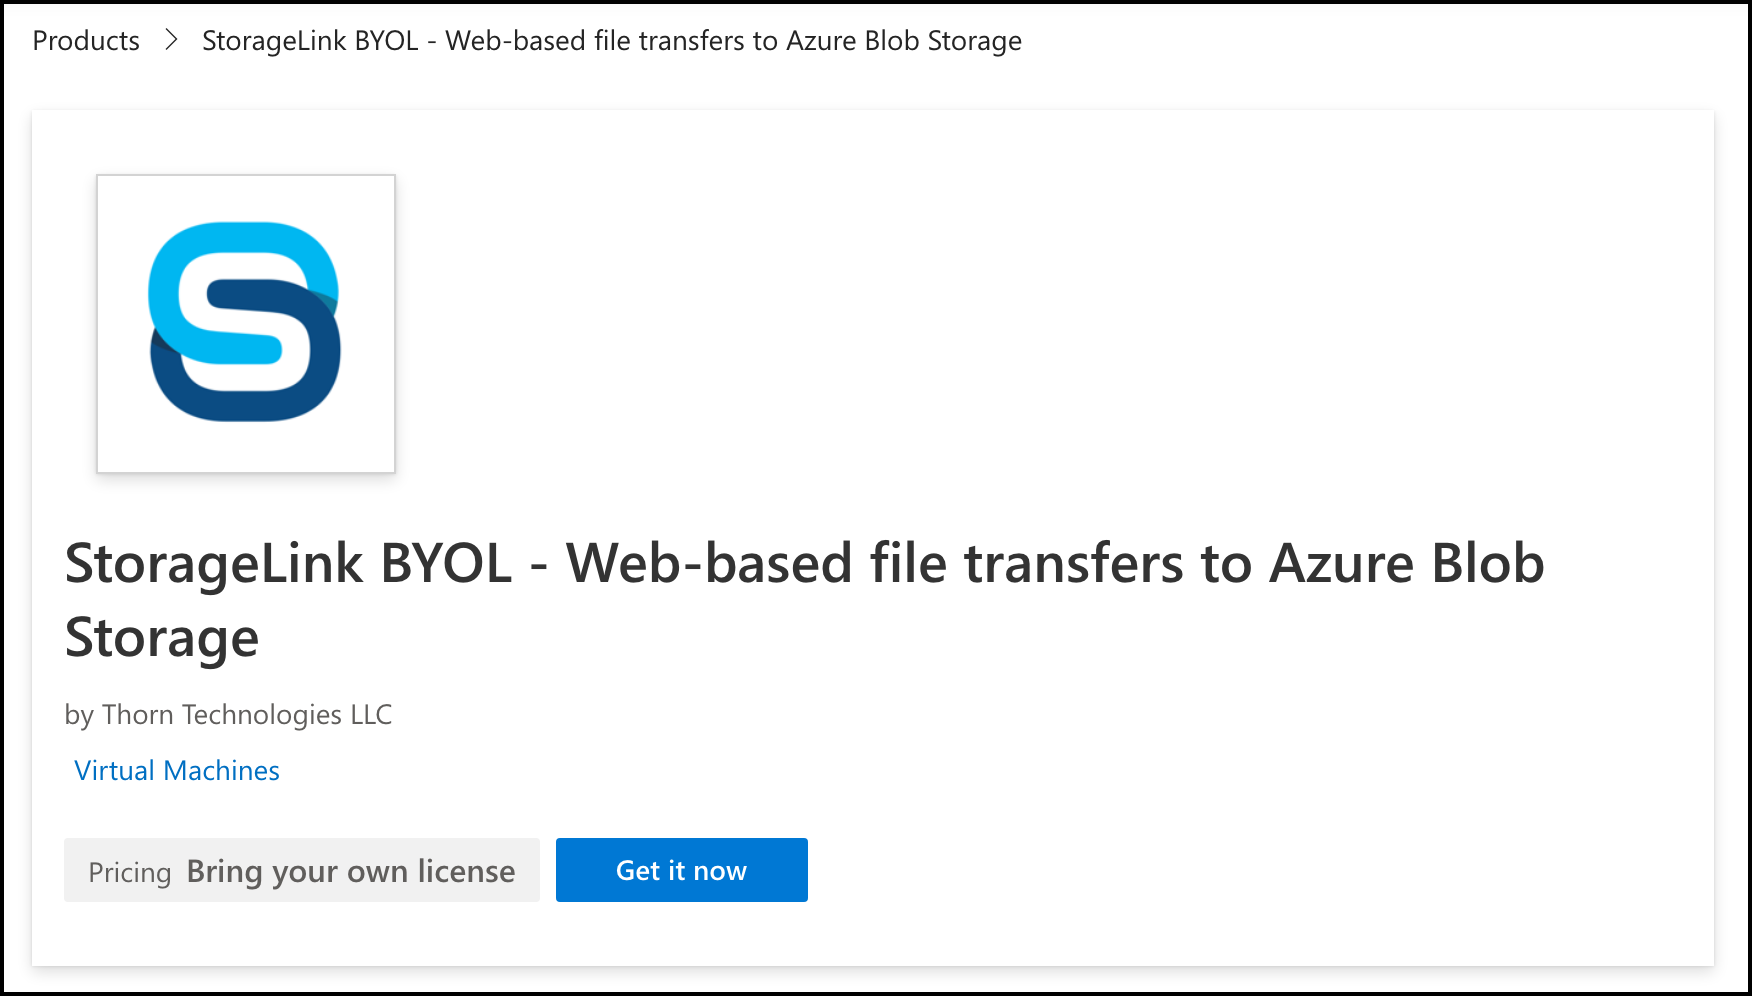
Click the Get It Now button.
You will see a modal that may ask you for basic profile information. Fill out the required fields if necessary, and click the Continue button.
Azure Portal Steps
You will be taken to the Azure Portal.
Under Plan, choose StorageLink BYOL from the drop down menu. Then, click Create.
It will bring you to the Create a virtual machine wizard.
Create a VM
On the Basics tab, fill out the following information:
- Resource Group: Click Create new and enter a name. Or, select an existing one from the drop-down menu.
- Virtual machine name: Enter a name for your VM. Since this is Linux, try to use only lowercase letters and hyphens if possible.
- Region: Select a region.
- Image: This should be pre-populated, since you were directed here from the Azure Marketplace.
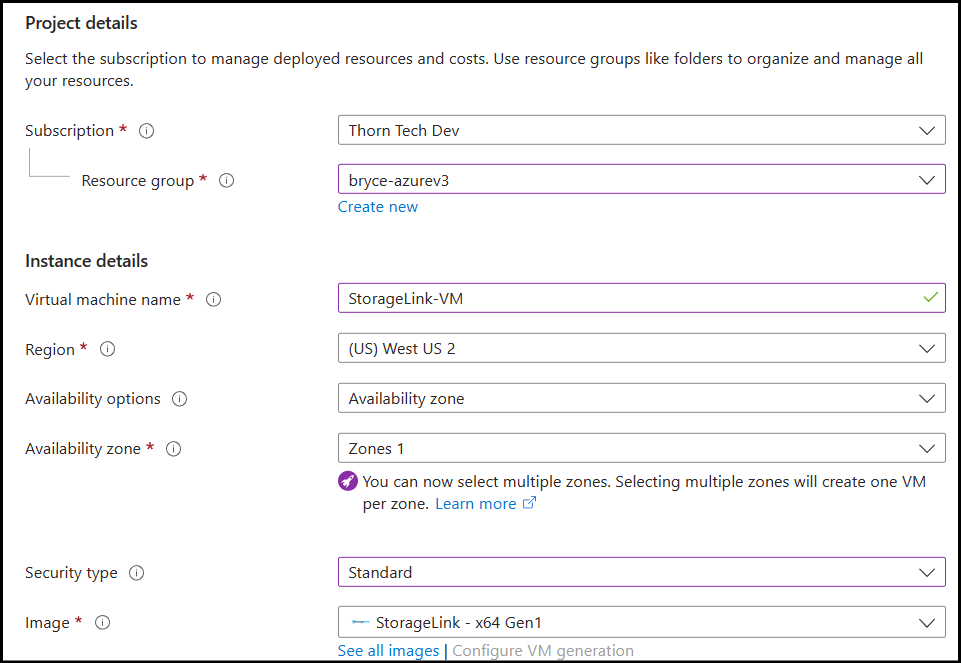
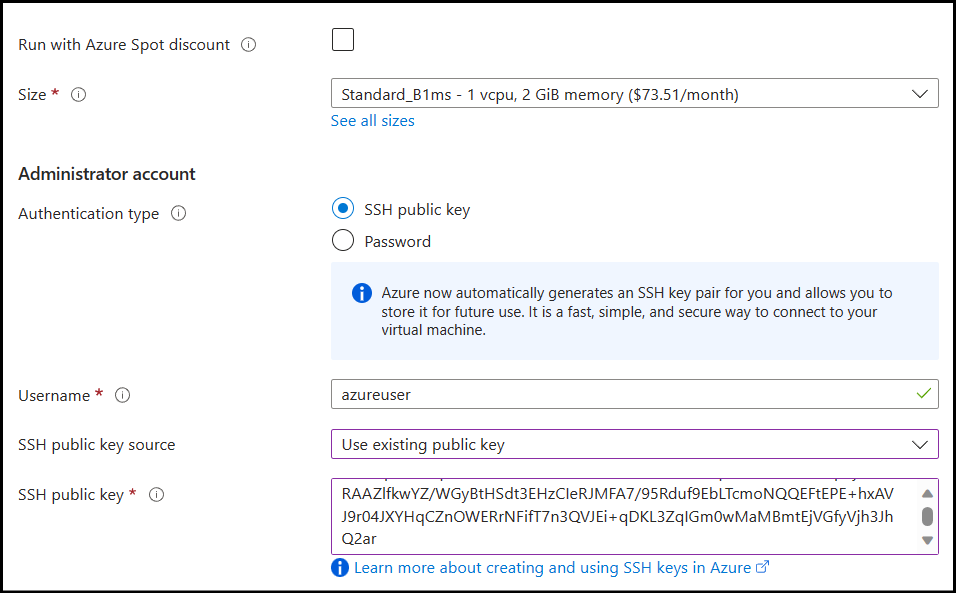
- Size: For testing purposes, you can use B1ms. For production, we recommend one of the D sizes.
- Authentication type: Select SSH public key authentication (or Password).
- Username: Enter a username, such as azureuser.
- SSH public key: Paste in a public key in which you have access to the private key.
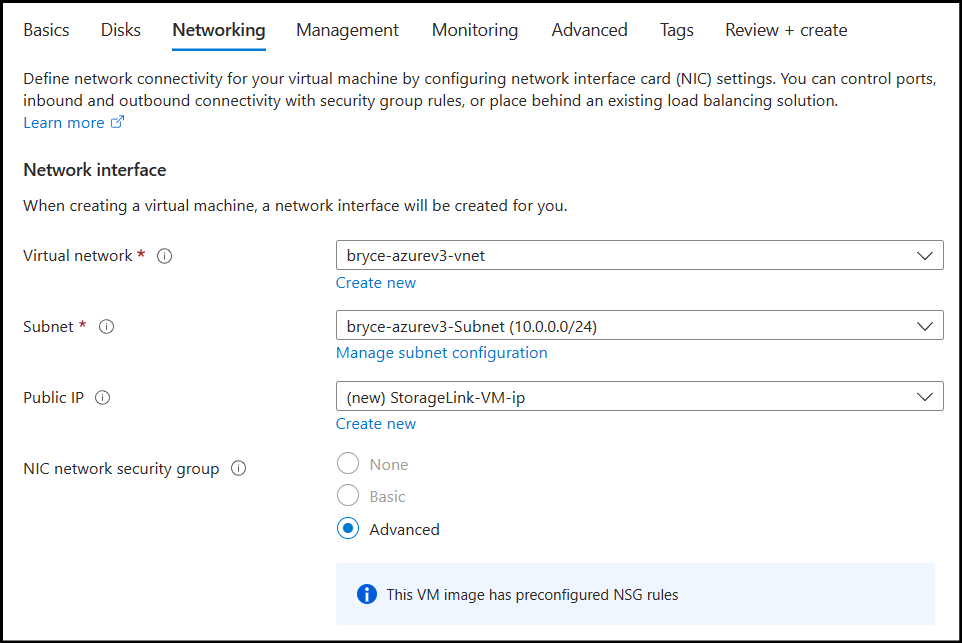
Click on the Networking tab, and you will see the following options:
- Virtual network, Subnet, Public IP: These should auto-populate based on information you provided earlier.
- NIC network security group: The NSG rules have been preconfigured for you. So, if you'd like to restrict access via the NSG, make sure to edit the rules under the Networking section after the VM creation.
Click the Review + create tab on the top
It will take a few moments to validate. You should see "Validation passed" in green. Otherwise, go back and address any issues.
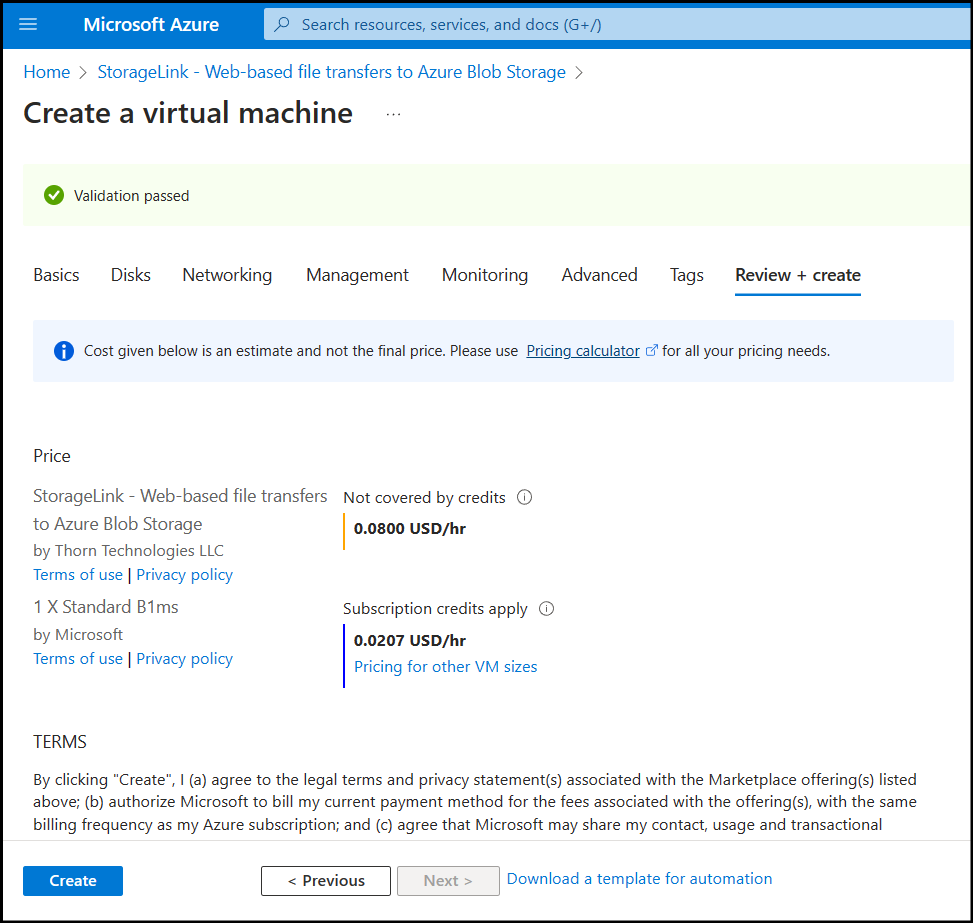
Review your information and click Create on the bottom.
It will take a few minutes to provision your VM.
Once complete, you should see your Resource Group with the following resources:
- Virtual machine: This is the StorageLink server.
- Public IP address: When you stop the VM, you will be given the option to reserve the IP address. Make sure you do so.
- Network security group: This acts as a firewall for the VM.
Access the StorageLink Interface
To access StorageLink interface, go to the VM details page and copy the Public IP address.

Paste the URL in the address bar of your browser.
Google Cloud Marketplace Steps
Navigate to the StorageLink BYOL product on the Google Cloud Marketplace. There is no software charge on the listing, so your Google Cloud invoice shows only the VM, disk, and storage costs.
You should see the following screen:

Click Get Started, and you will be taken to the Agreements page.
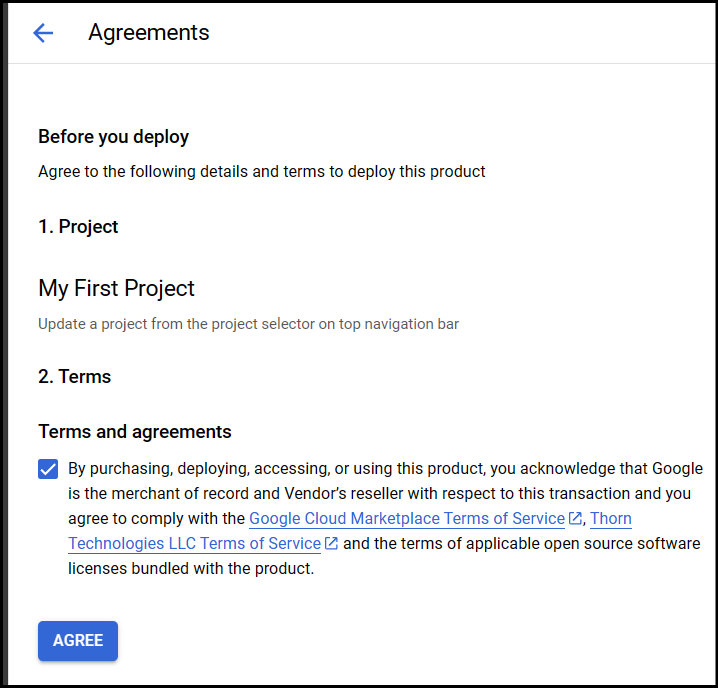
Check the box for Terms and agreements, then click Agree.
You will then see a popup acknowledging you've completed the Terms and agreements. Click Deploy to navigate to the StorageLink Deployment wizard. Here, you will configure your Virtual Machine. The cost estimate on the right of the wizard lists only infrastructure fees, because the BYOL listing has no license fee.
Create a VM
First, create a Deployment name. Since this is Linux, try to use only lowercase letters and hyphens.
Select a Zone in which to deploy your virtual machine.

For the Machine type, we recommend a General-Purpose E2 Series machine for testing and evaluation. We recommend at least a size of e2-medium.
Note: Do not use an e2-small, since it does not have adequate CPU.
For production environments with a heavy workload, we recommend using an N2 Series machine such as n2-standard-2.
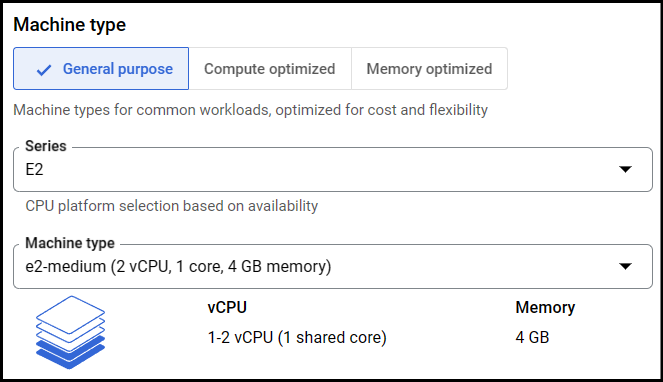
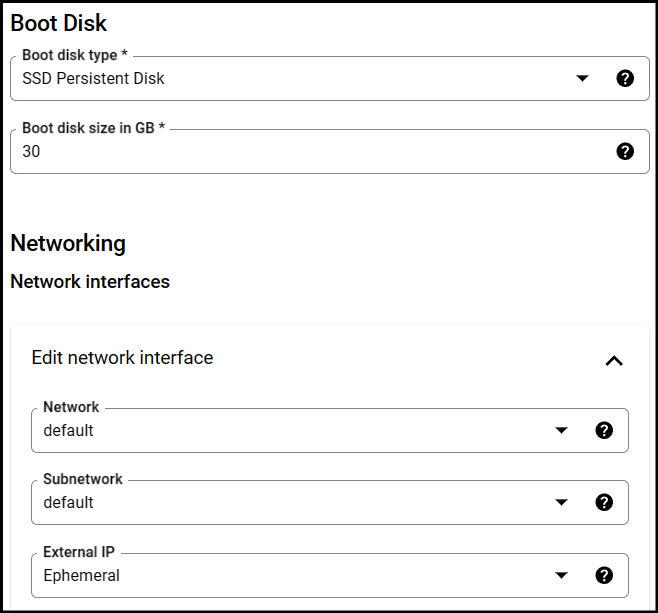
The Boot Disk can be left as default since the disk will only contain the OS and rotated log files.
The Network Interface may also be left as default unless you want to use your own specific network and subnet or if you want to use an existing External IP instead of creating a new one.
Note: If you deploy the pay-as-you-go listing instead, the instance confirms its marketplace license with Google Cloud in the background. For that check to complete, keep a service account attached to the VM (the wizard attaches one by default) and, if the VM has no external IP, enable Private Google Access on its subnet. If the check cannot complete, the admin UI explains what is blocked and links to Marketplace License Network Requirements in the in-app help. The BYOL listing carries no marketplace license, so this check does not apply to it.
StorageLink exposes the following ports and protocols:
80: HTTP443: HTTPS22: SSH
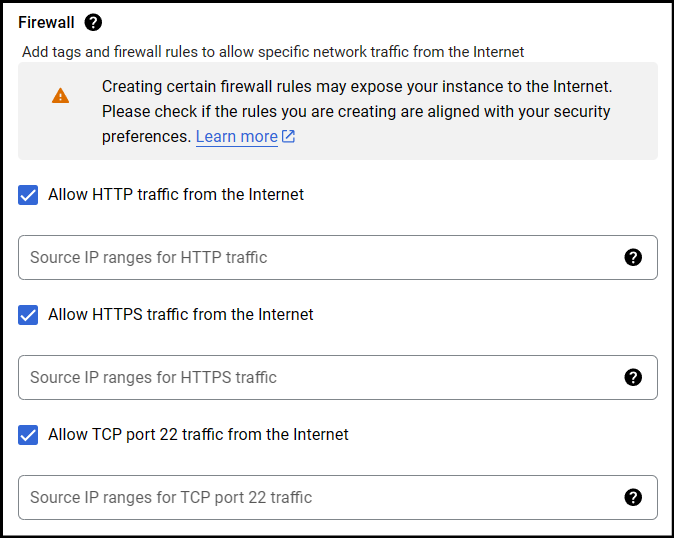
For HTTP and HTTPS, paste in 0.0.0.0/0. Since Web Users access the StorageLink Interface over the web ports, HTTP and HTTPS, you would open this port to the world instead of trying to manage the public IP of every user connecting to the site.
For the SSH port, paste in your public IP address. To determine your public IP, go to http://checkip.dyndns.org/

After you have configured everything on the deployment page, at the bottom of the page, click Deploy.
Access the Admin Interface
After clicking Deploy, the console opens your StorageLink deployment on the Solution deployments page. Google Cloud Marketplace runs VM deployments through Infrastructure Manager, which replaced Deployment Manager.
When the deployment finishes, click the Site address link to access the StorageLink Interface.
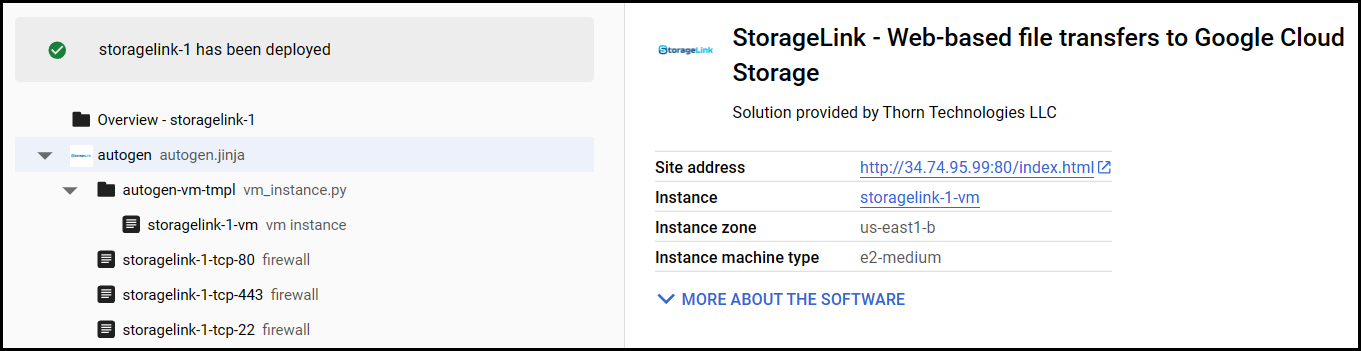
The next step is to go through the First Launch Experience to sign into the StorageLink Interface and start your free 30-day trial.