Setting up an Instance Identity for StorageLink
Purpose: Let StorageLink access Azure Blob Storage through the VM's system-assigned managed identity (instance identity) instead of a hard-coded connection string
Steps:
- Turn on System assigned managed identity when creating the VM (Management tab), or later under the VM's Identity settings
- On the VM's Identity → System assigned tab, click Azure role assignments → Add role assignment
- Set Scope to Resource group, choose the VM's resource group, set Role to Storage Blob Data Contributor and click Create
Next Step: In the admin UI, use instance identity instead of a connection string for your Folder mappings to the Blob Storage account
Note: Your Azure account needs permission to create role assignments
Product: StorageLink by Thorn Technologies — cloud storage gateway for secure file sharing
Overview
This article goes over how to set up StorageLink with a System-Assigned Managed Identity.
Folders can then use this Identity, instead of hard-coding a Connection String.
Create a Managed Identity
A Managed Identity lets you assign permissions to a VM.
This can include access to a Blob Storage Account.
In this section, you will create a System-Assigned Managed Identity for the VM.
Then, you will assign it permissions to Blob storage.
Step 1
When setting up the VM, under Management, select System assigned managed identity.
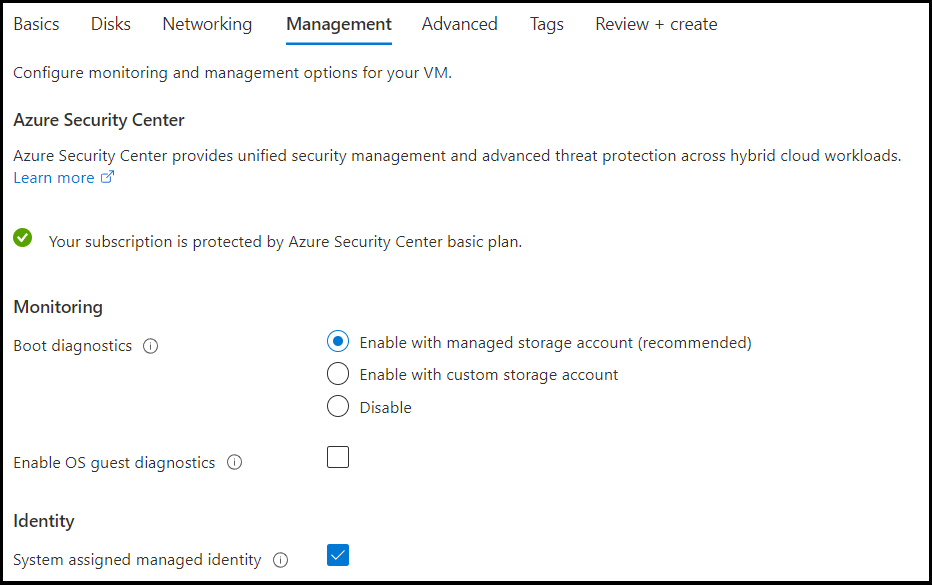
Note: You can also turn On System assigned managed identity after the VM has been created.
Step 2
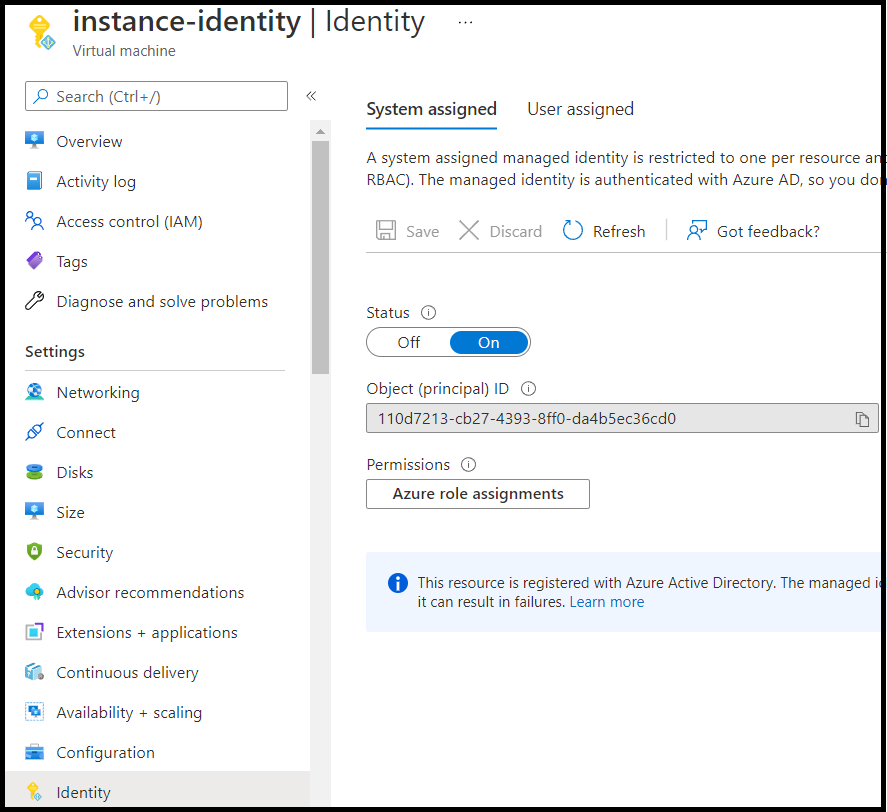
Once you have created your VM, under Settings go to identity.
You will see two tabs:
- System assigned
- User assigned
It will default to System assigned, which is what you want.
Under Permissions, click Azure role assignments.
Step 3
Click Add role assignment (Preview).
This will open a modal window.
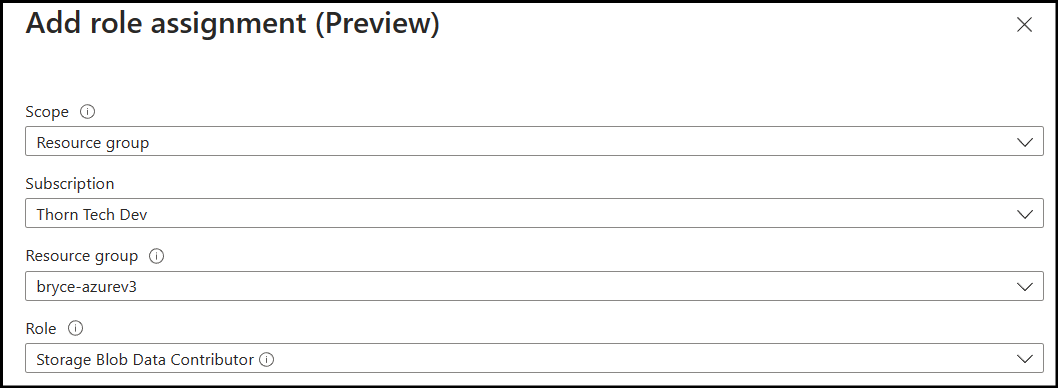
Under Scope, select Resource group.
Under Subscription, select the subscription you are currently under.
Under Resource group, select the resource group your VM is located in.
Under Role, select Storage Blob Data Contributor.
After you have properly configured your Role Assignment, press Create.
Note: If your account does not have the proper permissions you may not be able to create Role Assignments.
Once you log into the Web Admin Interface, you will now be able to use instance identity for your Folder mappings to a Blob Storage Account.