Creating Your First Web User
Purpose: Create a Web User in StorageLink and set up everything they need to start transferring files
Steps:
- Users → + Create User
- Enter a Username and keep the Web User role
- Set a One-Time Password that meets the password policy (the user changes it at first sign-in)
- Choose the Home Folder (default
/users/<username>) and Home Folder Permissions - Keep Inherit from Ancestor Folders or map the home folder to its own cloud storage location
- Click SAVE
Web User: A regular user chrooted to one home folder, who cannot manage folders, users, or settings
Next Step: Walk the user through Normal Flow as a Web User
Product: StorageLink by Thorn Technologies — cloud storage gateway for secure file sharing
Overview
A Web User is a regular user who signs into StorageLink to upload, download, rename, and delete files. Unlike an Admin User, a Web User cannot manage folders, users, or settings — they are chrooted (locked) to a single home folder and can see and modify only their own area.
This article walks through creating your first Web User and explains every field on the form. For a conceptual overview of the two user types and how permissions work, see Add & Configure Users.
Step 1 — Open the User Management page
Sign in as an Admin User and click Users in the left sidebar to reach User Management. This page lists every Admin User and Web User on your instance. The icon beside each name marks the role: a plain person for a Web User, a person-with-cog for an Admin User.
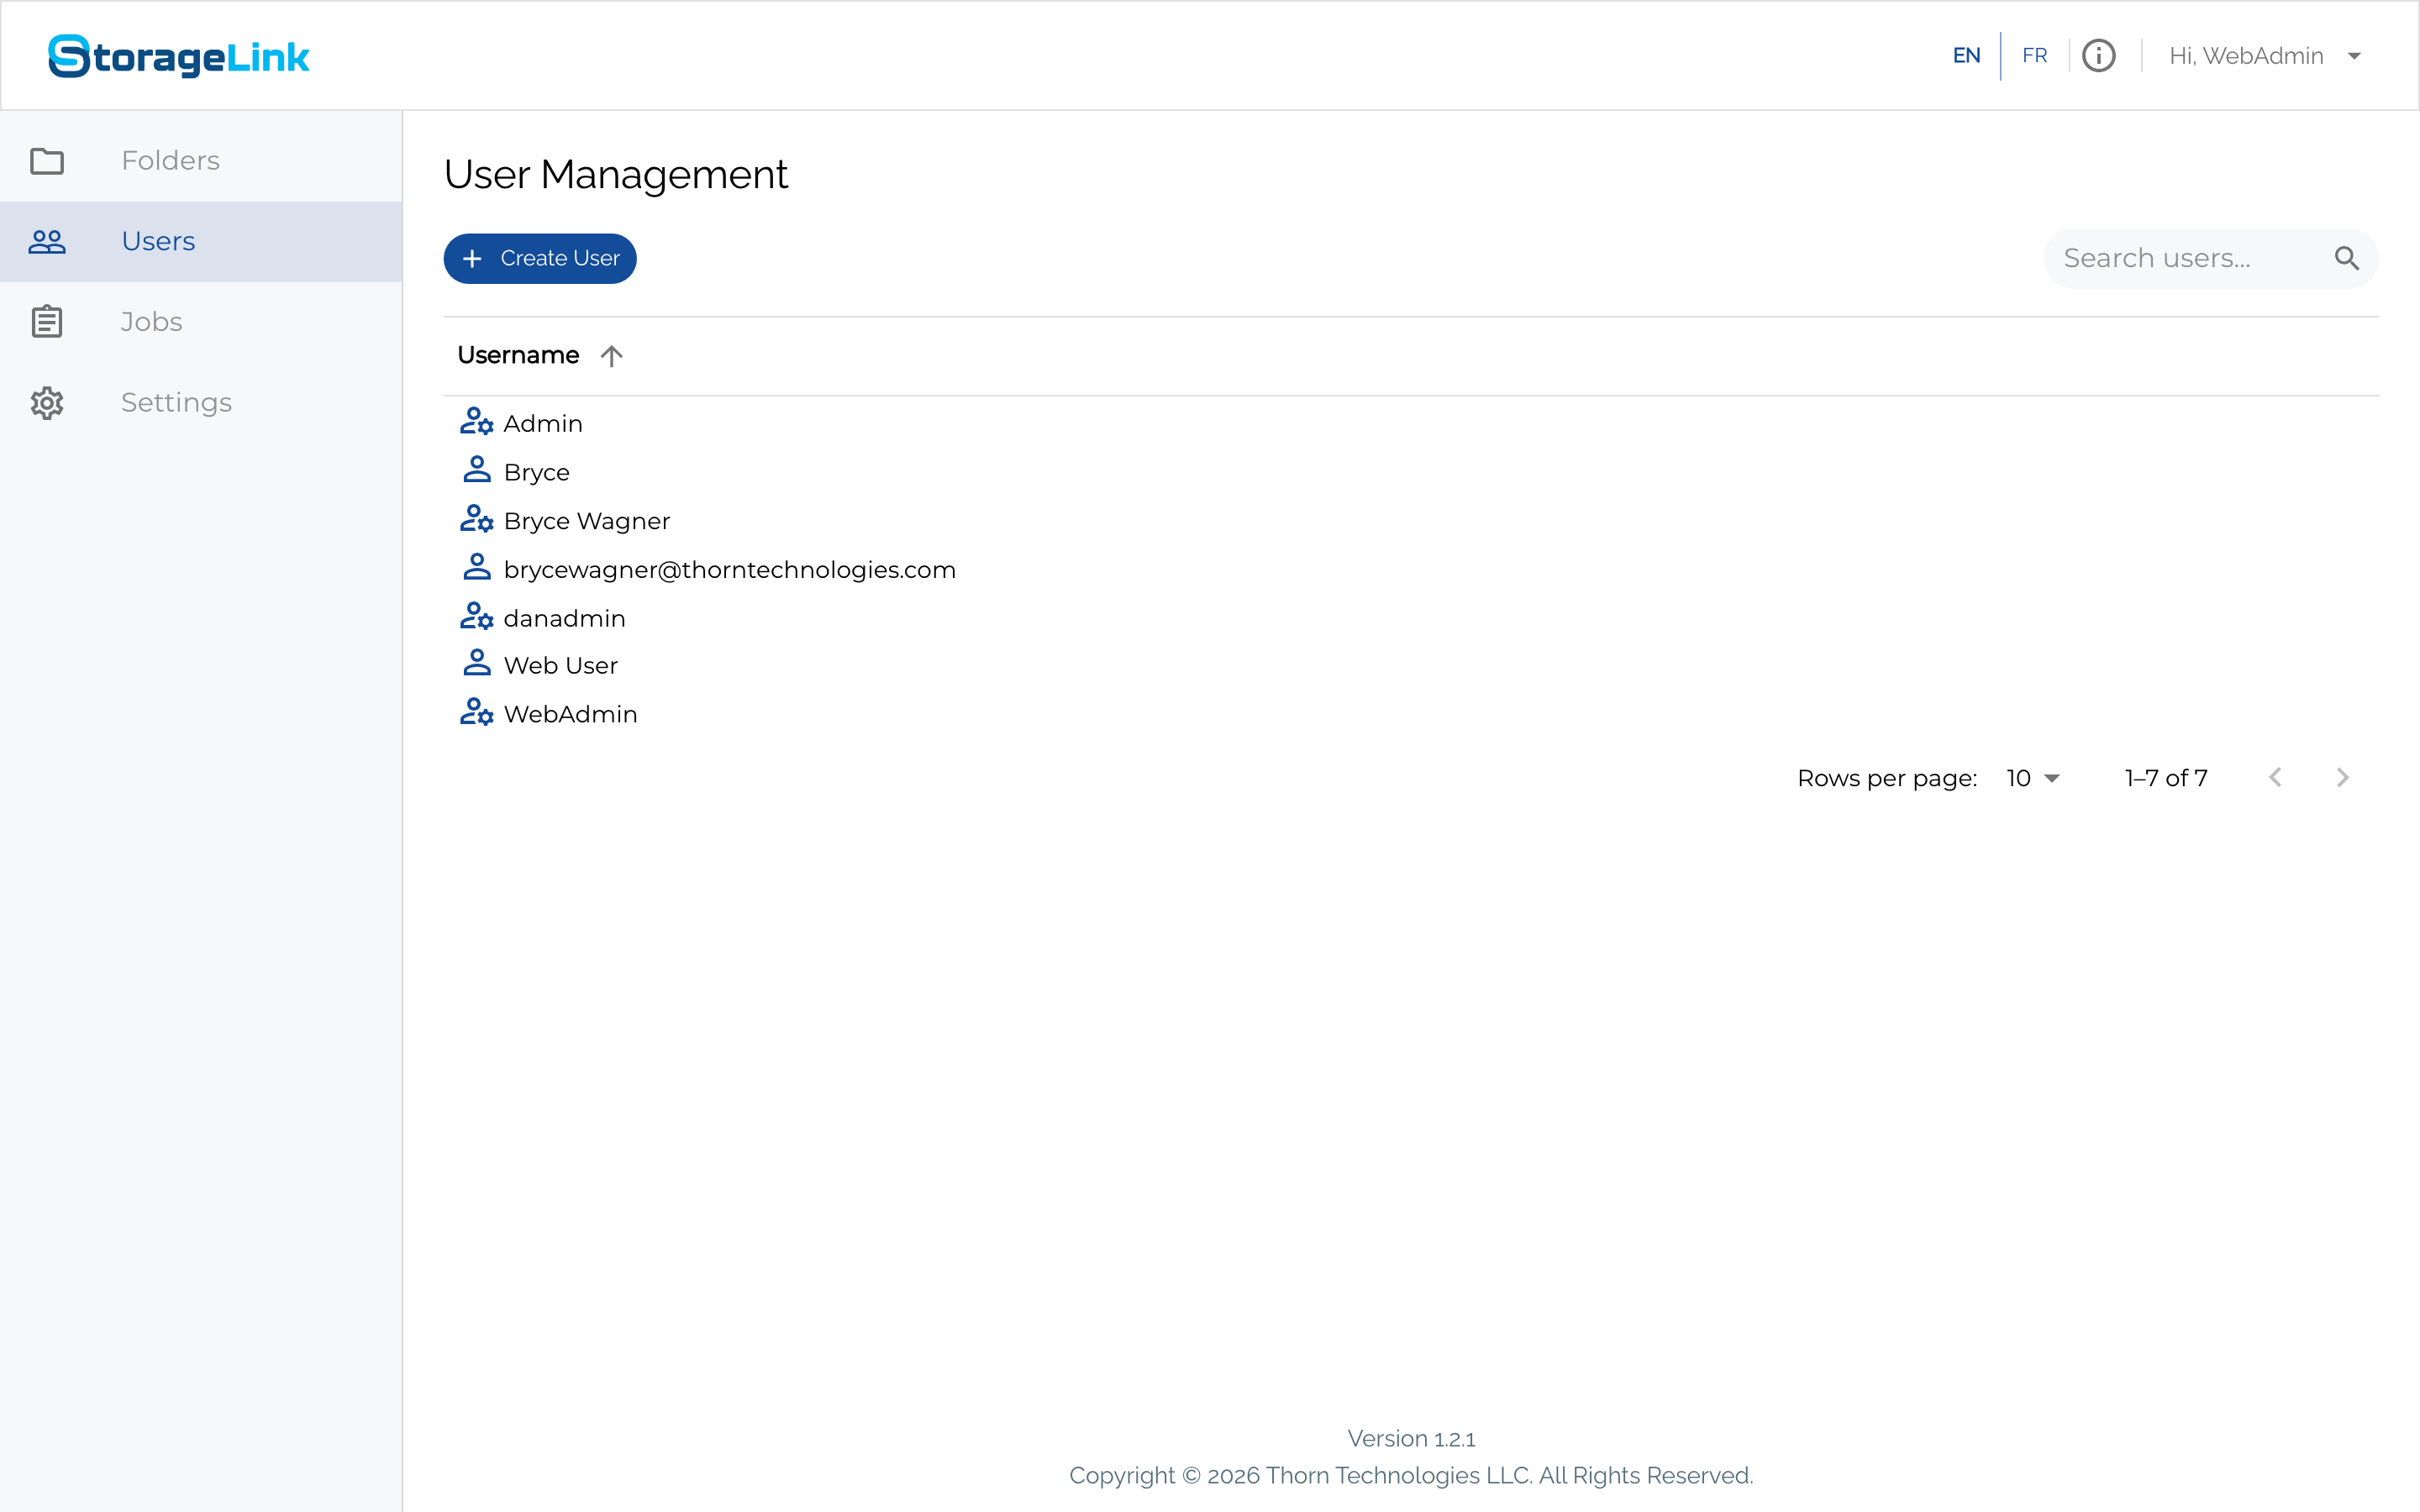
Click + Create User to open the Add User form.
Step 2 — The Add User form
The Add User form is a single page. The right-hand Support + troubleshooting panel shows contextual help for each field as you work.
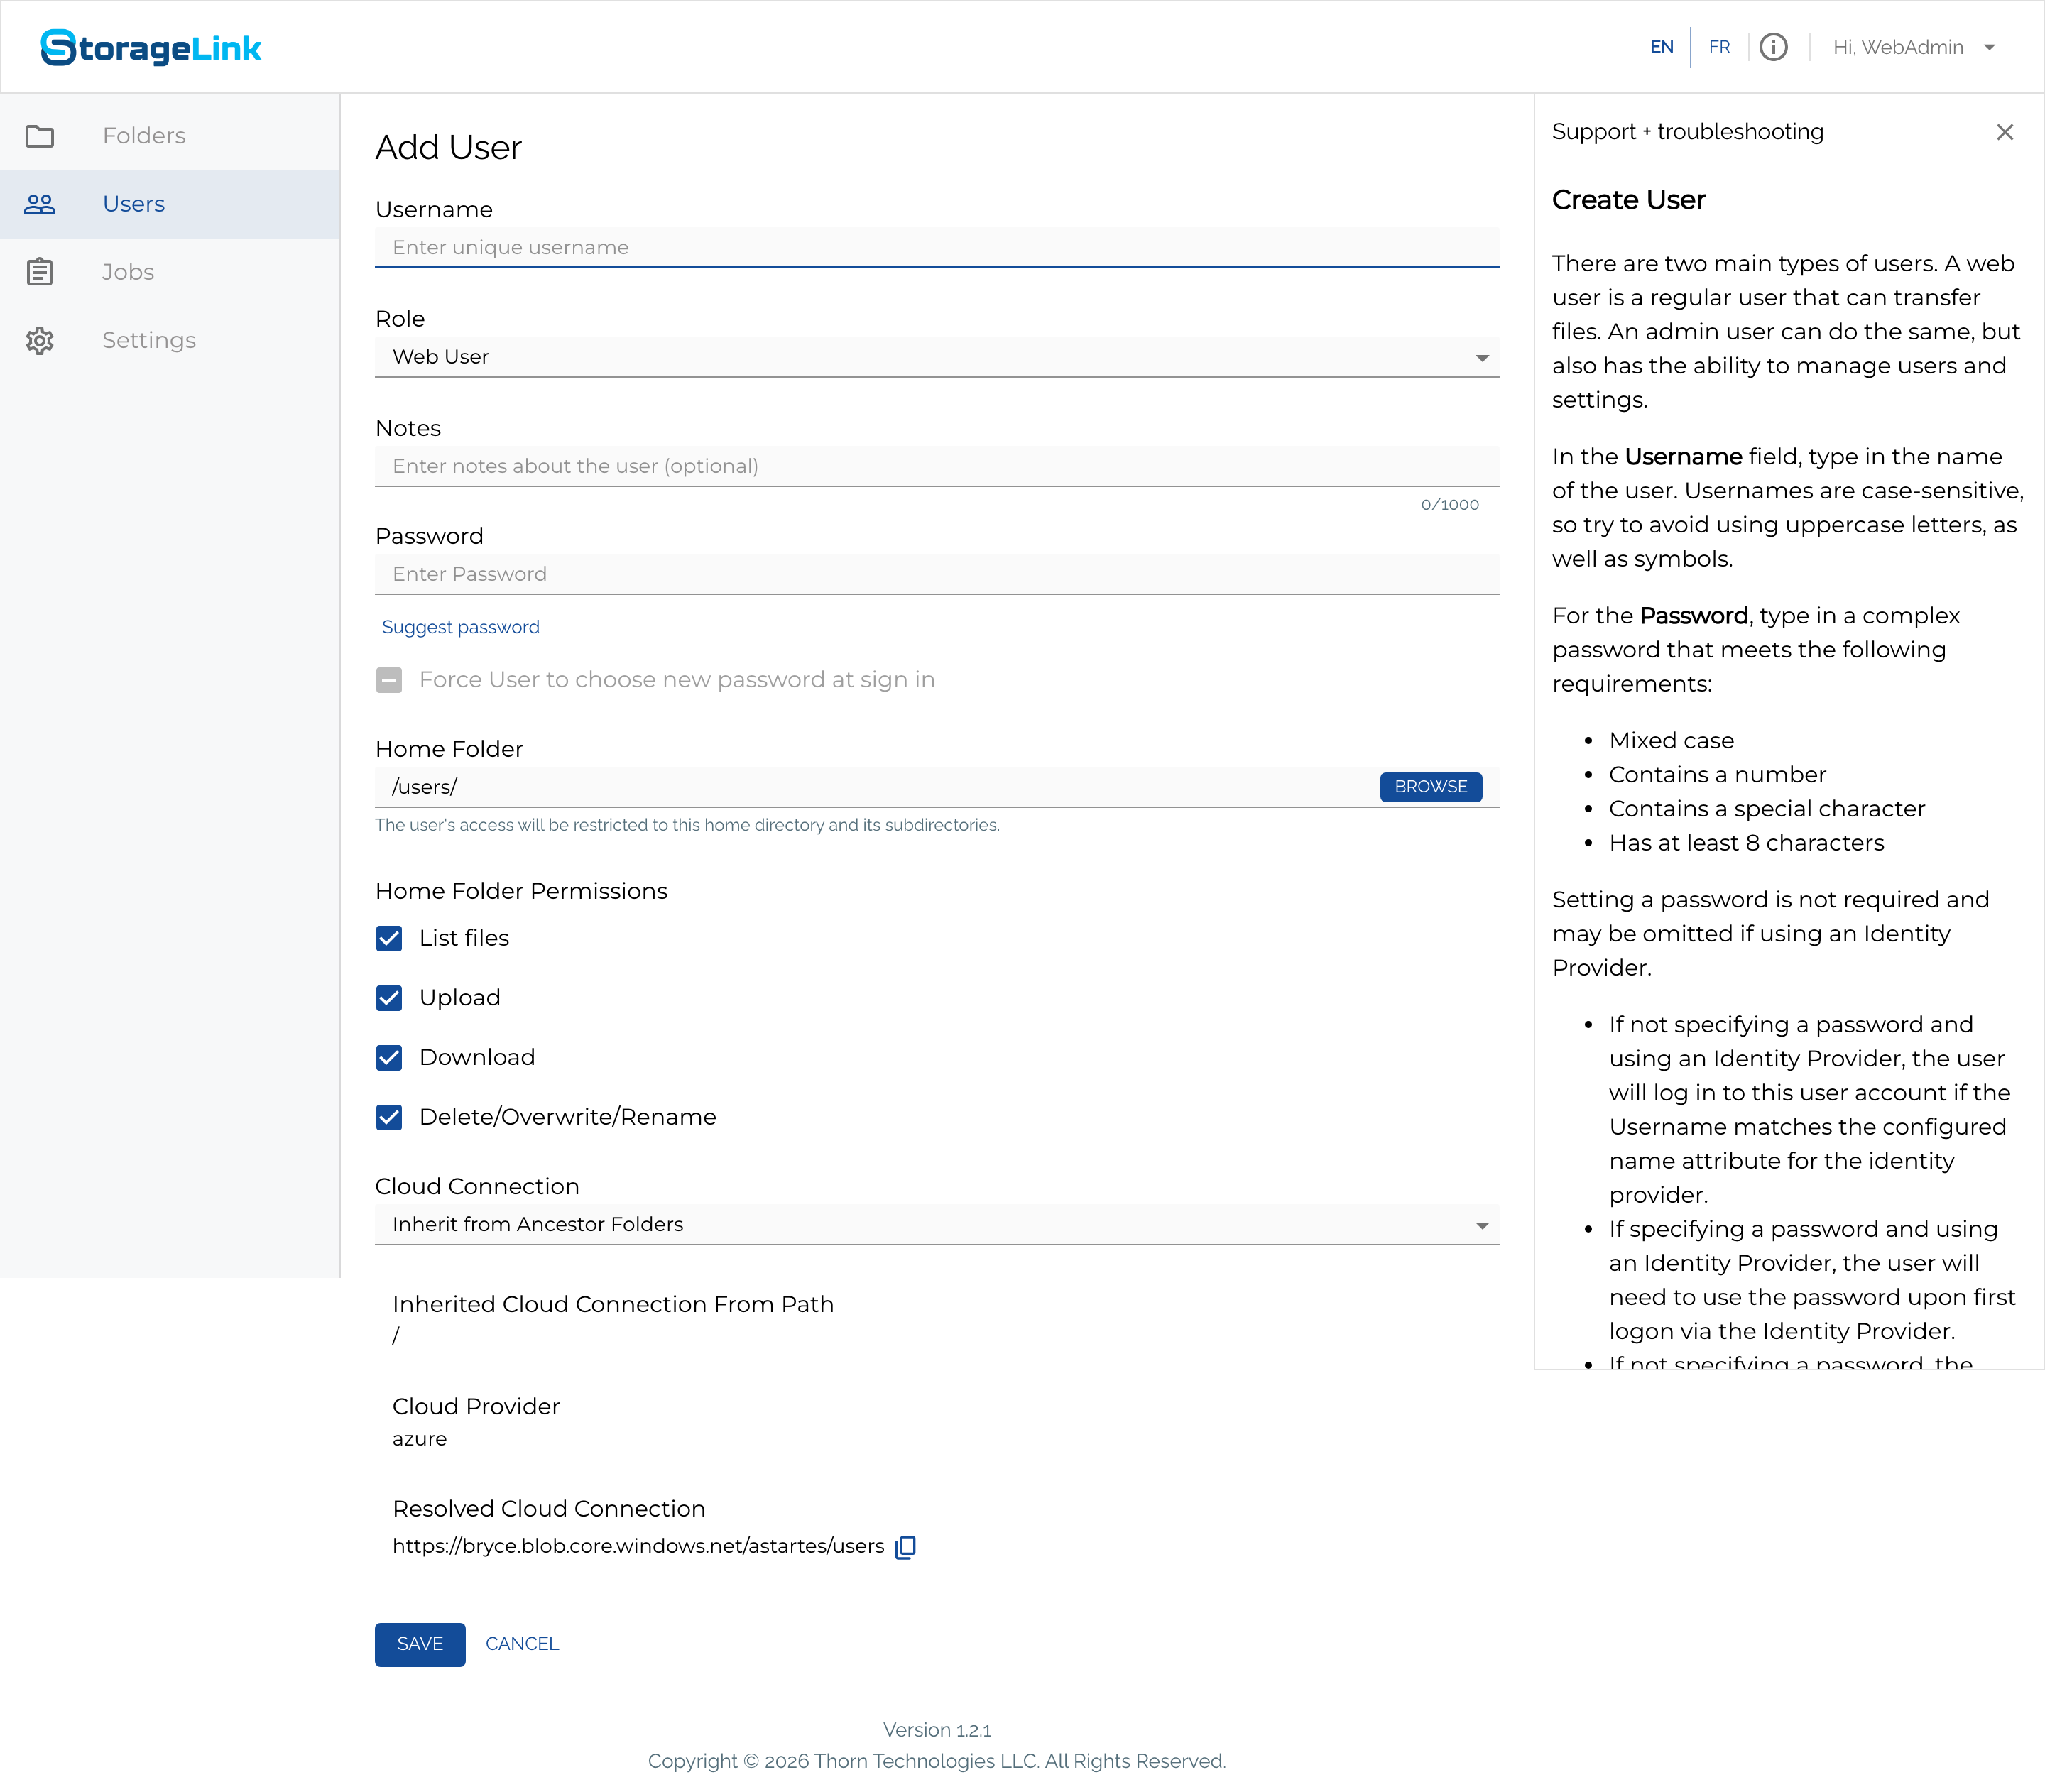
Every field, top to bottom:
| Field | Description |
|---|---|
| Username | Must be unique. Case-sensitive at sign-in, so avoid relying on capitalization. Avoid symbols. |
| Role | Choose Web User for a regular file-transfer user, or Admin User for someone who also manages folders, users, and settings. |
| Notes | Optional free-text (up to 1,000 characters) — useful for recording who the account belongs to. |
| Password | A One-Time Password the user must change on first sign-in. Click Suggest password to auto-generate a compliant one, or type your own. It must satisfy the password policy (see below). |
| Force User to choose new password at sign in | Leave checked so the password you set is treated as a one-time password. |
| Home Folder | The directory the user is locked to. Defaults to /users/<username>. Click Browse to pick an existing folder. |
| Home Folder Permissions | Five checkboxes: List files, Upload, Create Folder, Download, Delete/Overwrite/Rename. |
| Cloud Connection | Where the home folder's files physically land in cloud storage. Defaults to Inherit from Ancestor Folders. |
Step 3 — Set the username, role, and password
Type a Username, leave the Role as Web User, and enter a Password.
As you type the password, a live strength meter and a checklist validate it against the configured password policy. A green checkmark marks each satisfied rule, and the Save button stays disabled until the password qualifies. On this instance the checklist enforces:
- At least 12 characters
- At most 72 characters
- Not in the prohibited word list
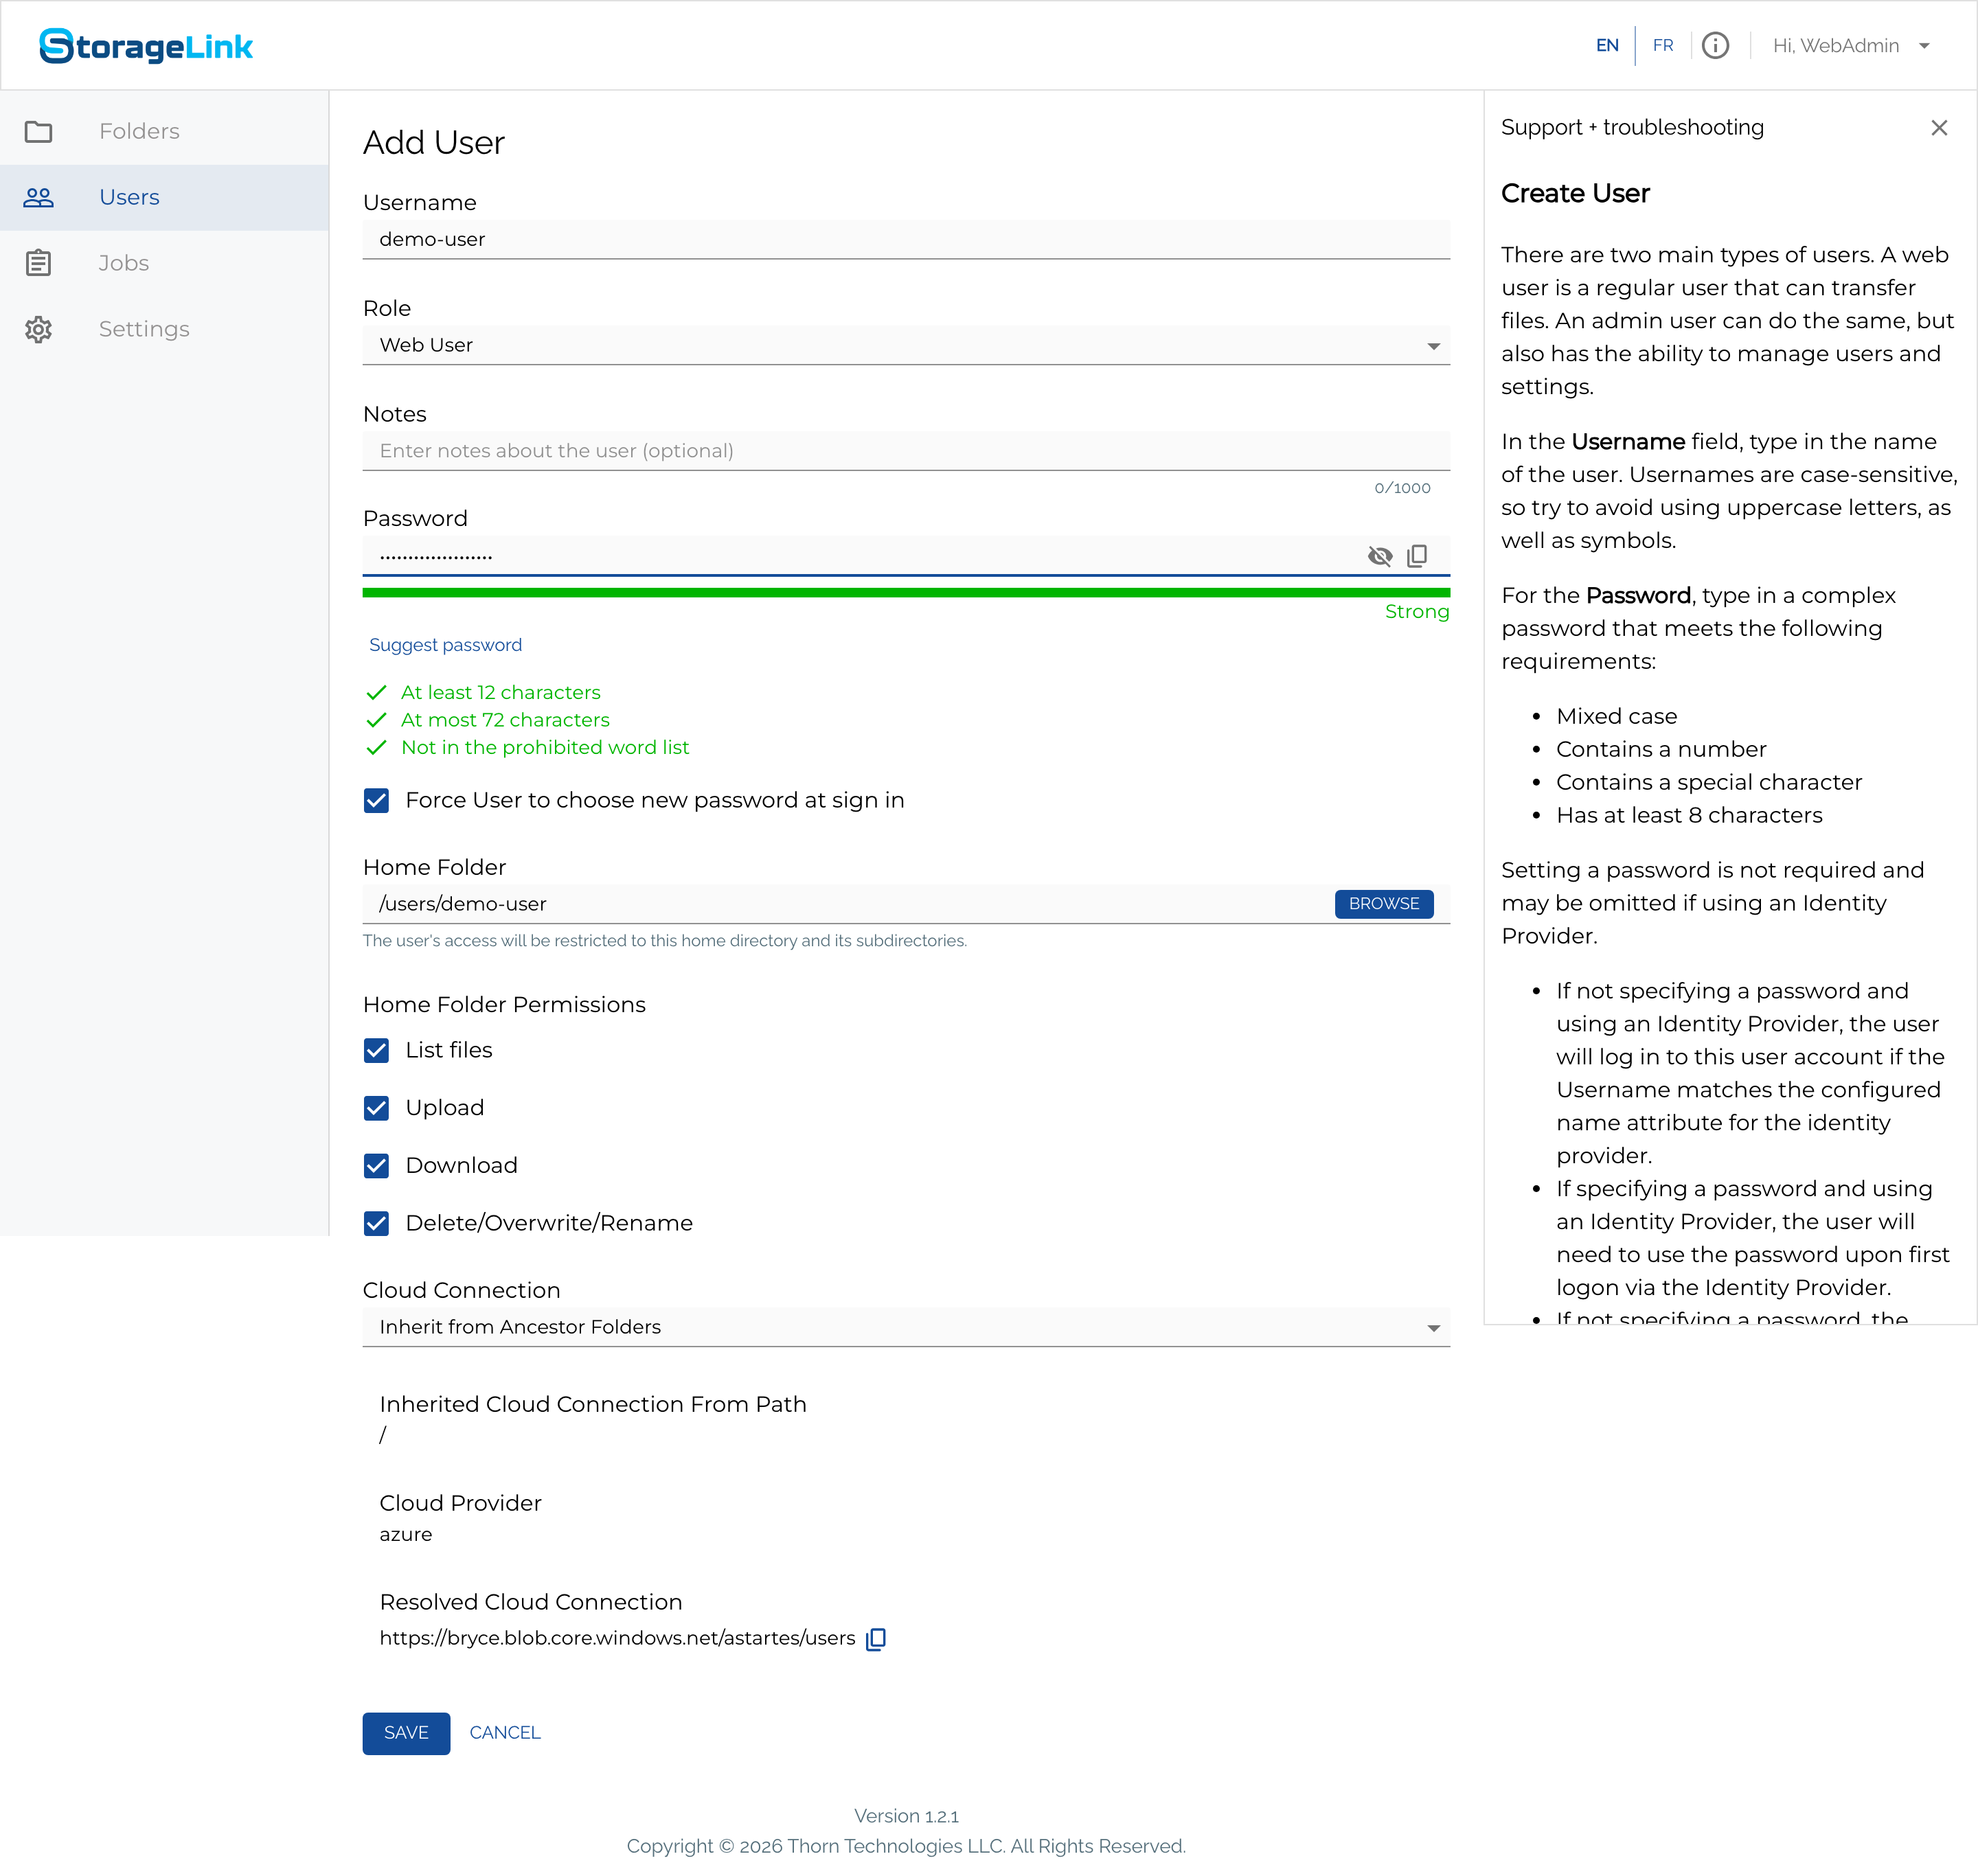
Depending on your password policy, StorageLink can also require a mix of uppercase, lowercase, digits, and special characters, and block reuse of recent passwords. The rules a user sees are whatever your instance's policy enforces.
A password is optional if the user signs in through an Identity Provider (OIDC / SSO). In that case, leave the password blank and make sure the Username matches the identity attribute configured on your IdP.
Step 4 — Choose the Home Folder
By default, a new Web User's Home Folder is /users/<username>. A user named demo-user gets:
/users/demo-user
StorageLink creates this folder automatically. Because each user lands in their own sibling directory under /users/ and is chrooted to it, users cannot see or reach each other's folders — even if one knew another's path.
You can also point the Home Folder at an existing directory with Browse, or type a new path to create one. The note under the field — "The user's access will be restricted to this home directory and its subdirectories" — is the chroot in action.
Step 5 — Set Home Folder Permissions
The five permissions control what the user can do inside their home folder:
- List files — see the folder's contents
- Upload — add new files to folders that already exist
- Create Folder — create new folders (including the folders created when uploading a folder or a nested tree), and rename or copy folders. Requires Upload as well; on its own it grants nothing.
- Download — retrieve files
- Delete/Overwrite/Rename — remove or modify existing files
Uncheck any you want to withhold. For example, a drop-box-style account might enable Upload only, with Create Folder, List files, Download, and Delete/Overwrite/Rename turned off, so the user can drop files into the folders you created but cannot change the folder layout.
You can also tune these permissions per-folder later for finer control on specific subdirectories.
Step 6 — Choose a Cloud Connection
The Cloud Connection determines where the user's uploads physically land in cloud storage. The default, Inherit from Ancestor Folders, makes the home folder use its parent's cloud connection. When inheriting, the form shows three read-only values:
- Inherited Cloud Connection From Path — the folder being inherited from (for example, the root
/) - Cloud Provider —
aws,azure, orgcp - Resolved Cloud Connection — the exact bucket or container and path the user's files are written to
Instead of inheriting, you can map the home folder to its own AWS S3 bucket, Azure Blob Storage container, or Google Cloud Storage bucket. For details on connection types, see Cloud Connections in StorageLink.
Step 7 — Save
Click SAVE. The new Web User appears in the User Management list immediately.
What happens on first sign-in
When the user signs in for the first time with the One-Time Password, StorageLink sends them to an Update Password screen, where they must set their own password before using the service. They then land in their home folder and can begin transferring files.
Walk your new user through the next steps with the Normal Flow as a Web User guide.