
Transfer Jobs in StorageLink
What: A Transfer Job copies or moves files in the background on the server, with automatic retries, so no browser tab has to stay open
Create: Jobs → + Create Job → Copy or Move, Source Folder, Destination Folder — the only way to copy or move files
Lifecycle: Pending → Running → Completed / Failed / Canceled; failed operations retry up to 3 times by default
New in 1.3.0: Create the destination folder in the Browse picker, and download a CSV report for a completed job
Note: Jobs are per-user, so My Jobs shows only your own jobs. Completed records are kept for 365 days by default.
Tuning (Admins): Set features.transfer-jobs.* in /opt/swiftgw/application.properties, then run sudo systemctl restart swiftgateway
Product: StorageLink by Thorn Technologies — cloud storage gateway for secure file sharing
Transfer Jobs were introduced in StorageLink v1.2.0.
Overview
A Transfer Job is a copy or move operation that runs in the background. In StorageLink, copying or moving files always happens as a Transfer Job — instead of holding a browser tab open while files transfer, you submit a job and walk away — StorageLink processes it on server-side worker threads and retries failed operations automatically.
Transfer Jobs are useful for:
- Large files or entire folder trees that take time to transfer
- Operations you don't want tied to an open browser session
- Bulk copy or move work that should retry on transient errors instead of failing outright
You create a Transfer Job from the Jobs page using + Create Job. This is the only way to copy or move files in StorageLink.
The Jobs page
Click Jobs in the sidebar to open the My Jobs page, where you view and manage in-progress and completed transfer jobs. Jobs are per-user: the My Jobs page shows only the jobs you created. If another admin creates a job, it will not appear in your list.
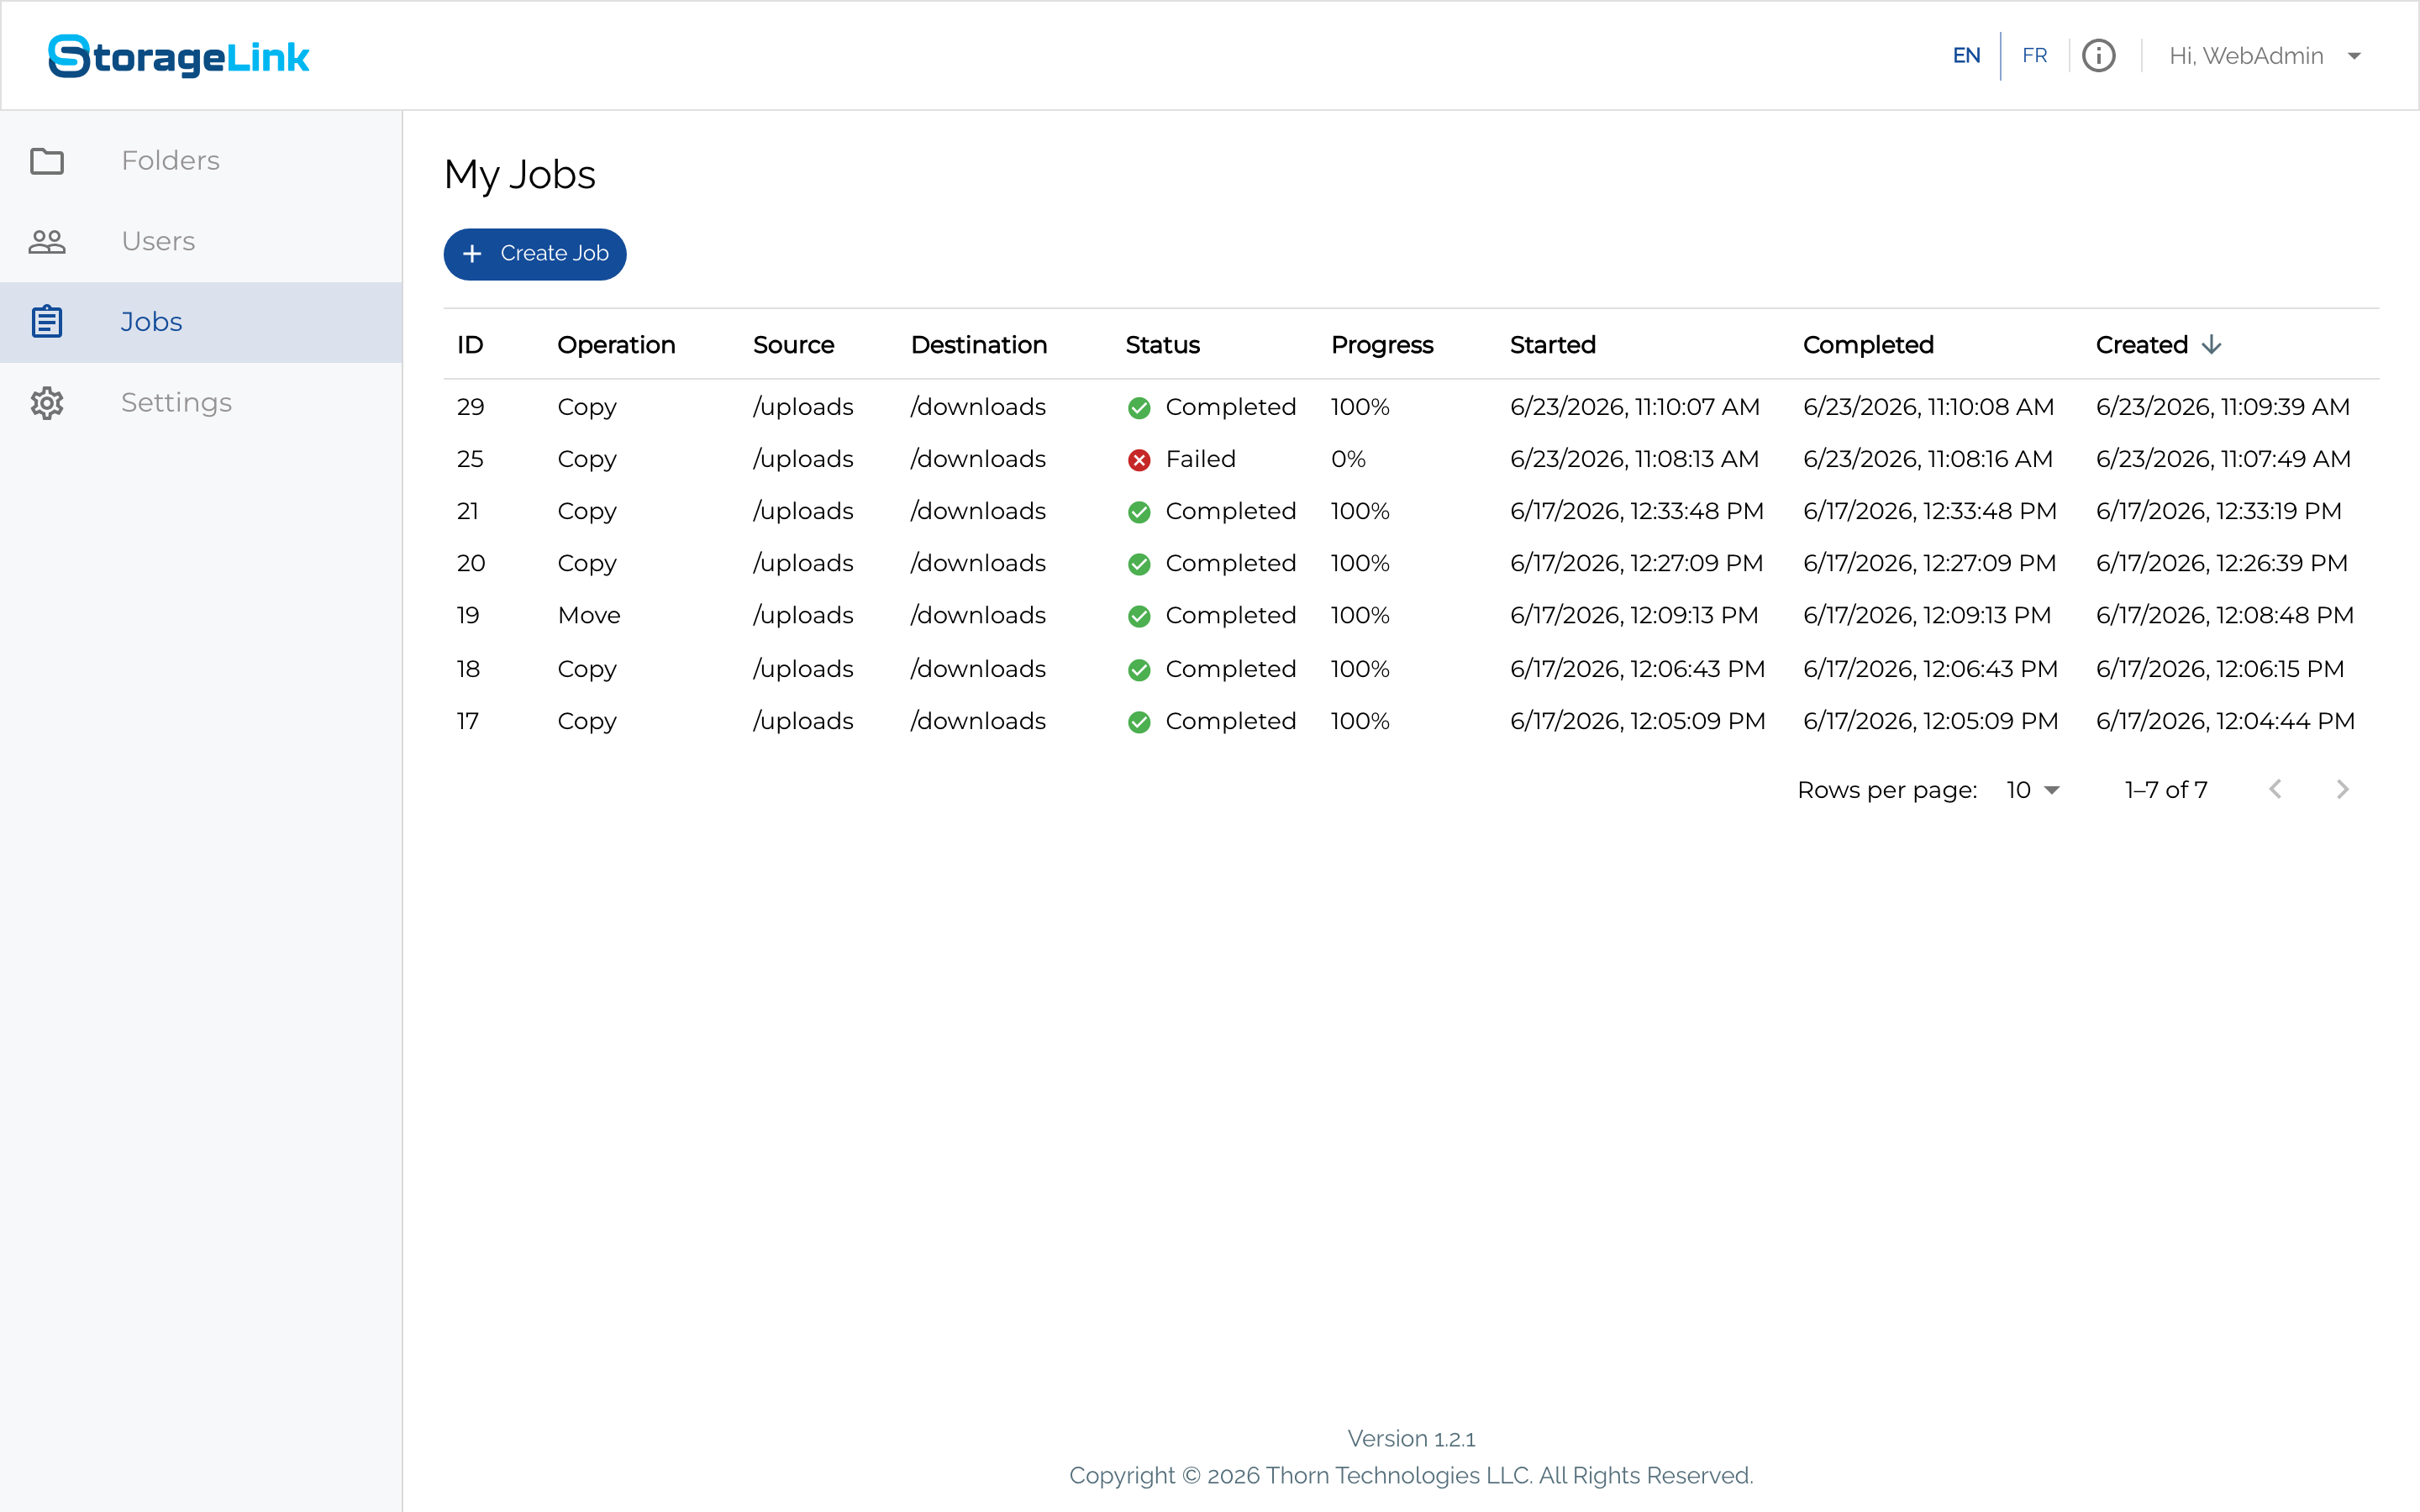
The page lists each job with the following columns:
| Column | Description |
|---|---|
| ID | Unique job identifier |
| Operation | Copy or Move |
| Source | Origin path of the file or folder |
| Destination | Target path |
| Status | Pending, Running, Completed, Failed, or Canceled |
| Progress | Percent complete (with transfer rate and bytes transferred while running) |
| Started | When the job began processing |
| Completed | When the job finished |
| Created | When the job was submitted |
Creating a job
Click + Create Job at the top of the Jobs page to open the Add Job form. This is the standard and only way to create a Transfer Job.
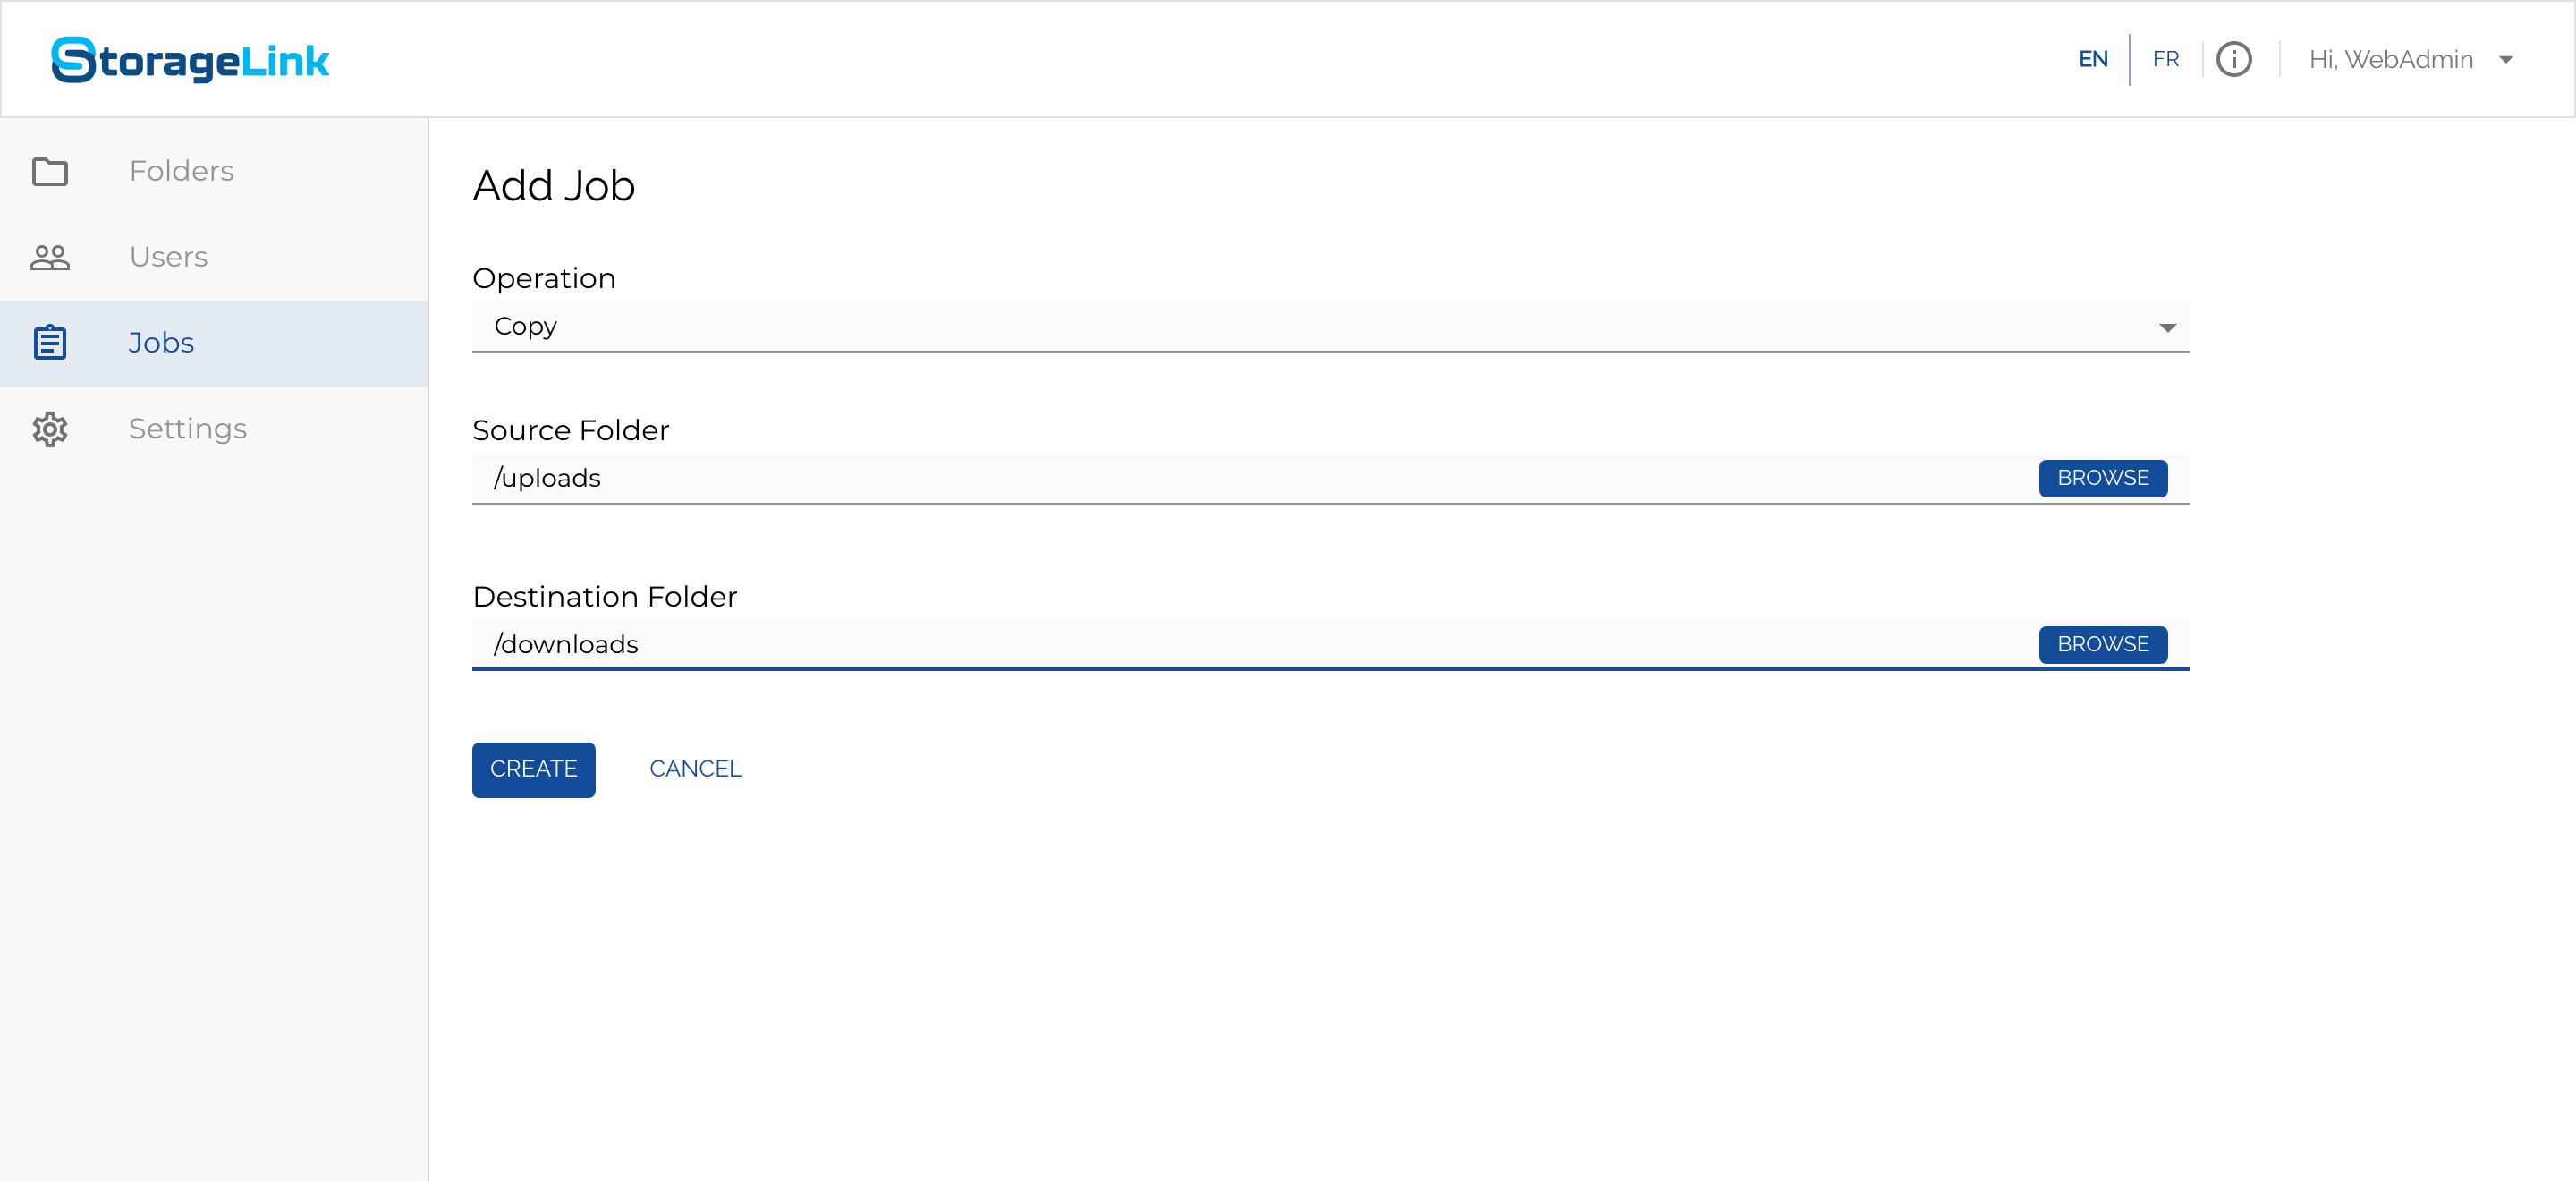
Fill in three fields:
| Field | Description |
|---|---|
| Operation | Copy (leave the source intact) or Move (remove the source after transfer). |
| Source Folder | Where the files come from (e.g., /uploads). Use Browse to pick it. |
| Destination Folder | Where they go (e.g., /downloads). Use Browse to pick it. |
If the destination folder does not exist yet, you can create it right inside the Browse picker (new in StorageLink 1.3.0); the new folder is selected automatically.
Click Create, and the job appears in the list.
Folder operations
When the source is a folder, StorageLink tracks the work as a parent job with one child job per file. You can monitor overall progress on the parent job and per-file status on the children, which makes it easy to pinpoint exactly which file failed in a large transfer.
Viewing job details
Click any job in the list to open its Job Details page, which reports how much data moved and how fast.
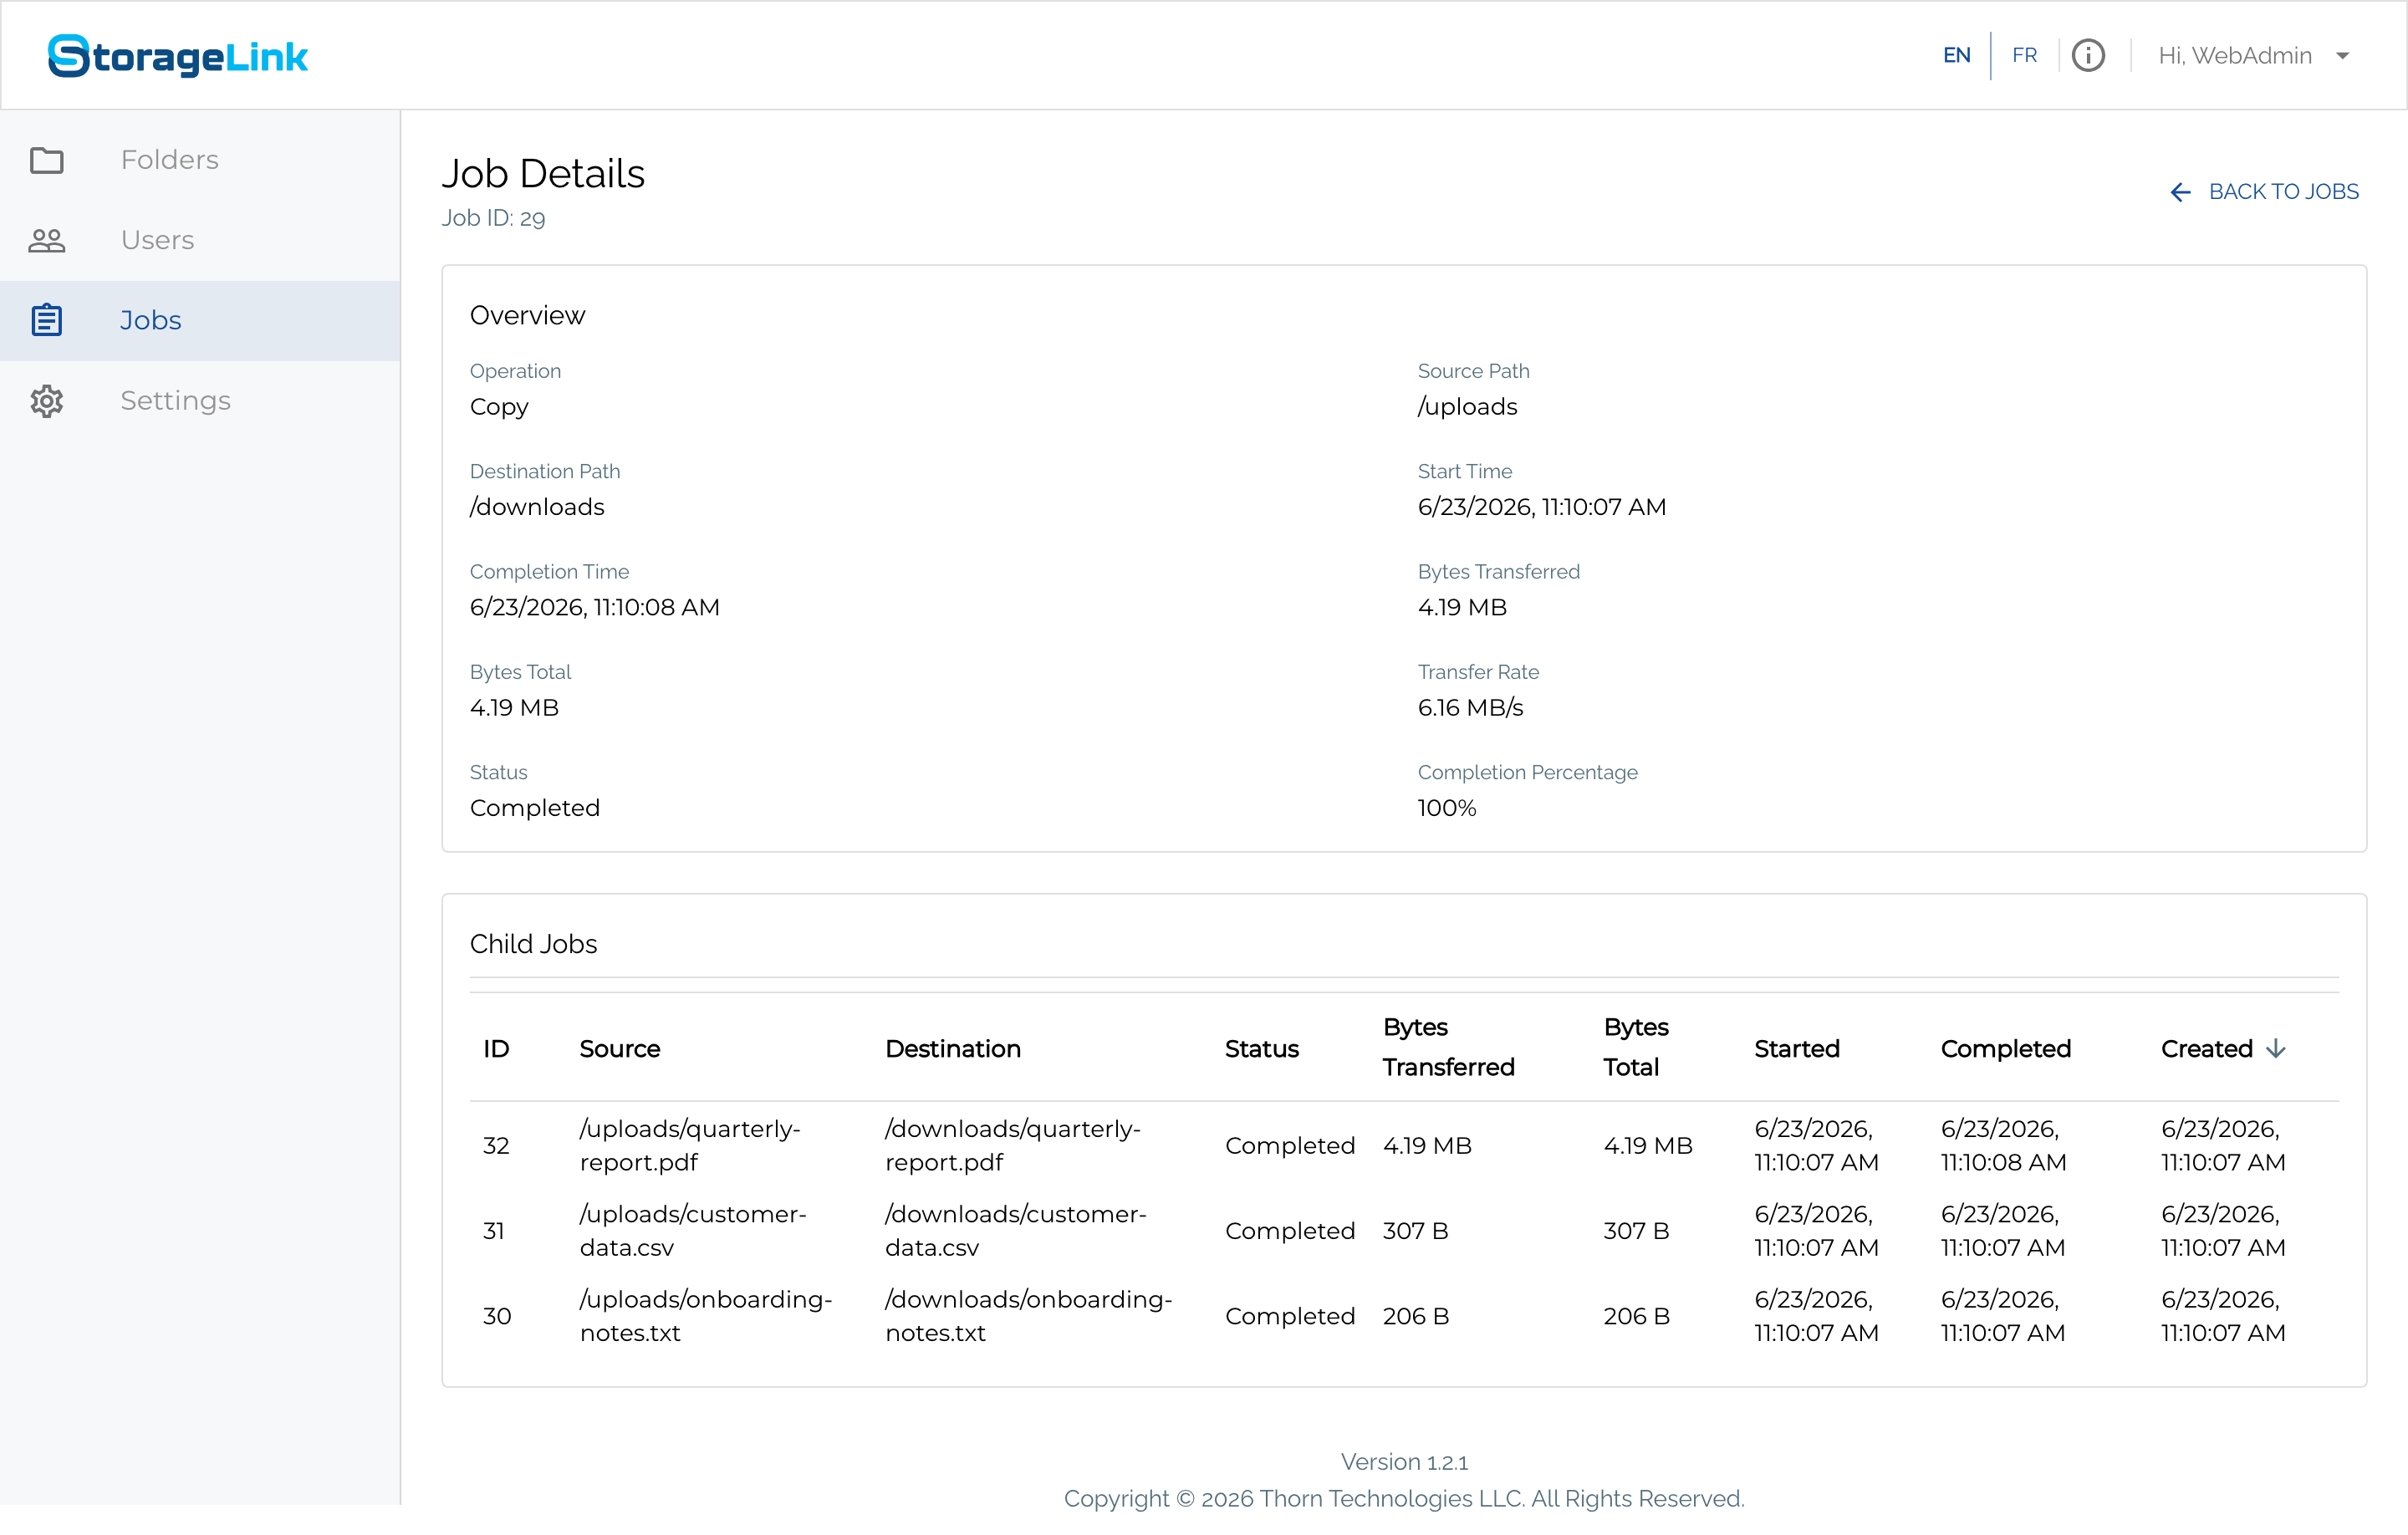
The Overview section shows:
| Field | Description |
|---|---|
| Operation | Copy or Move. |
| Source Path / Destination Path | Origin and target of the transfer (e.g., /uploads to /downloads). |
| Bytes Transferred | How much data has moved so far (e.g., 4.19 MB). |
| Bytes Total | The total size of the transfer (e.g., 4.19 MB). |
| Transfer Rate | The speed of the transfer (e.g., 6.16 MB/s). |
| Start Time / Completion Time | When the job started and finished. |
| Status / Completion Percentage | Current state and overall progress. |
The Child Jobs table lists one row per file, each with its own Bytes Transferred, Bytes Total, and status — so for a folder copy you can see exactly which files transferred and how large each was. In the example above, copying /uploads to /downloads moved three files: a 4.19 MB PDF, a 307 B CSV, and a 206 B text file.
Bytes Total and Transfer Rate are only meaningful once data actually moves. A job over an empty folder still completes successfully, but reports 0 B and no rate.
Downloading a job report
For a completed job, the Job Details page offers a CSV report download (new in StorageLink 1.3.0). The report contains the job's metadata (operation, source, destination, status, timestamps) plus a per-file breakdown of successes, failures and skips.
Job lifecycle
A job moves through the following states:
| Status | Meaning |
|---|---|
| PENDING | Queued, waiting for a worker thread. |
| RUNNING | In flight. Status shows transfer rate and bytes transferred. |
| COMPLETED | Finished successfully. Records are retained for one year by default. |
| FAILED | Exhausted all retries. Review the per-file error messages to diagnose. |
| CANCELED | A user or admin canceled the job mid-flight. |
Automatic retries
Failed operations retry automatically up to three times by default before the job is marked FAILED. The features.transfer-jobs.max-retry-count=3 application property controls this count.
Completed job retention
First, remember that jobs are per-user — the My Jobs page shows only your own jobs, so a job you don't see may simply belong to another user rather than having been removed. Otherwise, completed job records are retained for one year (features.transfer-jobs.completed-job-retention-days=365) by default, then removed by the cleanup job; increase that property to keep them longer.
Tuning Transfer Jobs (administrators)
Transfer Job behavior is configured through application properties in the configuration file (these settings are not exposed in the Web Admin Interface):
/opt/swiftgw/application.properties
After editing, restart the StorageLink service:
sudo systemctl restart swiftgateway
| Property | Default | Purpose |
|---|---|---|
features.transfer-jobs.worker-thread-count | 10 | Number of concurrent worker threads. Changing this requires a service restart. |
features.transfer-jobs.completed-job-retention-days | 365 | How long completed job records are kept before cleanup. |
features.transfer-jobs.max-retry-count | 3 | How many times a failed operation is retried before being marked failed. |
features.transfer-jobs.cleanup-interval-hours | 6 | How often the background cleanup job runs. |
Not sure how to edit the properties file from the terminal? See Editing Files on Linux (nano & vi).