Configure an EC2 security group
Discover the simple, secure, and affordable way to give SFTP users access to cloud storage locations. Get a 30-day free trial of SFTP Gateway. No credit card or commitment is required.
The EC2 security group acts as a firewall wrapper around your instance. You can modify the security group to restrict SFTP access to specific IP addresses.
Modifying an EC2 security group
Within the AWS console, navigate to the EC2 dashboard.
Click Running Instances, and check the box next to your SFTP Gateway instance.
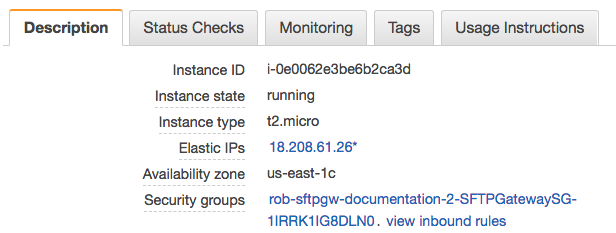
You should see the EC2 instance details on the bottom half of the screen.

Click the link next to Security groups. This takes you to the security group for the EC2 instance.
Click on the Inbound tab.

By default, the CloudFormation template allows port 22 from any IP address (0.0.0.0/0). This means that you can
both SSH and SFTP from anywhere.
Let's lock down access to a single IP address.
Click Edit. You should see this:

Under the Source column, change Custom to My IP. This allows you to SSH into the instance for administration purposes.
Next, click Add Rule, and set the following values:
- Type: SSH
- Protocol: TCP
- Port Range: 22
- Source: Custom
- Source IP: Enter in your client's IP address, followed by a
/32
It will look something like this:

Note: It's important to add the /32 to the end of the IP address. This is CIDR notation which specifies a range
of a single IP.
Finally, click Save.
Now, only you and your SFTP client can access the EC2 instance. You can add more rules to accommodate additional clients, and coworkers that need to manage the box from remote locations.
Check out our YouTube channel for how-to videos and additional assistance. For even more cloud computing news and tips, connect with us on LinkedIn and Twitter. Don't forget to sign up for your 30-day free trial of SFTP Gateway.