Windows Setup
The SFTP Gateway is a secure, pre-configured SFTP server that saves uploaded files to an Amazon S3 bucket.
The SFTP Gateway uses a different approach than other S3-based file system products, making it more reliable for production systems. Rather than using a permanent mount or virtual file system, it monitors file descriptors as new files are written to SFTP directories. Once the file is finished writing and the file descriptor is closed, it pushes the entire file to an S3 Bucket. The SFTP Gateway is simple, lightweight, and reliable.
When coupled with S3 Events and AWS Lambda, it is the ideal entry point for automated integration between your AWS application and external or third-party systems. It also complies with corporate security policies that require key-based SFTP file transfers.
Features
- SFTP server that stores uploaded documents to an S3 Bucket. Pre-configured with standard security settings. Easily manage SFTP users independent of IAM using built-in command line scripts.
- Automated S3 bucket creation and setup. Use the CloudFormation template or setup script from the single AMI to auto-configure the server. S3 events can be used to automate file processing with AWS Lambda.
- MD5 Hash Validation support to ensure data integrity of uploaded files
Installation and Usage
The first step is to subscribe to the SFTP Gateway product on Marketplace page. This will launch the SFTP Gateway EC2 instance.
This article assumes you are connecting using Windows. If you are trying to connect using Linux / OSX, click here.
CloudFormation Setup
Setup with AWS CloudFormation is recommended. See the Links section below to download the CloudFormation template.
To set up the SFTP Gateway server using CloudFormation, navigate to the CloudFormation console and click "Create Stack". Upload the SFTP Gateway CloudFormation template and specify the details of your instance.
SSH with PuTTY (Without CloudFormation)
If you are not using the CloudFormation template, then certain AWS resources must be configured after first launching the instance. Before continuing, make sure your EC2 instance has an IAM Role with the AmazonS3FullAccess policy. This is necessary for proper setup of the S3 bucket.
PuTTY does not natively support the PEM format that AWS uses, so you need to first convert your .PEM file to a .PPK file (PPK = PuTTY Private Key). To do this, you use the PuTTYgen utility packaged with PuTTY.
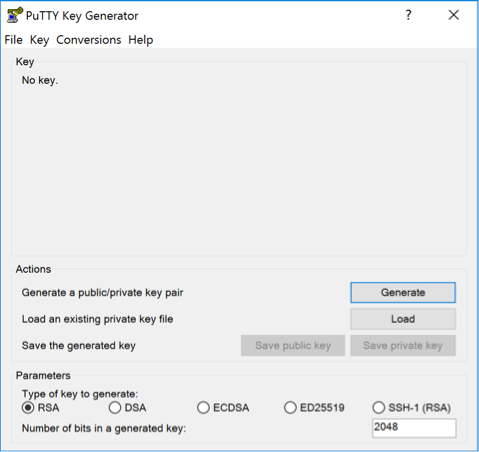
- Open PuTTYgen and click Load to browse for your .PEM key. When browsing for the key, be sure to select All Files in the dropdown menu. Click Open when you have selected your key.
- PuTTYgen will now convert your key to the proper filetype.
- To save your new PPK key, click Save private key.
You are now ready to SSH in to the server with PuTTY using the new .PPK key.
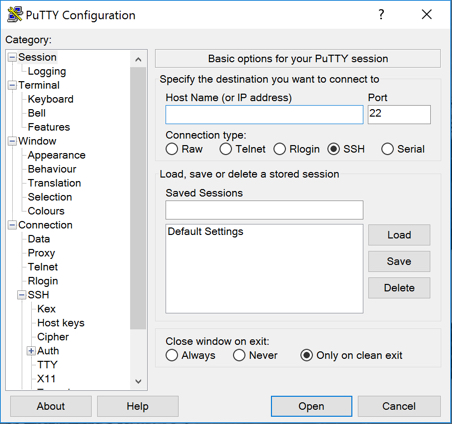
- Open PuTTY and select SSH as the connection type.
- In the Host Name field, enter
ec2-user@<public ip> - Expand the SSH section on the left, and click on Auth.
- Click on Browse to browse for the .PPK key, and click Open when you have selected it.
- To launch the SSH session, click Open.
You are now ready to begin the manual setup.
Manual Setup
If you did not use the AWS CloudFormation template, SSH in and run the following command to setup the S3 bucket and
other necessary properties: sudo sftpgatewaysetup.
Adding and Removing Users
The AMI comes preloaded with administration commands to add and delete users.
From the primary ec2-user user account, run the following command to add a new user: sudo addsftpuser <username>.
Running this command will do the following things:
- Create the new Linux user
- Disable the users login shell so they can only SFTP and not SSH to the server
- Setup the appropriate home directory for SFTP
- Create user's new SSH key and email the key to a chosen address
Uploads will only occur within the user's upload directory.
Users can be deleted by running the following command from the primary ec2-user account
sudo deletesftpuser <username>. The user's account, their SSH key, and their home directory along with everything in
it, will be deleted. Be sure to backup the home directory before running this command if you want to keep the files.
Connecting as a User
When creating a new user, the user's SSH key is emailed to a chosen address. In order to SFTP into the server as that user, you need to convert the emailed plaintext key into a usable .PEM key.
- Open a text editor (such as Wordpad) and paste the contents of the email, including the start and end tags.
- save the file as
userPrivateKey.pem - You can now SFTP into the server as the new user using this key.
SFTP with FileZilla
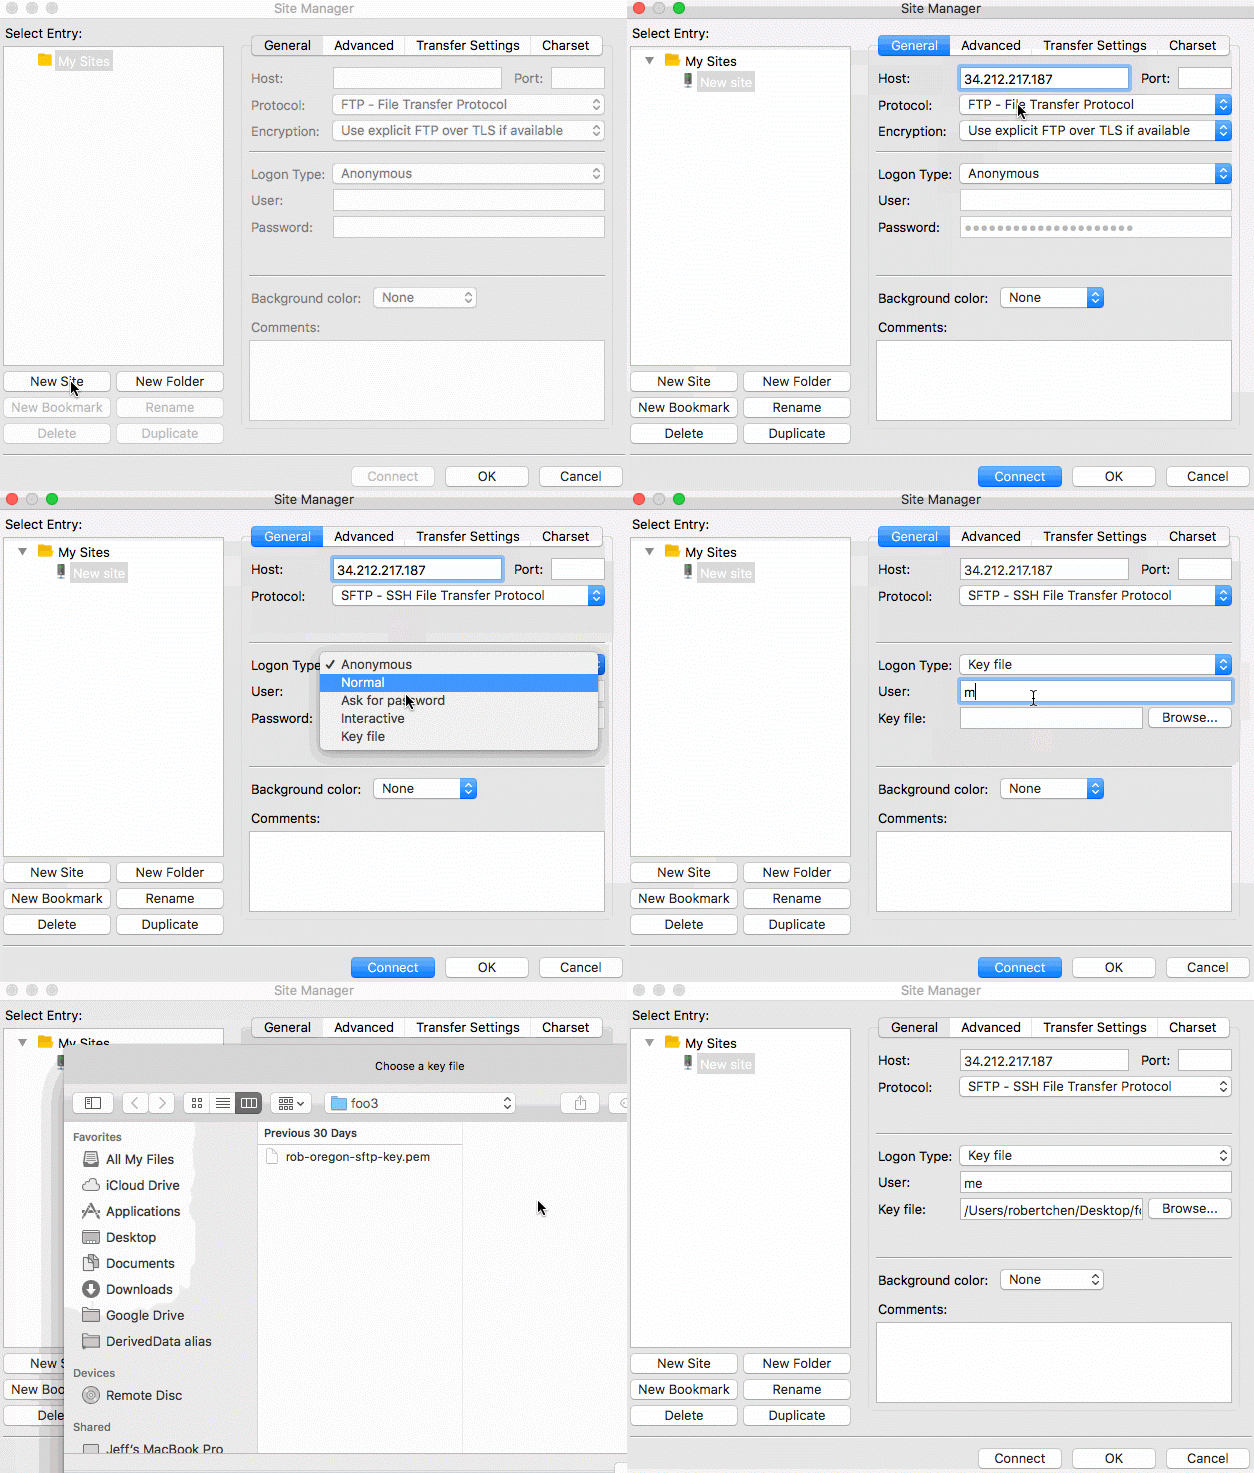
To log into the SFTP Gateway server using FileZilla, follow the GIF below. Be sure to enter the username for the user,
the instance's public IP for the host, "key file" for the logon type, and select the userPrivateKey.pem you created
in the last step.
SFTP with WinSCP
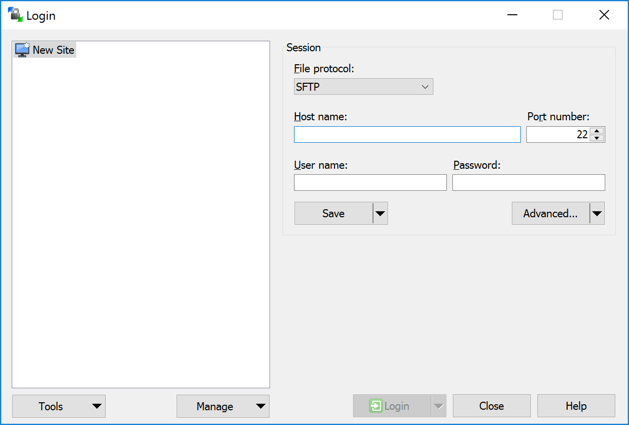
To log into the SFTP Gateway server using WinSCP, enter the username for the user name, the instance's public IP for the host name, and "SFTP" for the file protocol.
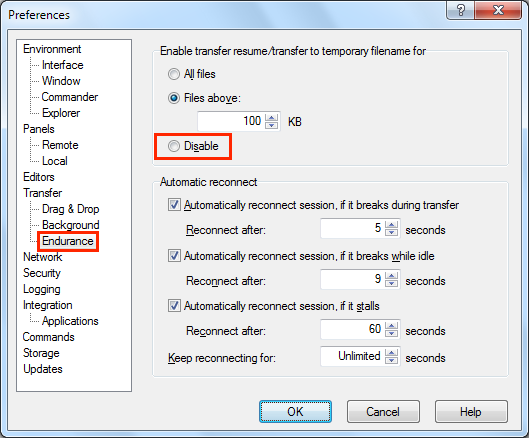
Note: "Transfer resume" must be disabled to properly transfer files when using WinSCP. Click Preferences, and open the Endurance section. Click Disable as shown.
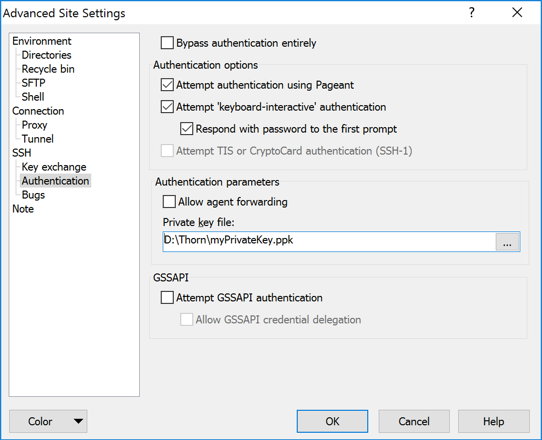
Click Advanced, then click Authentication. Select the userPrivateKey.pem you created in the last step. A
dialog will appear asking if you want to convert the .PEM file to a .PPK file, click Ok and save the file. Select
the newly converted key and click Ok.
To connect to the SFTP Gateway server, click Login.
Links
- Product Website
- EULA
- CloudFormation Template - No setup is necessary if you use this CloudFormation template. This template uses the proper AMI based on your region.
Support
Email support is available to Amazon Web Services Marketplace Customers at support@thorntech.com. We do not offer refunds, but you may terminate your AMI or CloudFormation Stack at any time.
Troubleshooting
For troublshooting and frequently asked questions, refer to our Troubleshooting Article