StorageLink Standard vs BYOL
What: StorageLink is available on each cloud marketplace under two listings — Standard and Bring Your Own License (BYOL). Same software, different way of paying for it and licensing it.
Standard: The license comes with the listing — your VM licenses itself automatically, and the marketplace bills a $0.08 USD/hour software fee on top of your VM costs (30-day free trial). From 1.3.0, licensed for 10 StorageLink users; administrators are not counted.
BYOL: No marketplace software fee — deploy for free, then start a 30-day free trial from the admin UI or activate a license purchased from Thorn Technologies, available in 10-, 100- or 1,000-user tiers (Standard, Professional and Enterprise).
Moving Standard → BYOL: A Standard VM cannot be converted in place. Export a backup, deploy from the BYOL listing, start the trial or activate your license, import the backup, cut over, then stop the old VM (and, on AWS, cancel the marketplace subscription) to end the hourly fee. Check application.properties and website.conf for settings the backup does not carry.
Containers: The container edition is licensed the same way as BYOL.
Product: StorageLink by Thorn Technologies — cloud storage gateway for secure file sharing
Overview
StorageLink is available on the AWS, Azure, and Google Cloud marketplaces under two listings that run the same software, but with two different ways of paying for it and licensing it:
- StorageLink (Standard) — the license comes with the listing. The VM confirms its entitlement with the cloud provider automatically, so there is nothing to enter, and the marketplace bills an hourly software fee alongside your infrastructure costs. From 1.3.0, a Standard instance is licensed for 10 StorageLink users.
- StorageLink BYOL — the listing itself is free, with no marketplace software fee. You bring your own license, purchased directly from Thorn Technologies in a 10-, 100- or 1,000-user tier (Standard, Professional or Enterprise), with a free 30-day trial to get started.
Both listings are current, supported options. Standard is the fastest way to get started and a good fit for small teams and evaluation. BYOL is the path for production deployments, for teams with more than 10 users, and for anyone who prefers a predictable annual cost over an hourly fee.
StorageLink is also available as a container edition for Docker Compose, Kubernetes, and OpenShift. Containers are licensed the same way as BYOL — see Running StorageLink in containers.
This article explains how the two listings differ, how to decide between them, and how to move an existing Standard deployment to BYOL.
The word Standard does not appear in the marketplace listing names. The existing listings (for example StorageLink - Web-based file transfers to S3 on AWS) are the Standard listings; the BYOL listings carry BYOL in their name.
The two listings
Each cloud has one listing of each kind. The Standard listings are the ones described in the Installation guide.
- AWS
- Azure
StorageLink (Standard)
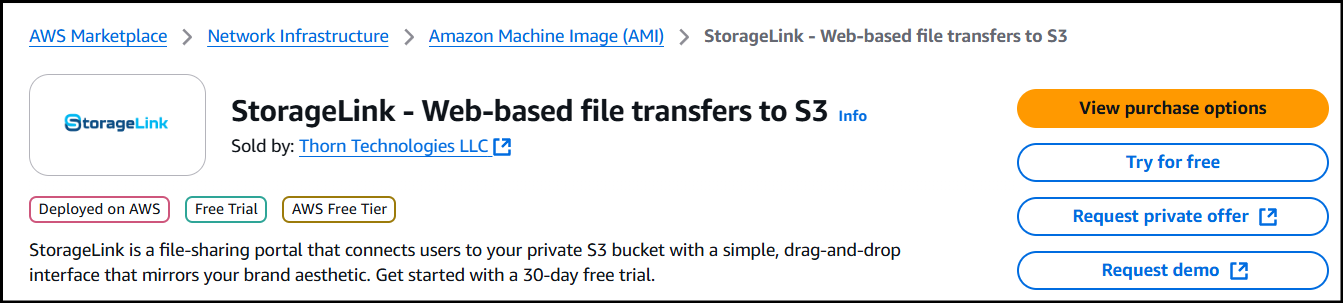
The StorageLink listing on the AWS Marketplace (StorageLink - Web-based file transfers to S3). Click Try for free to subscribe, then launch with CloudFormation.
StorageLink BYOL
The StorageLink BYOL listing on the AWS Marketplace (currently titled StorageLink BYOL - Web-based file transfers to S3).
Subscribing is free and there is no software charge on the listing — your AWS invoice shows only the EC2 and storage costs.
StorageLink (Standard)
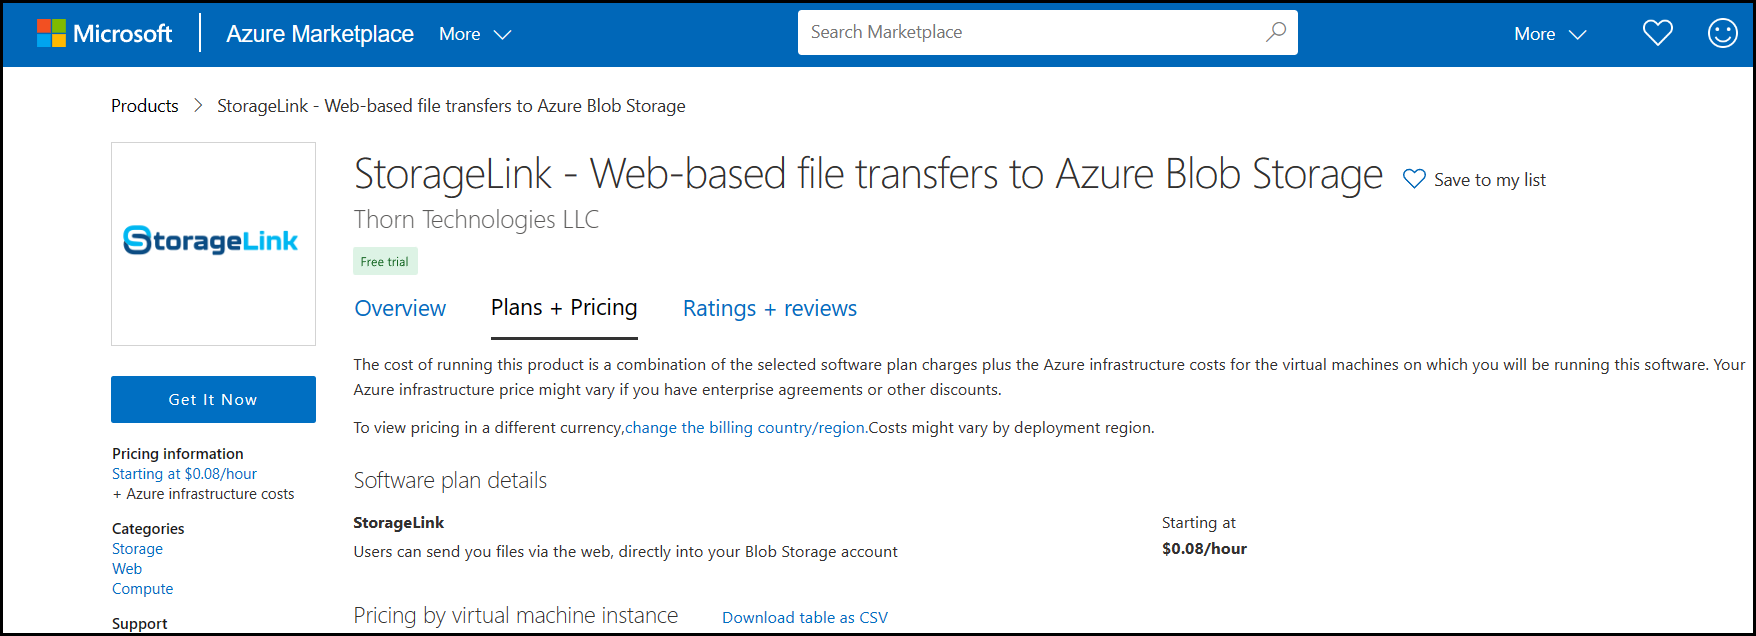
The StorageLink listing on the Azure Marketplace (StorageLink). Click Get It Now, then Create in the Azure Portal to open the VM creation wizard.
StorageLink BYOL
The StorageLink BYOL listing on the Azure Marketplace.
There is no software charge on the plan — your Azure invoice shows only the VM, disk, and storage costs.
StorageLink (Standard)
The StorageLink listing on the Google Cloud Marketplace (StorageLink - Web-based file transfers to Google Cloud Storage). Click Get Started to accept the terms and open the deployment wizard.
StorageLink BYOL
The StorageLink BYOL listing on the Google Cloud Marketplace.
There is no software charge on the listing — your Google Cloud invoice shows only the VM, disk, and storage costs.
What you pay, and where
Standard — license included, billed hourly by the marketplace
With Standard, you never handle a license. In exchange, the marketplace bills a $0.08 USD per hour software fee on your cloud invoice, on top of the underlying VM and storage costs. The fee is the same regardless of VM size, and it accrues for every hour the VM runs, whether or not it is transferring files.
Standard comes with a 30-day free trial through the marketplace, so you pay no software fee for the first 30 days. To stop being charged, stop or terminate the VM.
Running a Standard instance around the clock for 30 days costs about $57.60 USD in software fees. See Pricing in StorageLink for per-cloud details.
BYOL — free listing, license from Thorn Technologies
With BYOL, the marketplace listing is free — there is no software fee, and your cloud invoice only ever shows your infrastructure costs. Instead, you license the software directly from us:
- Start a free 30-day trial from the admin UI. No license file and no credit card are required.
- When you are ready, purchase a license that fits your user count. Licenses come in 10-, 100- or 1,000-user tiers (Standard, Professional and Enterprise), and pricing follows the tier.
Because the license comes from Thorn Technologies rather than the cloud marketplace, the same license model applies on AWS, Azure, Google Cloud, and the container edition.
Book a 15-minute call with our Sales team or email sales@thorntech.com. We will match you with a license sized to your deployment.
Licensing and the user limit
Standard: licensed automatically, 10 users
A Standard instance confirms its own entitlement with the cloud provider when it starts, so it is licensed from first boot. There is no license key to enter and nothing to bind to the instance. The License card in Settings shows that the license came from the marketplace.
Standard instances running StorageLink 1.3.0 or later are licensed for 10 StorageLink users. Administrators are not counted against that limit. Marketplace images before 1.3.0 had no user limit. A few things to know about the limit:
- It applies to creating users. Existing users keep working. An instance that already has more than 10 users continues to serve every one of them, but cannot add or replace a user.
- Restoring a backup with more than 10 users completes, imports the first 10 users, and reports each remaining user as skipped by name: "User X was not imported: the license user cap (10) has been reached. Contact sales@thorntech.com to raise the limit."
- The limit is the same for every subscriber. It cannot be raised on the Standard listing itself. When the import message tells you to contact sales@thorntech.com to raise the limit, that means moving to a BYOL license in a 10-, 100- or 1,000-user tier, or to the container edition.
- No license action is ever needed for rebuilds, resizes, autoscaling, or disaster-recovery replacements. The license is tied to the listing, not to a machine.
- A marketplace license cannot be transferred to a BYOL VM or a container.
The entitlement check runs in the background and only needs attention if it cannot complete. On AWS and Azure it needs no outbound internet access. It fails most often because the cloud provider's instance metadata service (the local endpoint a VM uses to learn about itself) has been firewalled off; on Google Cloud because the subnet lacks Private Google Access or the VM has no service account attached; or on Azure because the VM clock is more than five minutes off. In that case the admin UI explains what is blocked and links to Marketplace License Network Requirements in the in-app help.
BYOL: a trial, then a license sized to you
A BYOL instance starts unlicensed. Administrators can sign in and have full access to configuration and user management, but non-administrator users cannot sign in, and file transfers (uploads, downloads, and transfer jobs) are blocked until a trial or license is activated.
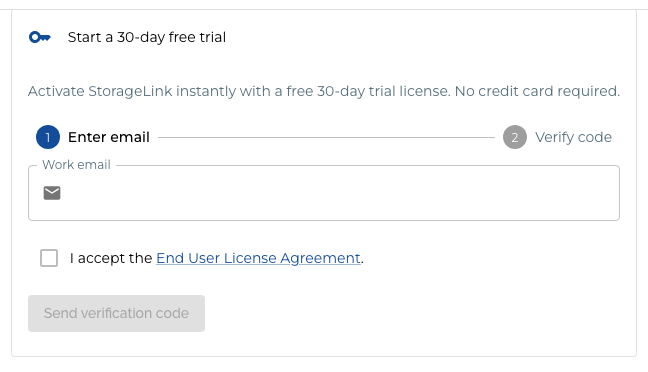
After your first sign-in, a Start a 30-day free trial card appears at the top of the admin UI. Enter a work email address, accept the End User License Agreement, and click Send verification code. Enter the 6-digit code from the email and click Start trial — the trial activates immediately. Each email address can start one trial; a second request from the same address shows a message with a purchase link.
Each BYOL deployment generates a stable Cluster ID — an identifier for that installation, shown on the License card in Settings with a copy button. A purchased license is bound to it when you activate.
When you purchase a license, our Sales team emails you a license file. In Settings, on the License card, drop or paste the file and click ACTIVATE. If the card then shows Activation required, click COMPLETE ACTIVATION to bind the license to your deployment's Cluster ID. Once the card reads Licensed, transfers are unblocked immediately, with no restart. Your license is sized to the number of users you purchased; when you need more users or a longer term, contact sales@thorntech.com and we will issue an updated license file.
For the full activation steps, including activating without internet access, renewing, and moving a license to a new deployment, see Purchasing a License.
Which listing should I choose?
| Standard (marketplace listing) | BYOL listing | |
|---|---|---|
| Software fee | $0.08 USD/hour, billed by the cloud marketplace (30-day marketplace trial) | None on the marketplace; license purchased from Thorn Technologies |
| License handling | Automatic — nothing to enter | 30-day in-app trial, then activate a purchased license file |
| User limit | 10 StorageLink users from 1.3.0 (administrators not counted) | 10, 100 or 1,000 users, by license tier (Standard, Professional, Enterprise) |
| Best for | Small teams, evaluation, dev/QA, quick start | Production, more than 10 users, predictable annual cost, air-gapped or fully offline networks, containers |
| Support | Same support options for both listings (see Support Overview) | Same |
Choose Standard if you want to be up and running in minutes with no purchasing step, your team has 10 or fewer users, or you are evaluating StorageLink or running a dev/QA environment. An hourly fee on your cloud invoice is the simplest way to pay for a short-lived or lightly used instance.
Choose BYOL if you are deploying for production, need more than 10 users, or prefer one annual license cost to an hourly fee. BYOL also suits air-gapped or isolated networks: when a deployment cannot reach the licensing service, our Sales team can issue a pre-activated license file for it. (On AWS and Azure, a Standard instance needs no internet egress either; on Google Cloud its entitlement check needs Private Google Access.) BYOL is also the licensing model for the container edition.
You can start on Standard and move to BYOL later. Your configuration travels in a single backup file, as described next.
Moving from Standard to BYOL
A Standard VM cannot be converted to BYOL in place: its marketplace license belongs to the listing and cannot be transferred, and the hourly software fee is tied to the VM you launched from the Standard listing. Moving to BYOL therefore means deploying a new VM from the BYOL listing and importing a backup of your configuration onto it. Your Users (passwords included), Folders, Cloud Connections and their credentials, Identity Providers, and Settings all travel in one backup file.
Test this on a non-production instance first so you know what to expect. The whole move can be done with the web interface, plus a short SSH session if you have customized configuration files.
1. Export a backup from your Standard instance
- Sign in to the web admin interface of your Standard instance.
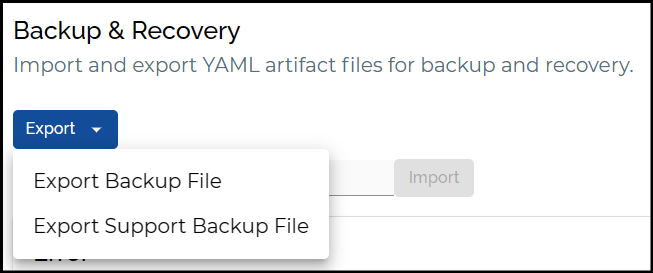
- Go to Settings and scroll down to Backup & Recovery.
- Click Export Backup File and save the
yamlfile somewhere secure — it contains sensitive configuration.
For details, see the Backup section of the upgrade guide.
2. Check for configuration outside the backup
The backup file covers everything you configured through the web interface. The most common places that live outside the backup are below; also re-apply any other server-side change you made, such as a custom SSH port.
Custom application properties — if you (or our support team) customized /opt/swiftgw/application.properties (password policy, transfer job tuning, and so on), those changes must be re-applied by hand on the new instance. SSH in and review the file. You do not need to carry over memory settings from /opt/swiftgw/swiftgateway-*.conf: a 1.3.0 instance sizes its Java heap from the VM's memory automatically.
Custom SSL certificate — if you installed your own certificate for the web interface, the certificate, its key, and the nginx configuration are not part of the backup. For a purchased certificate, note the certificate paths in website.conf and copy the certificate and key (normally under /etc/nginx/ssl/) to the new instance; see Install SSL Certificate. If you use LetsEncrypt, do not copy the files — once your DNS record points at the new instance (step 6), request a new certificate there as described in LetsEncrypt SSL Certificate.
Behind a load balancer or reverse proxy? On a 1.3.0 instance you must list the proxy's address range in security.client-ip.trusted-proxies in /opt/swiftgw/application.properties, keeping the default loopback entries (for example security.client-ip.trusted-proxies=127.0.0.0/8,::1/128,10.0.1.0/24), then restart StorageLink, or audit records show the load balancer's address instead of the user's. See the 1.3.0 release notes.
- AWS
- Azure
Connect with the EC2 key pair you chose when you deployed:
ssh -i private.key ec2-user@<standard-instance-ip>
cat /opt/swiftgw/application.properties
cat /etc/nginx/conf.d/website.conf
On AWS, the nginx configuration is /etc/nginx/conf.d/website.conf.
Connect with the admin username and key you chose in the VM wizard (azureuser in our examples):
ssh -i private.key azureuser@<standard-instance-ip>
cat /opt/swiftgw/application.properties
cat /etc/nginx/sites-available/website.conf
On Azure, the nginx configuration is /etc/nginx/sites-available/website.conf.
A Google Cloud Marketplace deployment does not ask for SSH credentials up front. Either open a browser SSH session from the VM's details page (SSH → Open in browser window; this needs Google's 35.235.240.0/20 range in your port 22 firewall rule — see SSH into StorageLink), or add your own key to the VM and connect with the Linux admin user you specified:
ssh -i private.key ubuntu@<standard-instance-ip>
cat /opt/swiftgw/application.properties
cat /etc/nginx/sites-available/website.conf
On Google Cloud, the nginx configuration is /etc/nginx/sites-available/website.conf.
See SSH into StorageLink for the full connection steps on each cloud.
3. Deploy a new instance from the BYOL listing
Deploy a fresh VM from the StorageLink BYOL listing for your cloud. There is no software charge on the listing. Use the same (or a larger) VM size as your Standard instance, then complete the First Launch Experience to sign in as the administrator — on AWS the admin credentials come from the CloudFormation parameters; on Azure and Google Cloud you create them on the Welcome page.
4. Start the trial or activate your purchased license
Sign in to the new instance as an administrator. Until a trial or license is active, non-administrator users cannot sign in and transfers are blocked, so do this before you import your backup.
- Evaluating? Use the Start a 30-day free trial card at the top of the admin UI.
- Already purchased? Go to Settings → License, drop or paste your license file, click ACTIVATE, and then click COMPLETE ACTIVATION if the card shows Activation required.
Your license is sized to the number of users you purchased, so check that it covers everyone in your backup before you import.
See Purchasing a License for the full trial and activation steps.
5. Import your backup
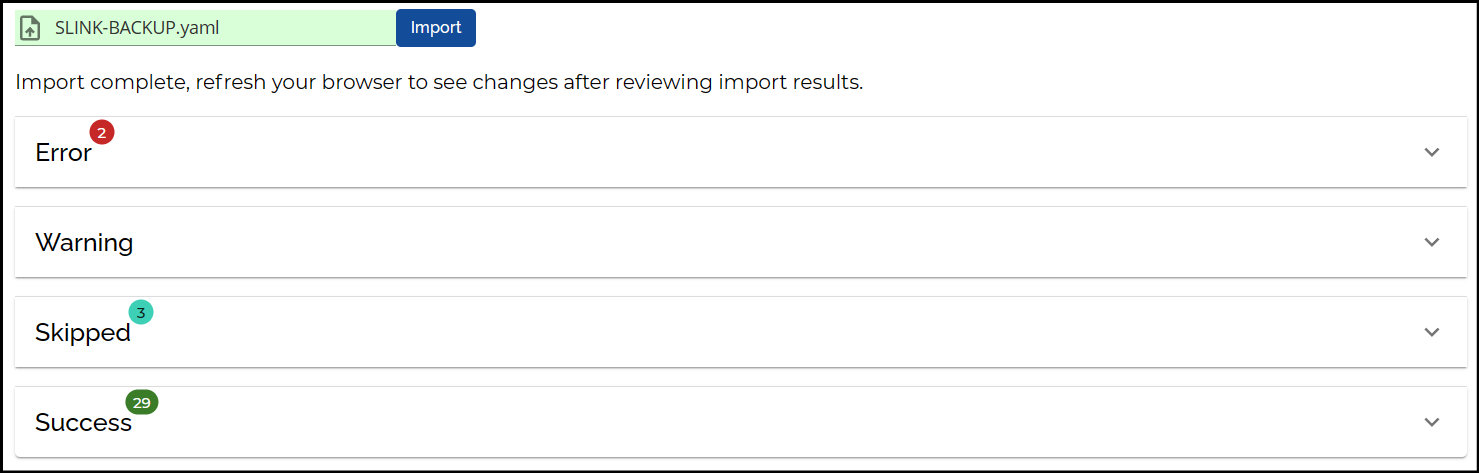
- Go to Settings → Backup & Recovery → Import.
- Choose the
yamlfile you exported in step 1 and import it. - Review the output. Entries are grouped into Error, Warning, Skipped, and Success.
Then re-apply anything you found in step 2:
- Add your custom values to
/opt/swiftgw/application.propertieson the new instance and restart StorageLink withsudo systemctl restart swiftgateway. See Editing Files on Linux if you are new to the terminal editors. - For a purchased SSL certificate, copy the certificate and key to
/etc/nginx/ssl/, update the paths andserver_nameinwebsite.conf(the path for your cloud is shown in step 2), then runsudo nginx -t && sudo service nginx restart. For LetsEncrypt, request the certificate on the new instance after the cut-over in step 6.
For details, see the Restore section of the upgrade guide.
6. Cut over
Point your users at the new instance. The simplest way is to move the public IP address so that bookmarks and DNS records keep working; otherwise update your DNS record to the new instance's address.
- AWS
- Azure
If your Standard instance uses an Elastic IP, you can move it: in the EC2 console, go to Elastic IPs, select the address and disassociate it from the old instance, then choose Actions → Associate address and pick the new BYOL instance. See Associate an Elastic IP address for the association steps.
If your Standard instance uses an auto-assigned public IP instead, update your DNS record to the new instance's address.
The Public IP address is its own resource in your resource group, and a static address can be moved between VMs. Open the Public IP address resource, click Dissociate, and confirm. Then open the new VM → Networking → its network interface → IP configurations → ipconfig1, set Public IP address to Associate, choose the address you just dissociated, and Save.
If the old VM's address is dynamic, update your DNS record to the new VM's address instead.
If your Standard VM has a static external IP address, you can move it. Edit the old VM, open its network interface, and set External IPv4 address to None — this detaches the address but keeps it reserved (do not use Release static address, which deletes the reservation). Then edit the new VM's network interface and choose the reserved address from the External IPv4 address list.
If the old VM still has an ephemeral address, promote it to a static address first — see Create a Static IP Address — or update your DNS record to the new VM's address.
Before you go further, sign in as a regular user and confirm you can browse folders and upload and download files to your cloud storage.
7. Stop or terminate the old VM and end the marketplace charge
The Standard software fee is metered on the running VM, so stop or terminate the old instance once you are confident in the new one.
- AWS
- Azure
Terminate the old EC2 instance. If you deployed with CloudFormation, you can delete the stack instead — first make sure nothing you still need, such as an Elastic IP you moved in step 6, was created by that stack.
Then cancel the Standard subscription under AWS Marketplace → Manage subscriptions. The hourly software fee stops accruing only when the subscription has no running instances.
Deallocate the old VM in the Azure Portal to stop the software and VM metering.
Delete the VM and its leftover resources (disk and network interface) when you no longer need them. Take care not to delete the Public IP address resource you moved in step 6.
Stop the old VM in the Google Cloud Console to stop the software and VM metering.
Delete the VM when you no longer need it, and release any static IP address you no longer use (not the one you moved to the new VM in step 6).
Running StorageLink in containers
StorageLink is also delivered as a container edition — a backend image and a UI image — for Docker Compose, Kubernetes, and OpenShift. There is no marketplace fee: containers are licensed the same way as BYOL, with a 30-day free trial or a license purchased from Thorn Technologies. For unattended deployments you can supply the license through the LICENSE environment variable (trial for evaluation, or your license) or through a license file path. Images are delivered per your engagement — contact your Thorn Technologies representative for registry access. See the Container Deployment Reference for every configuration option, and the Helm chart recipes for AWS, Azure, and Google Cloud for step-by-step deployments.
Need help?
If you have questions about licensing or pricing, book a 15-minute call with our Sales team or email sales@thorntech.com. For hands-on help with a move from Standard to BYOL, contact support@thorntech.com. The same support options are available for both listings.