Migrating from SFTP Gateway Standard to Professional
TLDR - Quick Summary
What: Migrate from SFTP Gateway Standard to Professional edition
Key Point: Cannot upgrade directly - must deploy new Professional instance
Steps: 1) Export backup from Standard, 2) Deploy new Professional, 3) Import backup, 4) IP cutover
Backup Location: Settings > Backup & Recovery > Export
Overview
SFTP Gateway Standard and Professional editions are separate deployments with different architecture and feature sets. You cannot upgrade directly from Standard to Professional edition. Instead, you must deploy a new instance of SFTP Gateway Professional and migrate your configuration and data from your existing Standard deployment.
This guide walks you through the complete migration process to ensure a smooth transition.
High-level Migration Steps
The migration process consists of the following key steps:
- Back up your current SFTP Gateway Standard configuration
- Deploy a new SFTP Gateway Professional instance
- Import your configuration to the new Professional deployment
- Perform IP cutover to redirect traffic to your new deployment
Detailed Migration Guide
1. Back up your SFTP Gateway Standard Configuration
Before beginning the migration process, you need to create a backup of your current SFTP Gateway Standard deployment:
Log in to your SFTP Gateway Standard Admin Portal
Navigate to
Settings>Backup & Recovery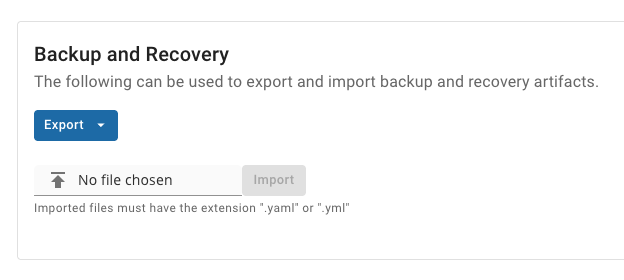
Click the
ExportButton >Export Backup FileButton. This will save the backup file to your local systemStore this backup file securely as it contains sensitive configuration information
For more detailed backup instructions, see our Google Cloud Standard Backup Guide.
2. Deploy a New SFTP Gateway Professional Instance
Next, you'll need to deploy a fresh instance of SFTP Gateway Professional:
- Visit the Google Cloud Marketplace: SFTP Gateway Professional listing
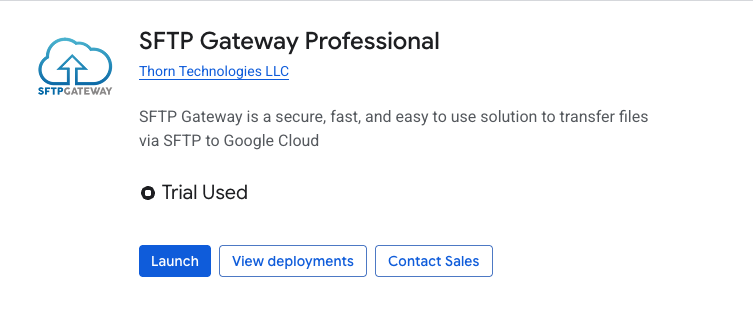
- Click
Launch - Review the terms and click
Continue - Configure your deployment with the following settings:
- Deployment name
- Zone selection
- Machine type (recommend at least e2-standard-2)
- Boot disk size and type
- Networking configuration (ensure proper firewall rules for ports 22 and 2222)
- Click Deploy to start the deployment process
- Wait for the deployment to complete (typically 5-10 minutes)
For detailed deployment instructions, see our Getting Started with SFTP Gateway Professional on Google Cloud Guide.
3. Import Your Configuration to the Professional Deployment
Once your new Professional instance is running:
- Obtain the public IP address of your new SFTP Gateway Professional deployment from the Google Cloud Console
- Open a web browser and navigate to https://
<your-new-instance-ip> - Setup your admin account
- Navigate to
Settings>Backup & Restore - Click the
No file chosenbutton - Select the backup file you downloaded from your Standard deployment and click
Upload - Review the configuration import summary and click
Import - Wait for the import process to complete
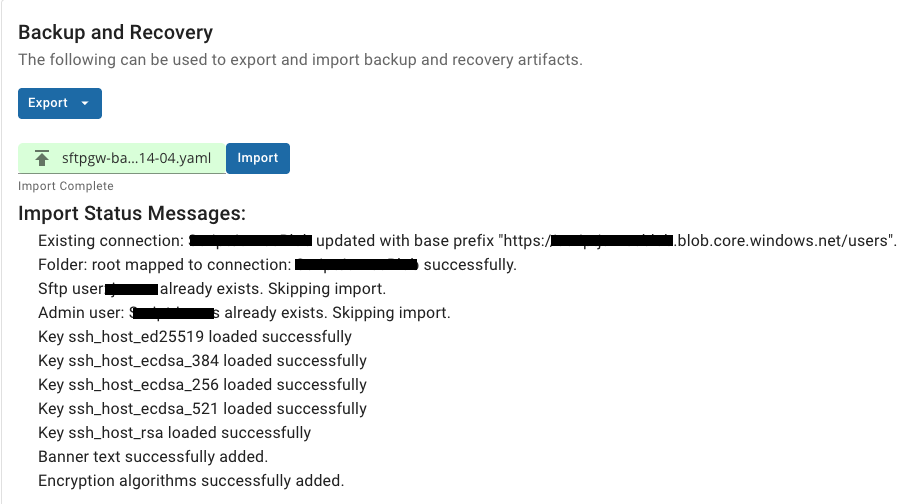 On your end, you won't get the "user already exists" message. However, ou should see a similar status message if completed successfully.
For more detailed import instructions, see our Google Cloud Restore Guide.
4. Verify and Cleanup
Once migration is complete:
- Verify that all users can connect to the new SFTP Gateway Professional deployment
- Confirm that all data and configurations have been successfully migrated
- Test any automated workflows or integrations to ensure they're functioning correctly
- Once you're confident everything is working properly, you can delete your old SFTP Gateway Standard deployment to avoid unnecessary costs
Need Help?
If you encounter any issues during migration or have questions about SFTP Gateway Professional features, please contact our support team at support@thorntech.com or visit our Knowledge Base for additional resources.