Configuring an SSL cert via ACM for Single Instance
TLDR - Quick Summary
What: Configure SSL certificate for single instance using AWS Certificate Manager
Steps: Create ACM cert, validate via DNS CNAME, create TLS Target Group on port 443, create NLB with TLS listener
Final: Create CNAME record pointing hostname to NLB DNS, add port 22 target group for SFTP
Overview
The Network Load Balancer on AWS supports SSL termination via a TLS listener. The NLB can also use TLS to connect to the instance behind the load balancer, making end-to-end encryption.
Before getting started, you’ll need to create a certificate in ACM. This is very straight forward to do if using Route 53 for DNS.
Creating a certificate in ACM
First, navigate to the AWS Certificate Manager service.

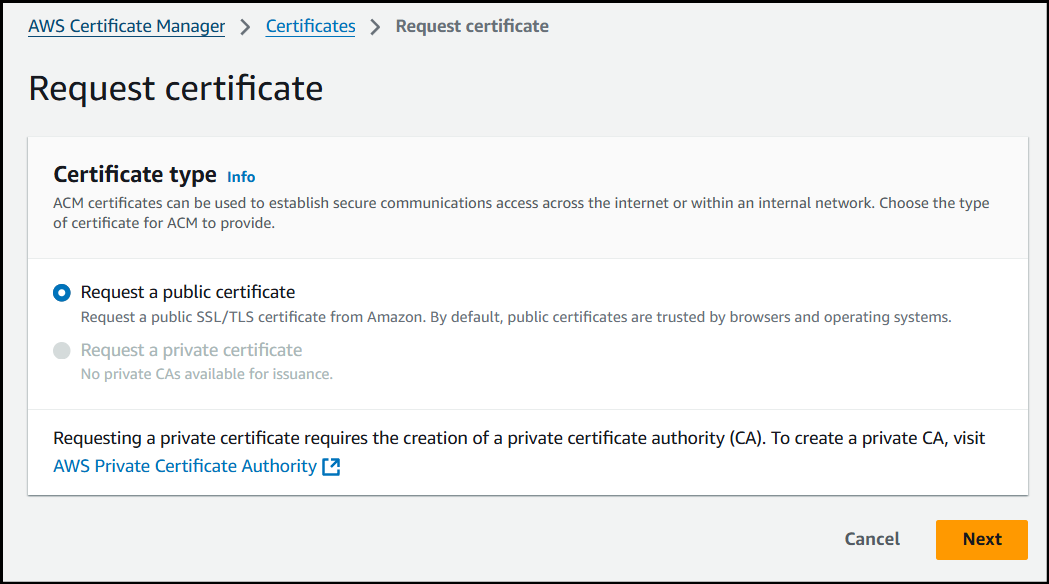
Next, click Request to create a new certificate.
In this example, we will be using a public certificate.
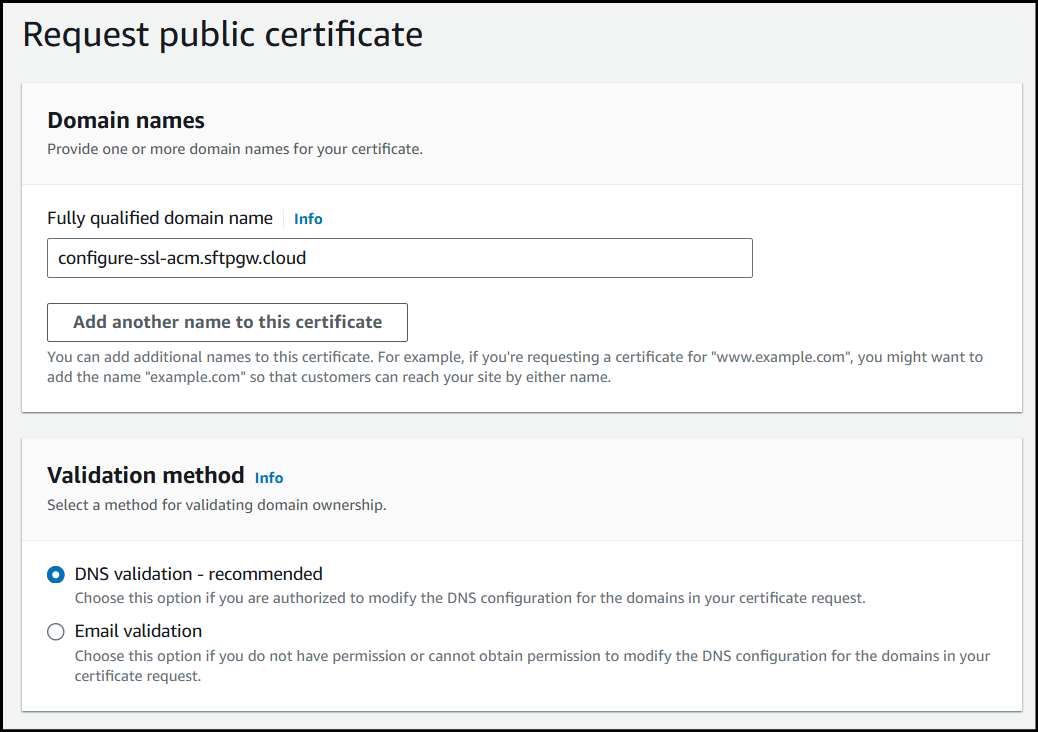
Enter the FQDN (Fully qualified domain name) or Hostname you plan to use. In this example I will be using DNS validation.
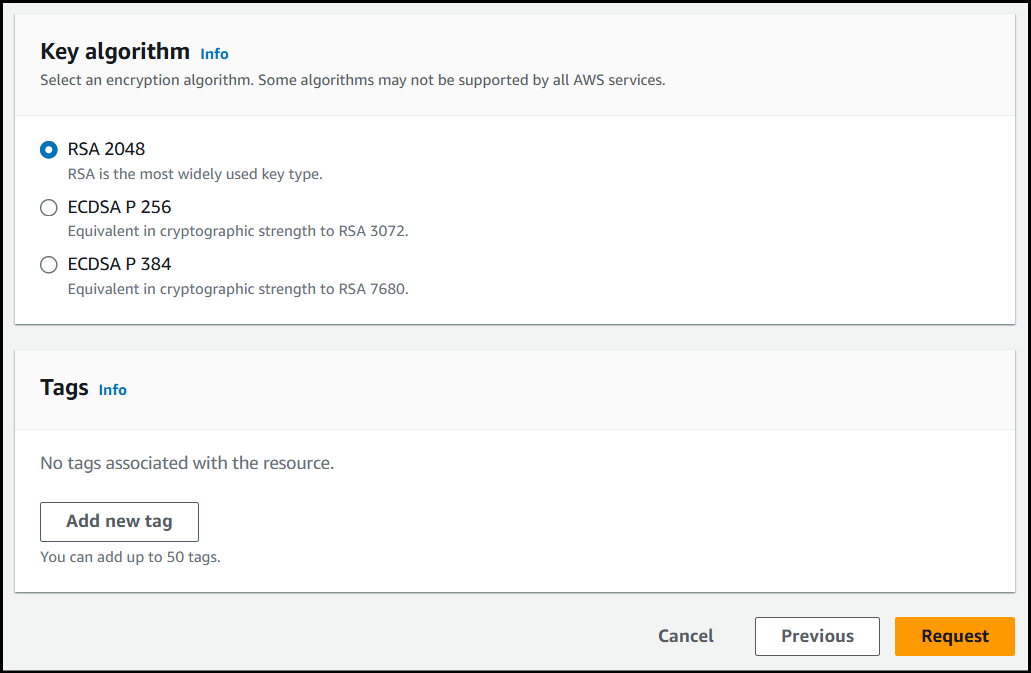
Select the Key algorithm you'd like to use for your cert and then click Request to create the certificate.
Now that the cert has been created, in order to get past Pending validation, we need to create a new CNAME record for our domain.

Creating a CNAME record
In this example, I will be using a domain hosted in Route 53.
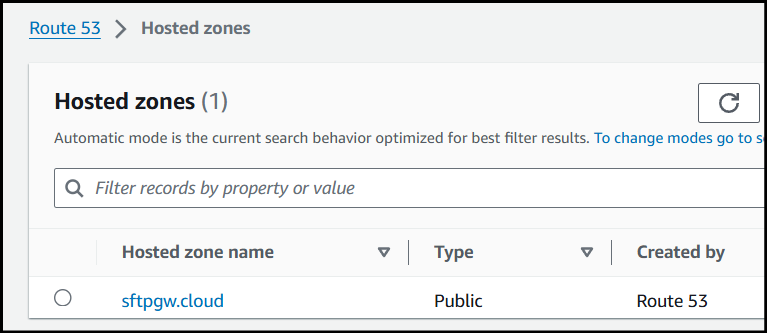
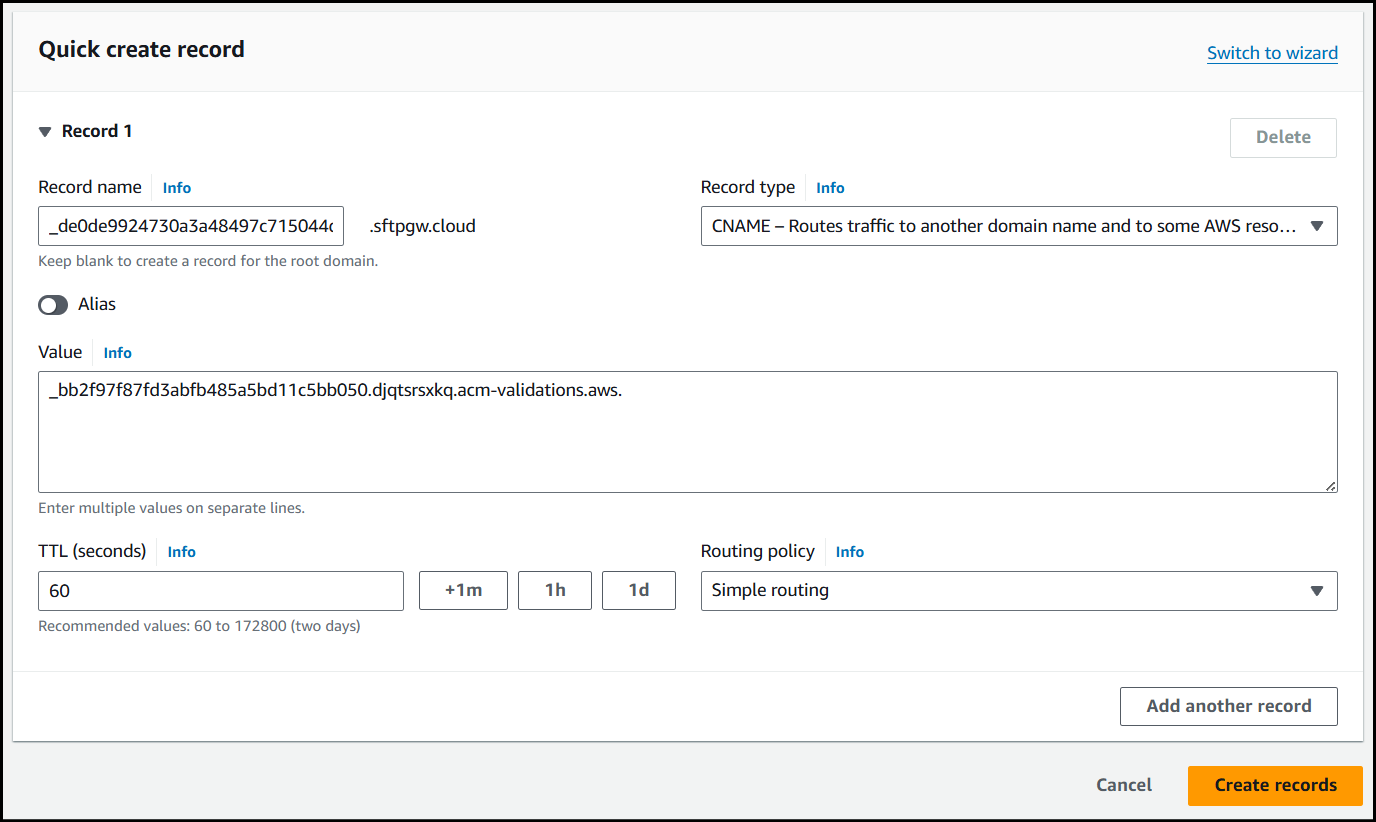
Once inside my domain, I will create a new CNAME record using the below values for reference:
Record Name - _de0de9924730a3a48497c715044d0cc4.configure-ssl-acm.sftpgw.cloud
When creating the record name I just used _de0de9924730a3a48497c715044d0cc4.configure-ssl-acm since .sftpgw.cloud is already being appended to the end of the name.
Record Type - CNAME
Record Value - _bb2f97f87fd3abfb485a5bd11c5bb050.djqtsrsxkq.acm-validations.aws.
Once the record has been created, navigate back to your certificate in ACM.
It'll likely still have the Pending validation message.

Wait around 5-10 minutes and refresh the page, where you should see your certificate has been issued.
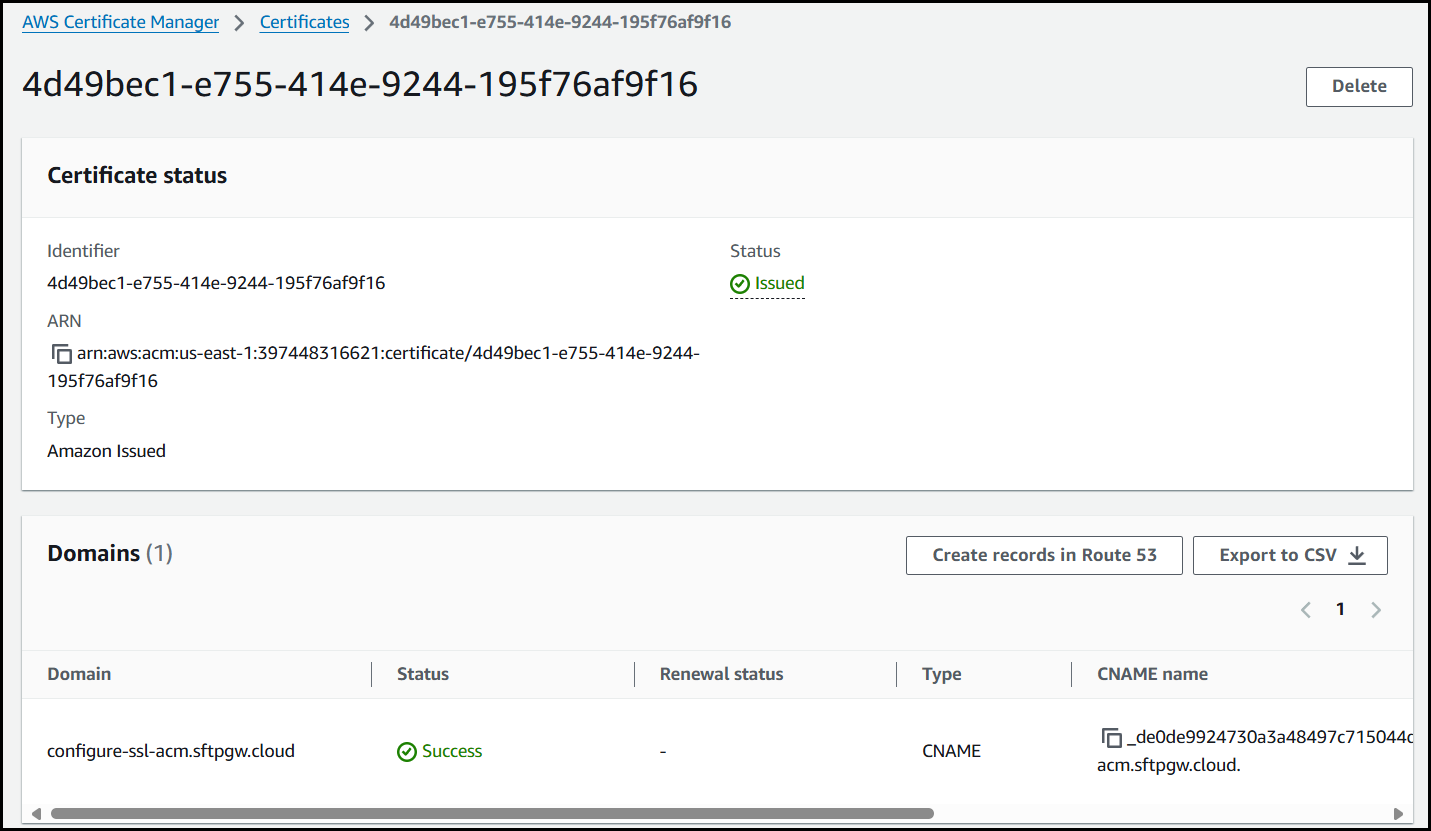
Now that the cert has been issued, we can begin configuration to use the ACM cert.
Create a Target Group
Navigate to the EC2 service & the Target groups section.
Click Create target group to configure a new group.

Choose Instances as the target type.
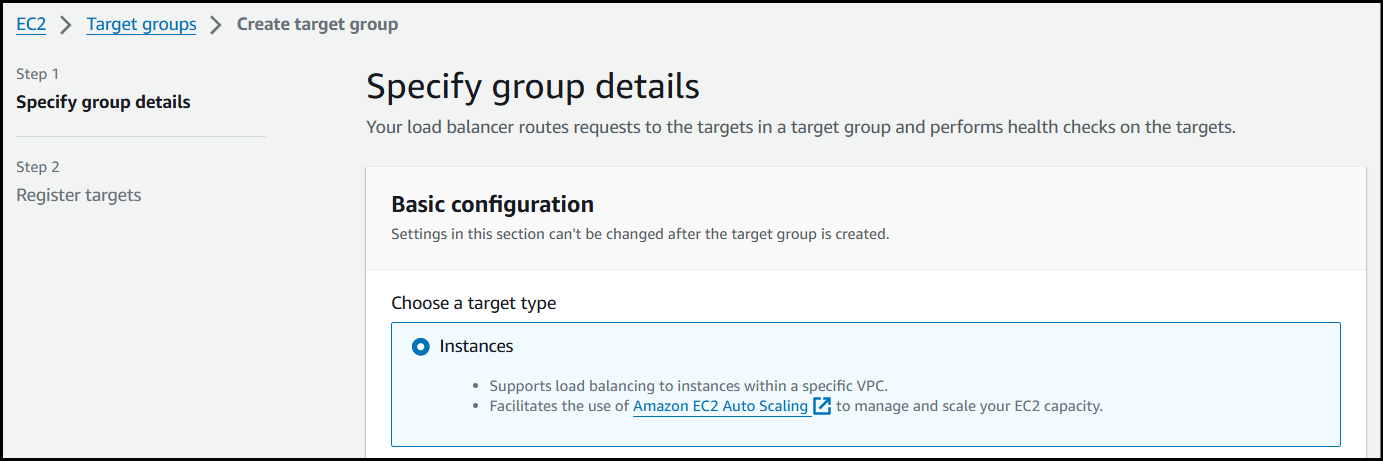
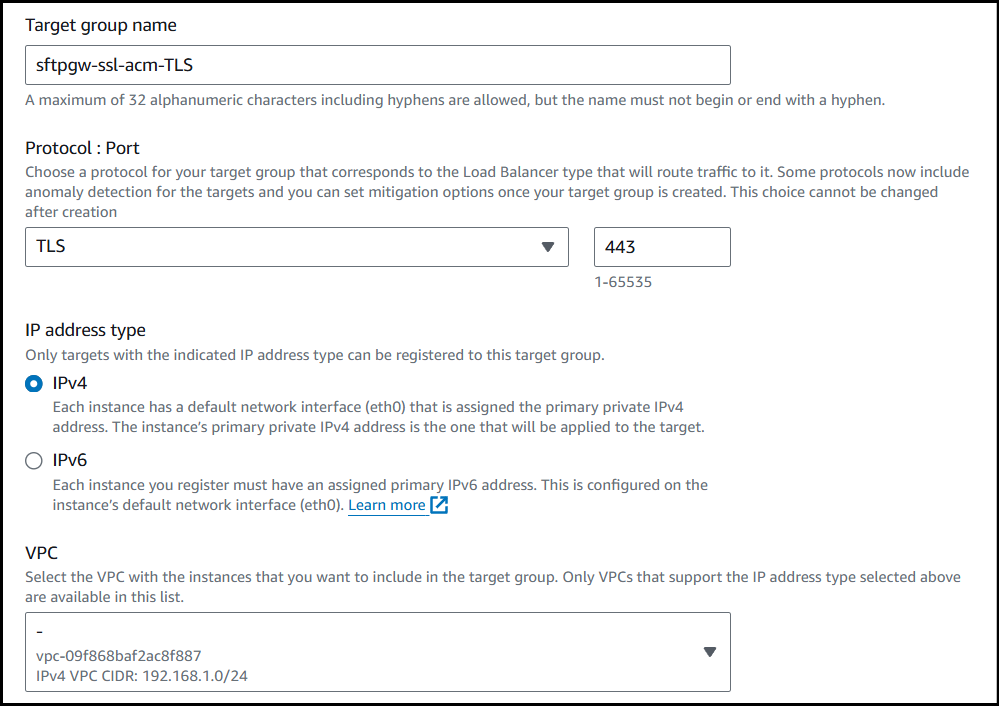
Create a Target group name (put TLS in it).
Set Protocol: TLS on port
443.Choose the VPC where your instances are located.
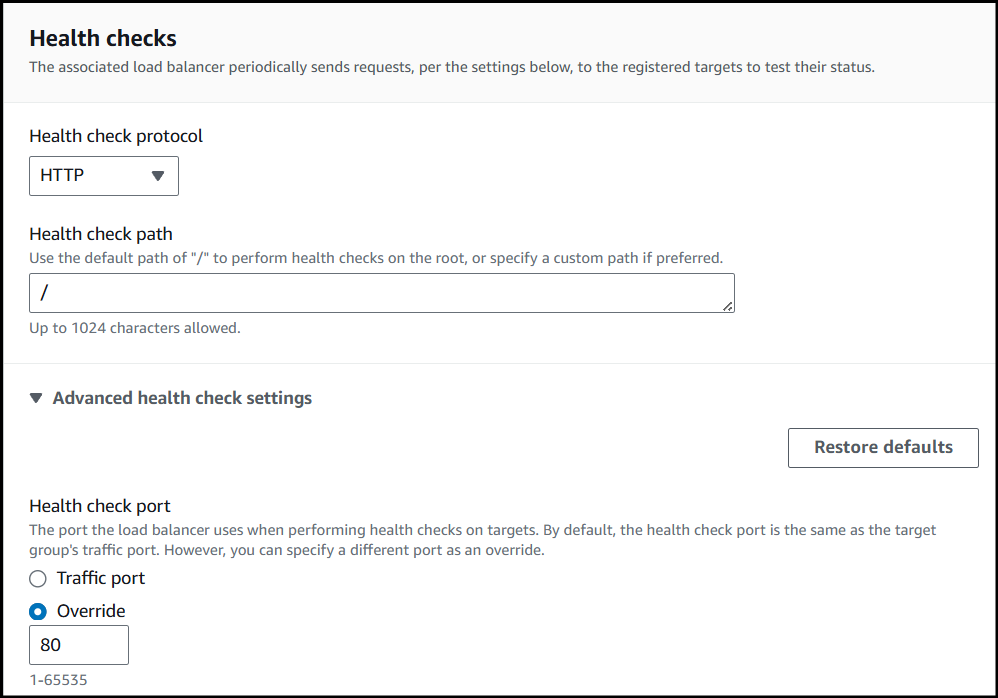
Set the Health check protocol to HTTP with a path of / and under the Advanced health check settings, change the port to 80.
After configuring the Health checks, at the bottom of the page click Next.
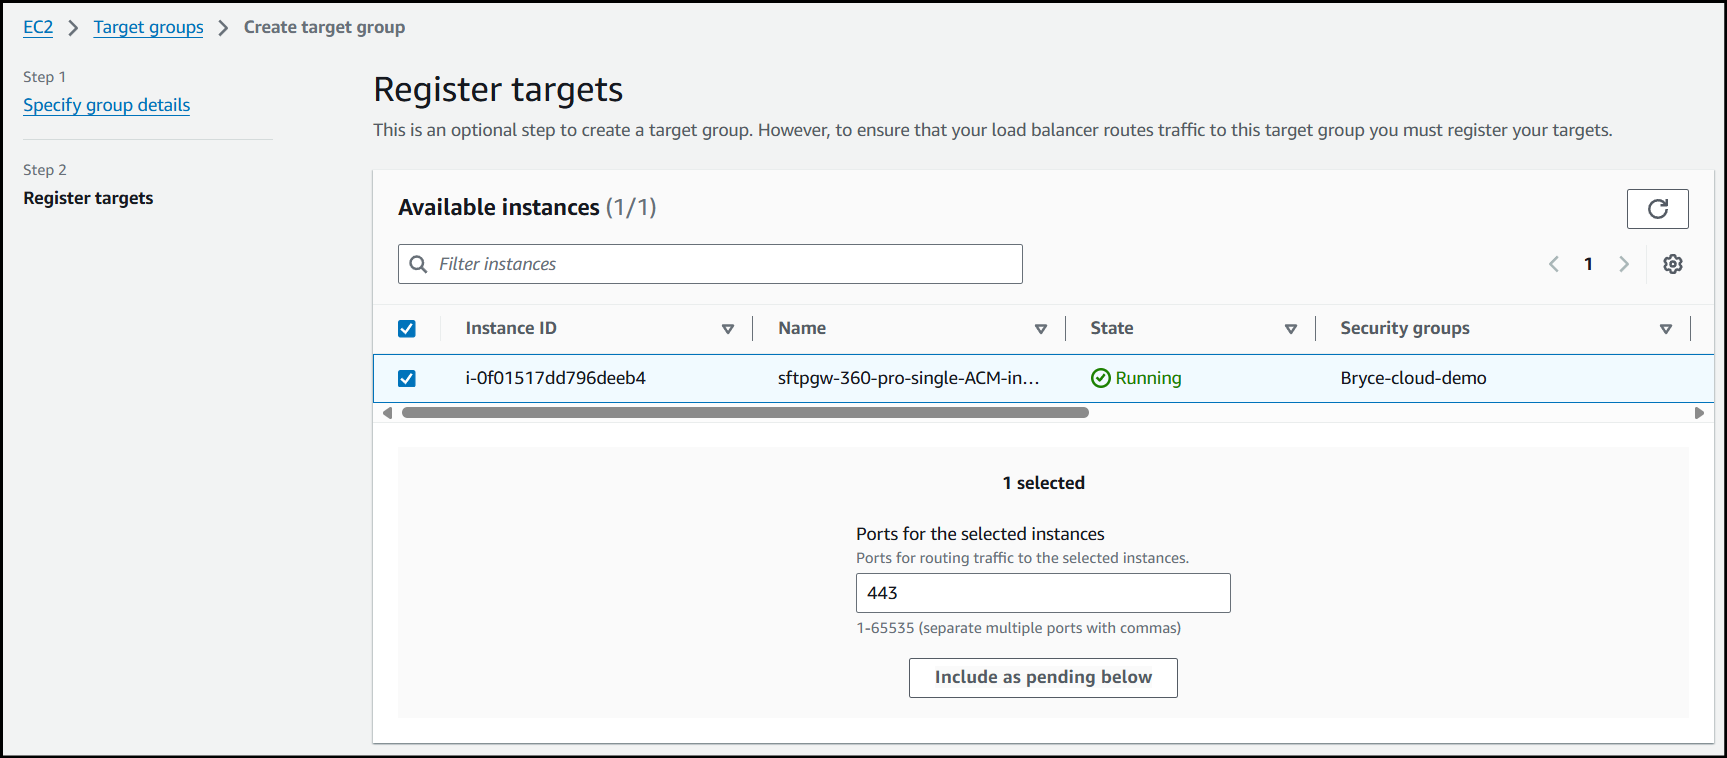
Select your single instance from the list and click Include as pending below.
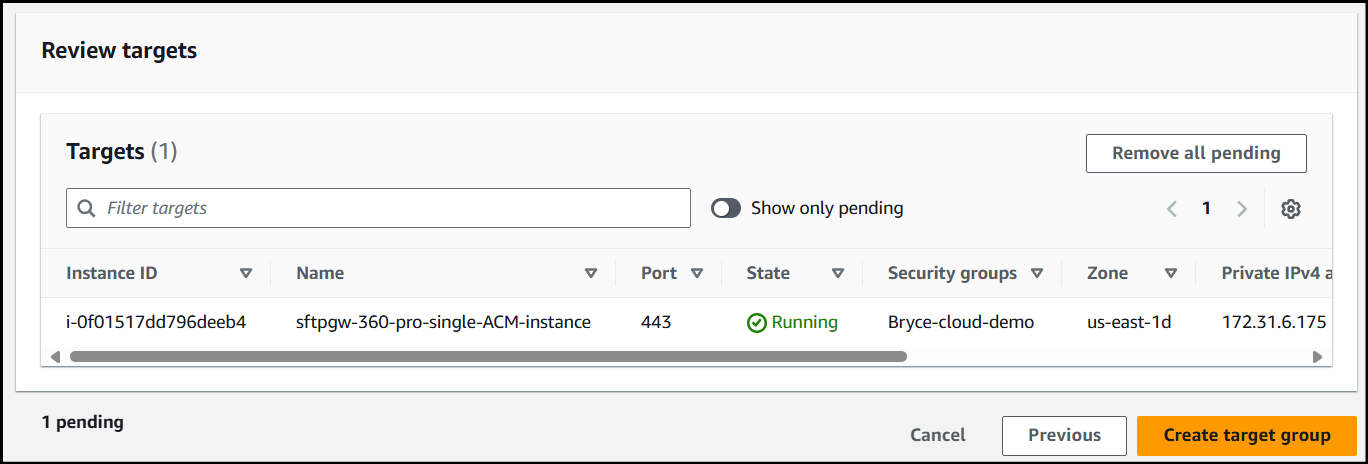
Verify the instance you've selected is the correct one and click Create target group.
Now that we've created the TLS target group, we need to create the Load Balancer.
Create the Load Balancer
Navigate to the EC2 service & the Load balancers section and click Create load balancer.

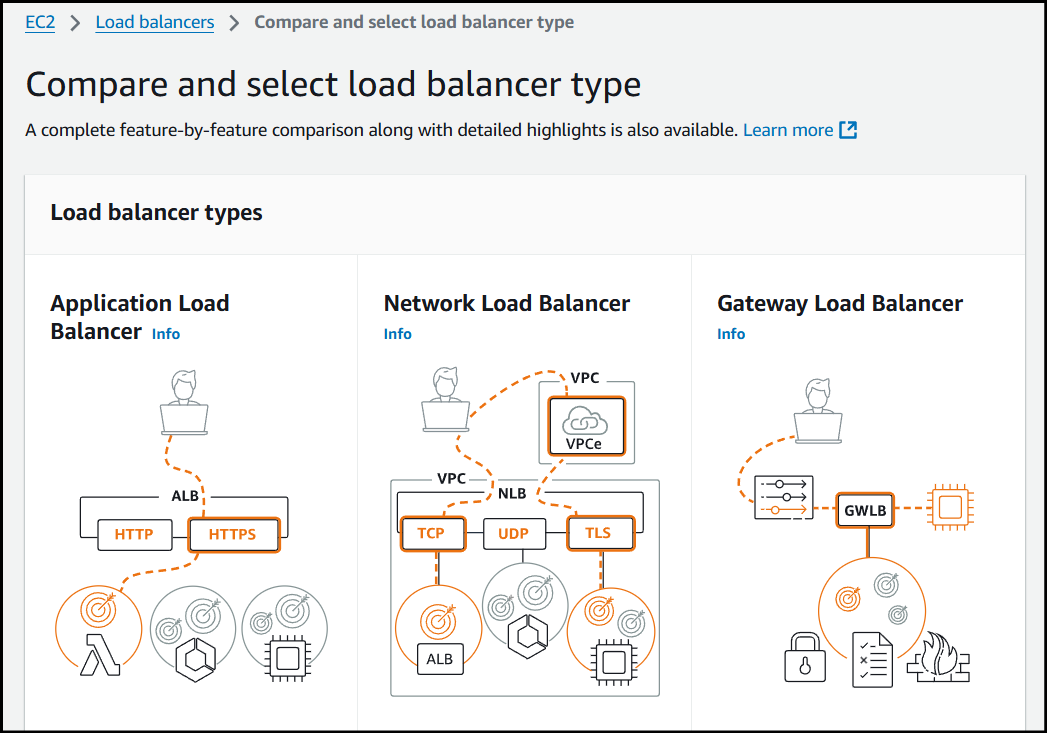
Select the Network Load Balancer option (middle).
Configure a name for your Load Balancer.
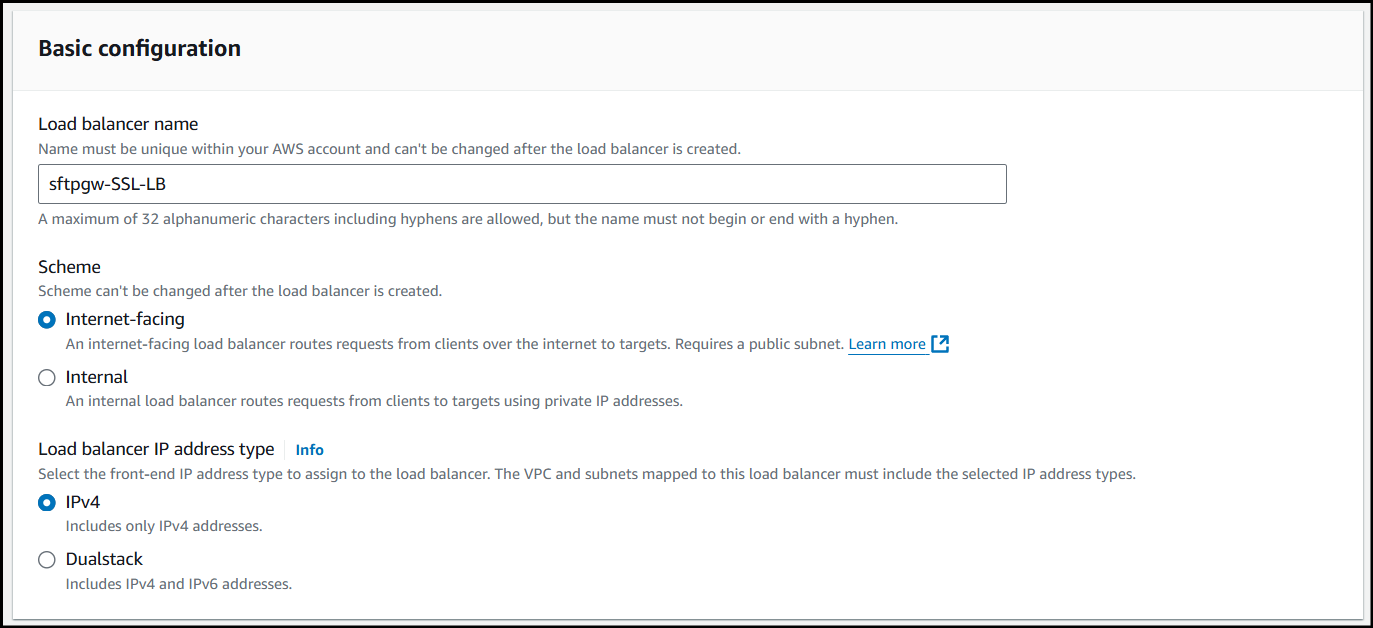
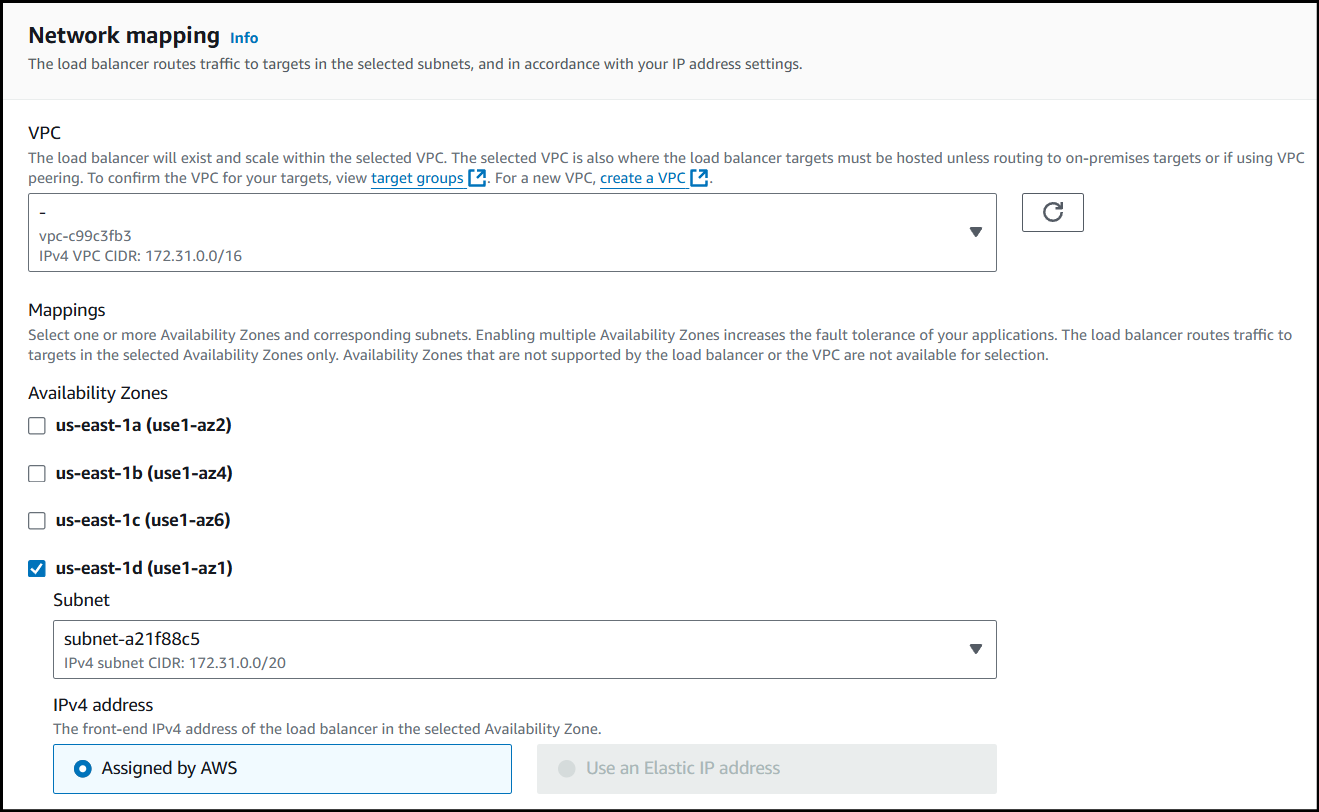
Select the VPC your instance is inside of and specify the Availability Zone(s) your instance is located.
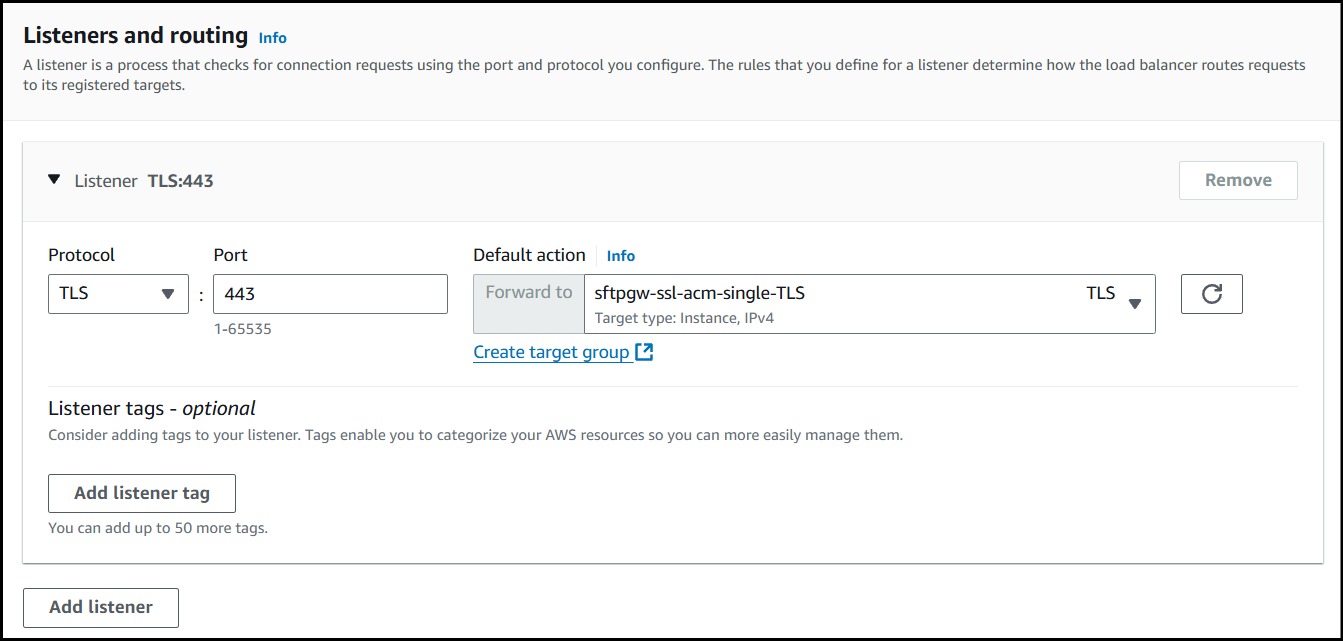
Change the Listener Protocol to TLS and configure the Default action to forward to the Target Group created earlier.
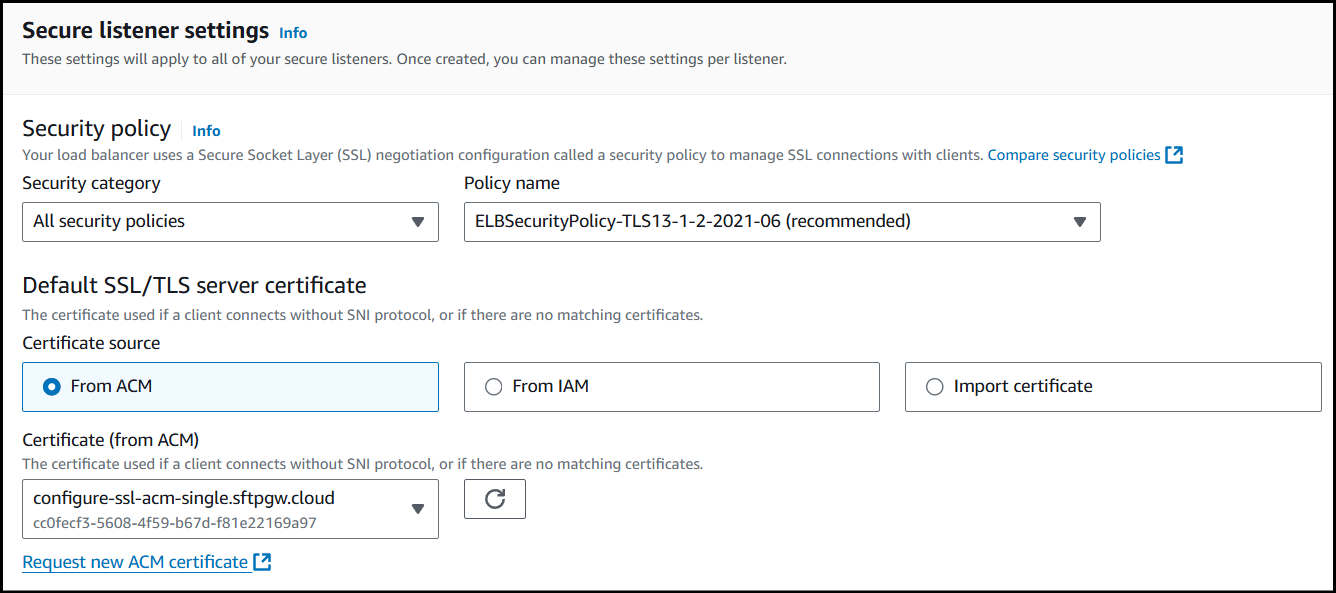
In the Secure listener settings section, set the Default SSL/TLS server certificate to the ACM certificate created in the first step.
After selecting the certificate, at the bottom of the page, click Create load balancer.
At this point, the SSL certificate should work to secure https access.
Point Hostname to the Load Balancer & Final Steps
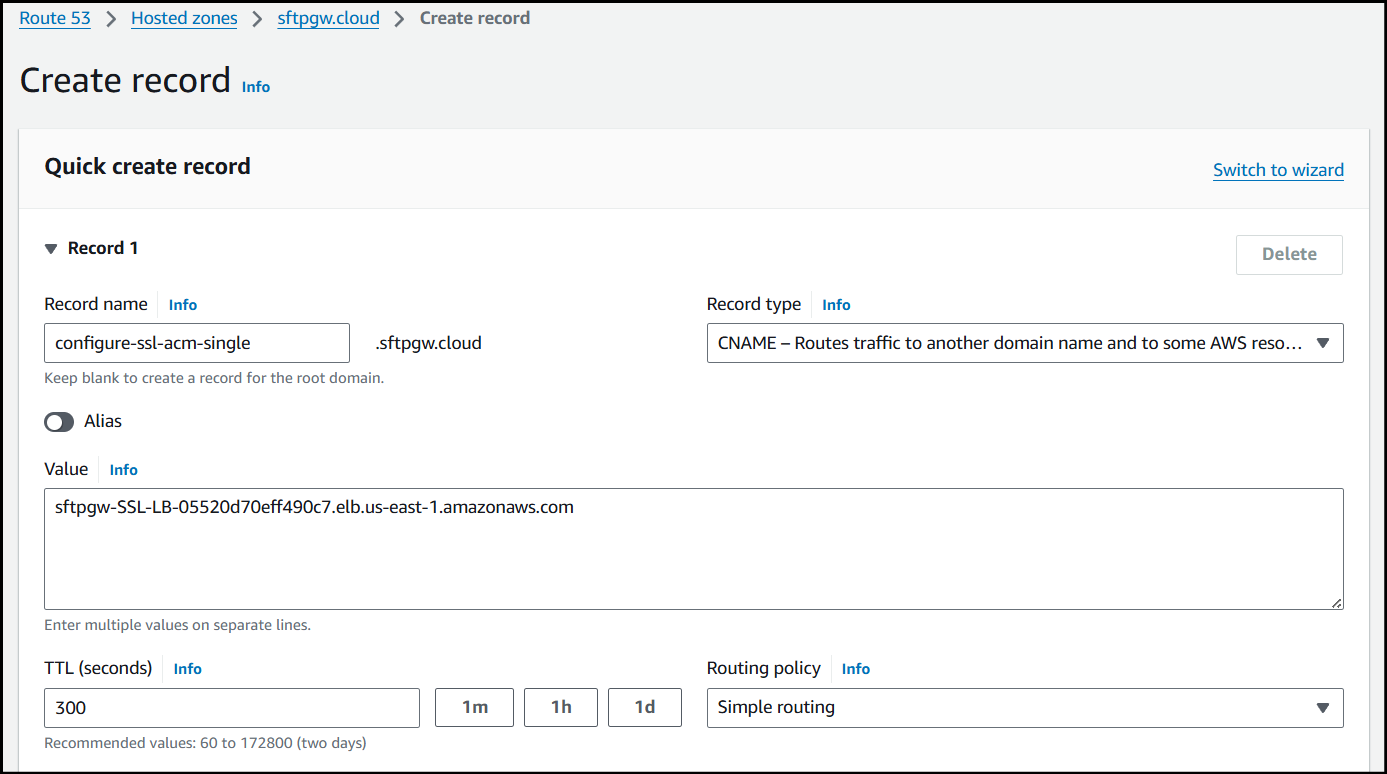
To configure the Load Balancer to use the Hostname we specified for ACM, we must create a new CNAME record and point it towards the DNS of our Load Balancer.
Finally, since we only created a target group for TLS, we need to create one for port 22, so we can connect to the Load Balancer via SFTP.
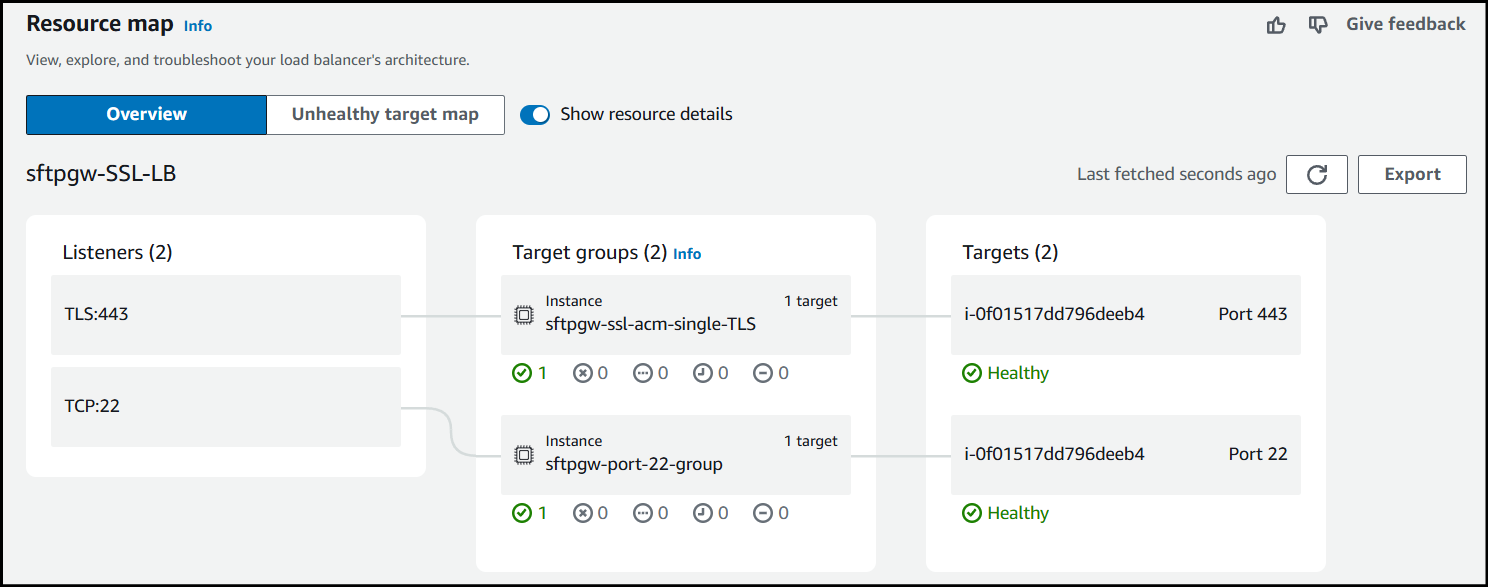
Now, HTTPS should be secured with the ACM cert, and you'll be able to reach the Load Balancer via SFTP.