Getting Started with SFTP Gateway 3.x
TLDR - Quick Summary
What: Deploy SFTP Gateway on AWS to transfer files to S3 via SFTP
Prerequisites: EC2 Key Pair + a (free) subscription to the SFTP Gateway listing on the AWS Marketplace
Deploy: Launch a CloudFormation stack (Single Instance or Multi-Instance)
License: Start a free 30-day trial directly from the web admin interface — no license key required
Result: Users upload via SFTP, files automatically land in your S3 bucket
Introduction
SFTP Gateway is a pre-configured SFTP server that transfers uploaded files to an Amazon S3 bucket. To start, you need to create a user and password (or SSH key). This can be done through the SFTP Gateway web admin interface. After that, you can upload your files to the SFTP server. Behind the scenes, the files are uploaded to an Amazon S3 bucket. Once uploaded, you can view them directly in S3.
The SFTP Gateway listing on the AWS Marketplace is free to deploy — you only pay for the underlying AWS infrastructure. After you deploy, you can start a 30-day free trial directly from the web admin interface. When you're ready to license your deployment, book a call with our Sales team and we'll match you with the license tier that fits your needs.
This guide will focus on getting started with a Single Instance SFTP Gateway setup for testing.
Before you begin
EC2 Key Pair
You will need to create an EC2 Key Pair in order to SSH into your instances. Although most SFTP Gateway configuration is via the web interface, there may be times when you need command line access.
To create an EC2 key pair:
Log into AWS and go to the EC2 console
In the navigation panel, under the Network & Security section, go to Key Pairs
Click Create Key Pair
Enter a name for the new key pair and click Create
Note: When you click Create, your browser will download a private key file. This must be kept secure in a place where you can always find it. If this file is lost or deleted, it is difficult to regain access to your EC2 instance.
Subscribe
You first need to subscribe to the SFTP Gateway product. Doing so allows your AWS account to use the SFTP Gateway AMI.
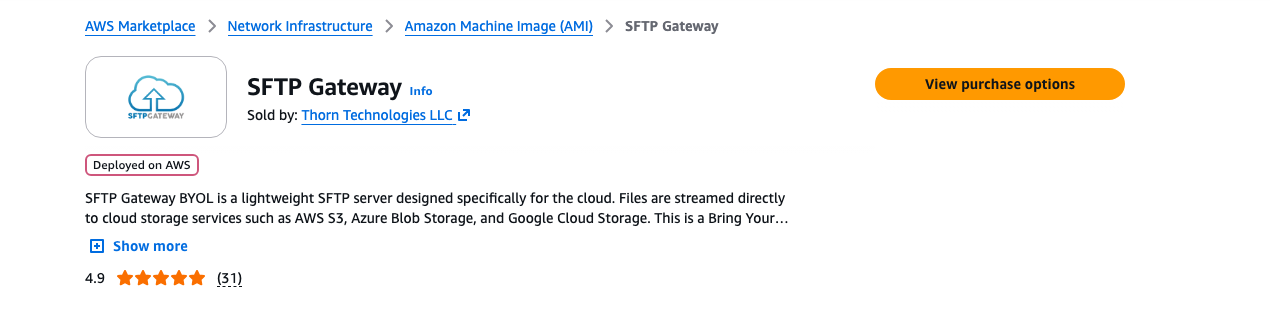
Click here to open the AWS Marketplace page for SFTP Gateway.
Click the View purchase options button.
You will be brought to the Subscribe to SFTP Gateway page. The software itself is free — the pricing details show a contract total of $0.00, and every usage dimension is $0.00 per hour. Only standard AWS infrastructure costs apply.
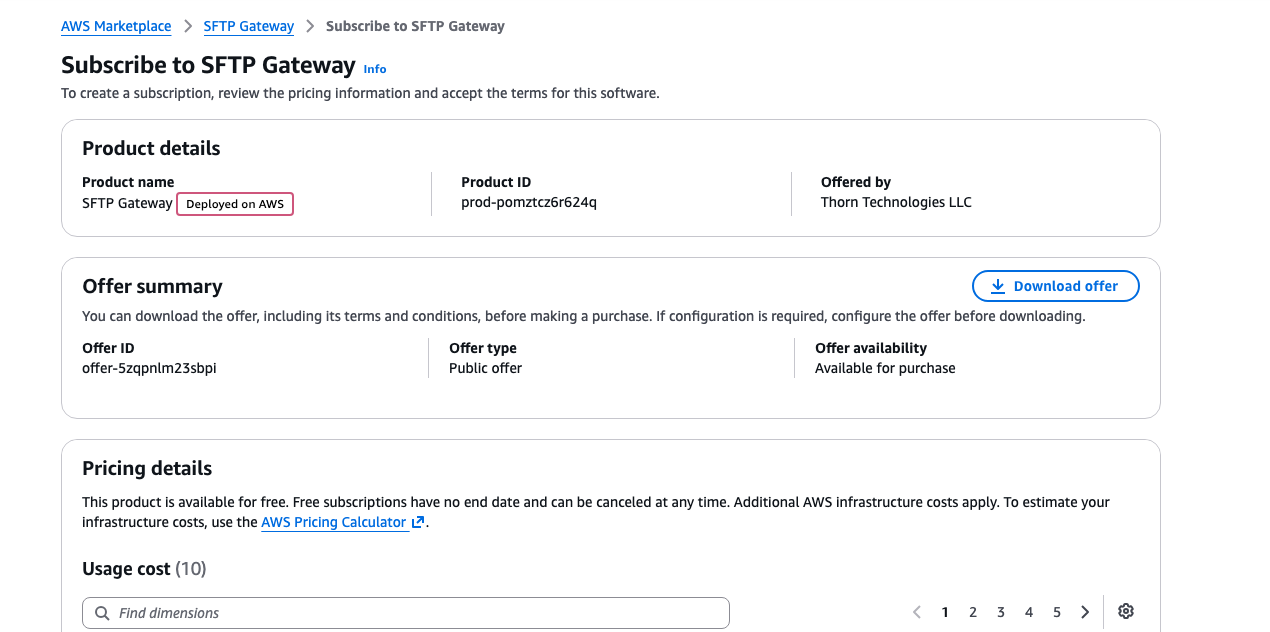
Scroll to the bottom of the page and click Subscribe.
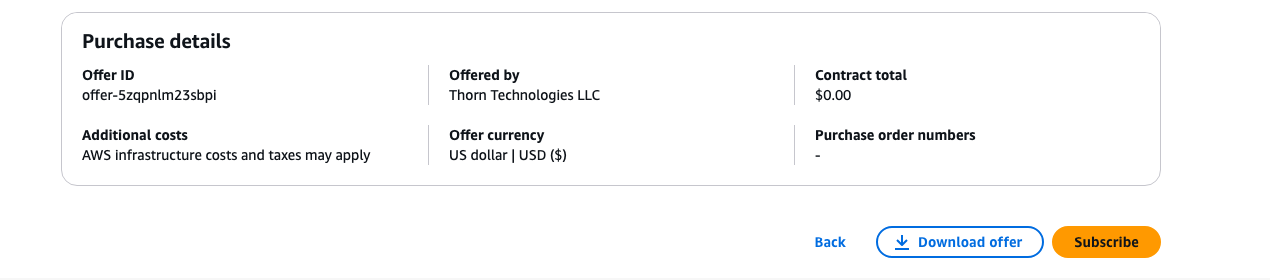
The subscription process will take a few minutes.

Launch your software
Once you are subscribed, you will be brought to the Launch SFTP Gateway page.
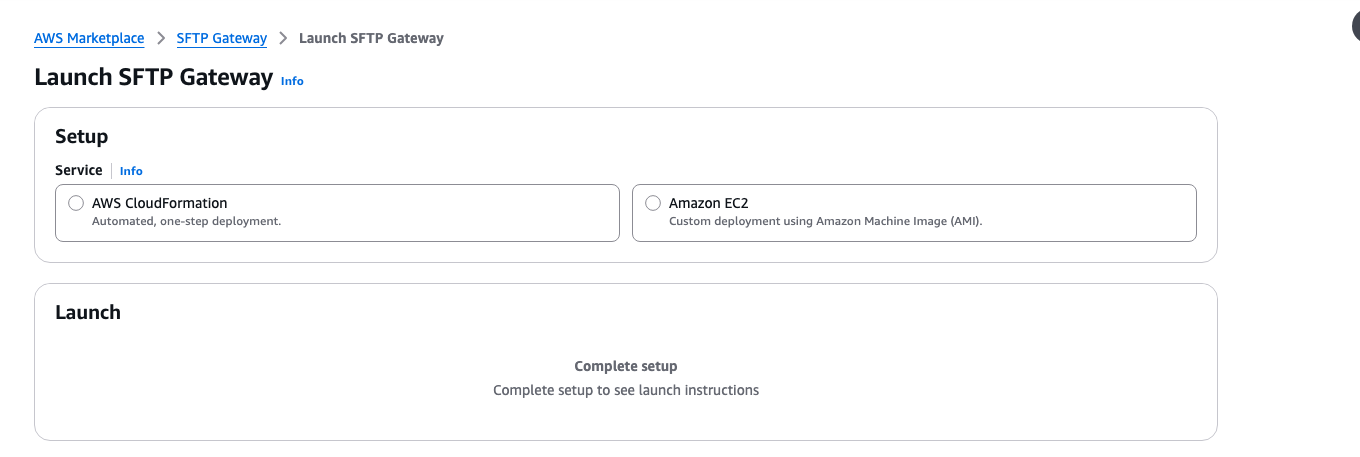
Under Setup, select AWS CloudFormation.
Leave the Version at the latest stable release.
Under CloudFormation template, select an option:
- SFTP Gateway (Single Instance - Existing Network)
- SFTP Gateway (Multi-Instance - Existing Network)
- SFTP Gateway (Multi-Instance - New Network)
Select your preferred region and click Launch with CloudFormation.
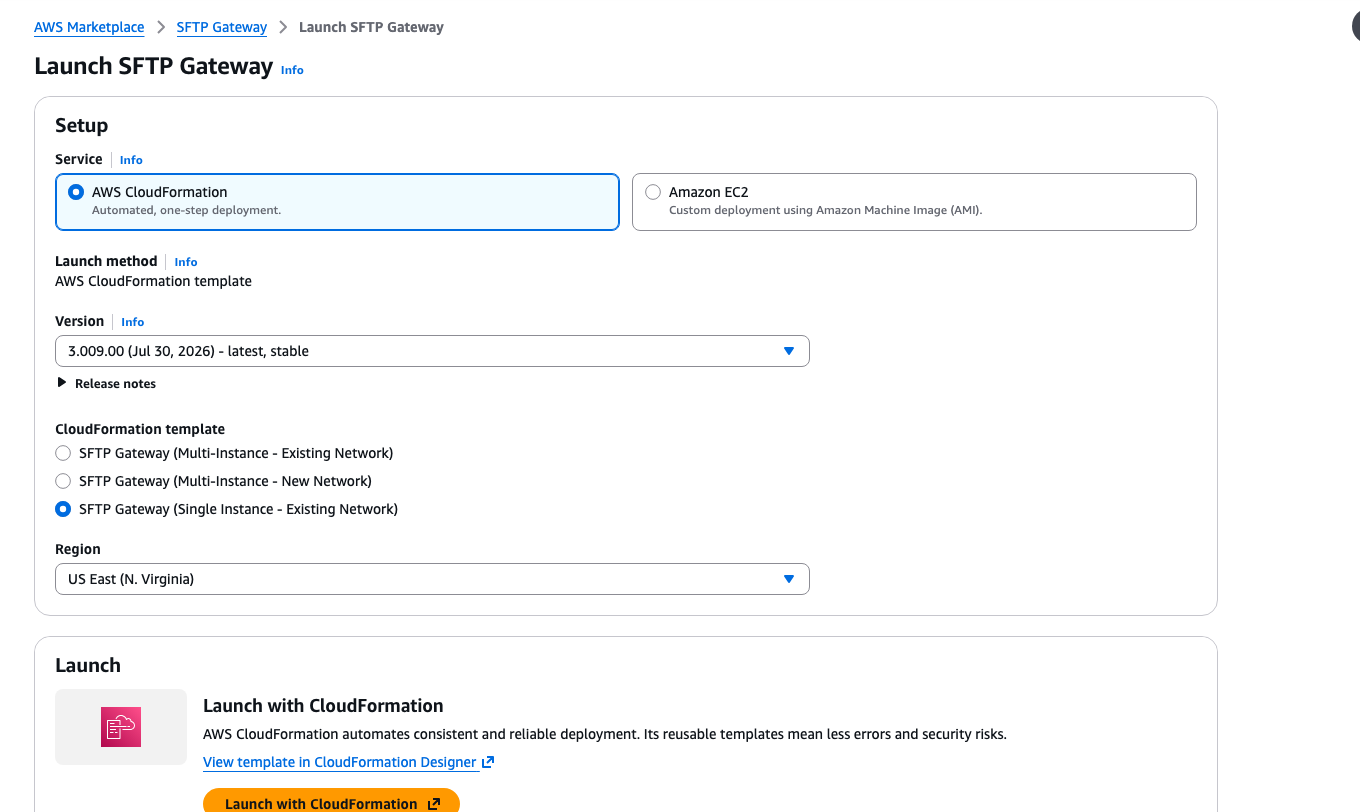
This will take you to the CloudFormation service in the AWS console.
Spinning up an SFTP Gateway CloudFormation stack
If you followed the instructions in the previous section, you should now be in the CloudFormation service within the AWS console.
The Template source should be pointing to a location on S3 corresponding to the CloudFormation template you specified.
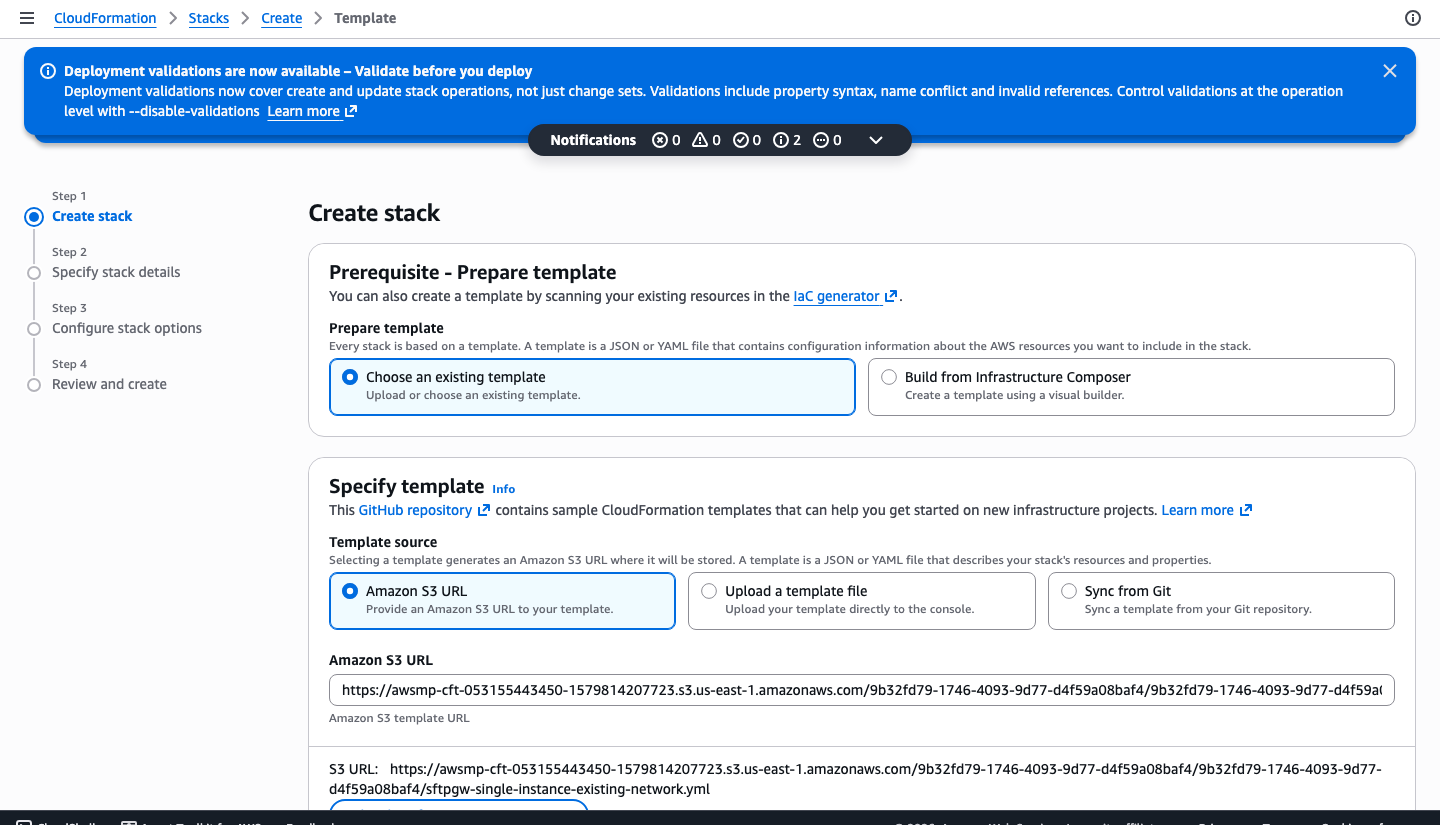
To spin up a Single Instance (Existing Network) CloudFormation stack of SFTP Gateway:
The Template source is already selected, so click Next to continue.
Enter the details for the stack:
Stack name: The name of your CloudFormation stack.
S3BucketName: Name of the S3 bucket that SFTP Gateway will use for file storage. You can specify an existing bucket or a new bucket name. IAM permissions will be scoped to this bucket only.
EC2Type: Defaults to m5.large, which we recommend for production workloads. You can use a t3.medium for testing.
DiskVolumeSize (GB): This must be 32 (the volume size of the AMI) or higher. You can always increase this at a later time (see Resizing an EC2 instance volume).
KeyPair: Choose the EC2 key pair you created in the Before you begin section. You will need the private key in order to SSH into the server. For more information on public and private keys see, SSH Key Pairs.
ImageId: Leave this at the default value — it is the alias of the Marketplace AMI that will be deployed as part of this stack.
VPC: Select a VPC that has a public subnet.
SubnetID: Select a public subnet in the above VPC.
InputCIDR: An IP range that allows inbound SSH and web traffic to your EC2 instance. We recommend obtaining your computer's public IP from http://checkip.dyndns.org/ and then appending /32 (a CIDR range of a single address). Although you can use 0.0.0.0/0 to allow all traffic, this weakens your security posture.
SFTPInputCIDR: An IP range that allows inbound SFTP traffic. If you support multiple SFTP users, it may be more practical to open this to the public (0.0.0.0/0). Otherwise, we recommend initially restricting this to your own IP as well.
WebAdminUsername: The Web Admin Username you'll use to sign into the Web Interface with.
WebAdminPassword: The Web Admin Password you'll use to sign into the Web Interface with. The password must be 12 or more characters in length. We recommend changing this password after your first login, since stack parameters can show up in cloud-init configuration logs.
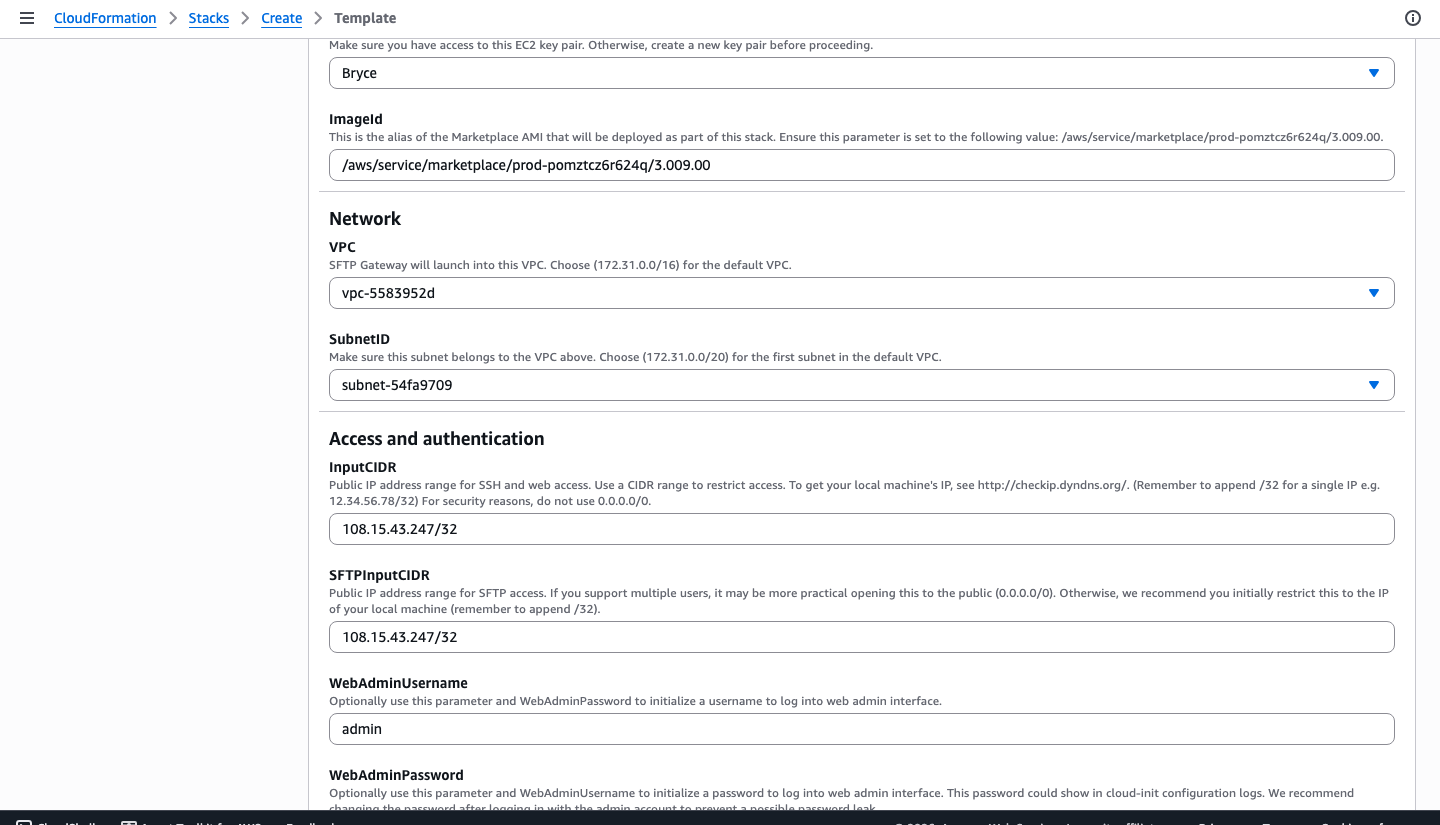
Stack Options: The stack options page can be left as is. Scroll to the bottom of the page and click Next.
- You must check the box that reads I acknowledge that AWS CloudFormation might create IAM resources to give CloudFormation permission to create IAM resources.
Review and create stack.
The stack creation progress can be monitored by selecting the stack and viewing the Events tab. Any errors that occur during creation will appear in the event log.
Access the Admin Interface
To access the SFTP Gateway admin interface, go to the Outputs tab of the stack in your AWS CloudFormation console and copy the Hostname value.
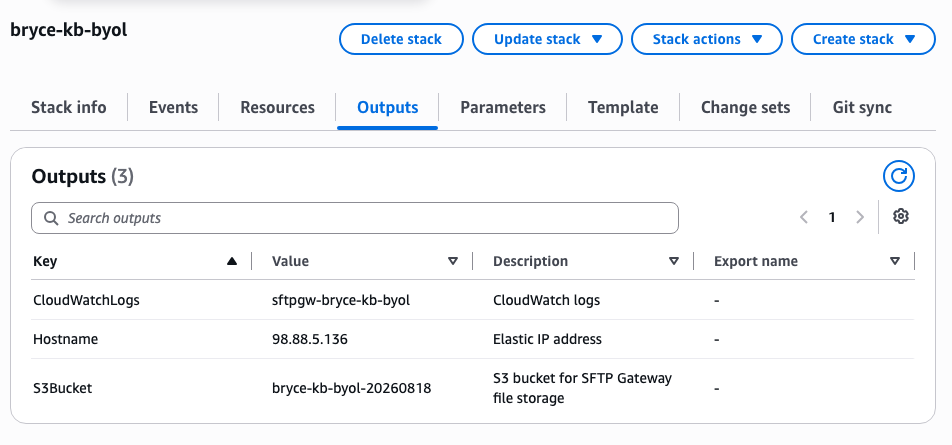
Paste the address into your browser using https://. The web interface uses a self-signed SSL certificate out of the
box, so your browser will show a warning — click Advanced and proceed to the site.
Log into the user interface
Use the Web Admin Username that you chose during the setup process.
Use the Web Admin Password that you chose during the setup process.
Click Sign In.
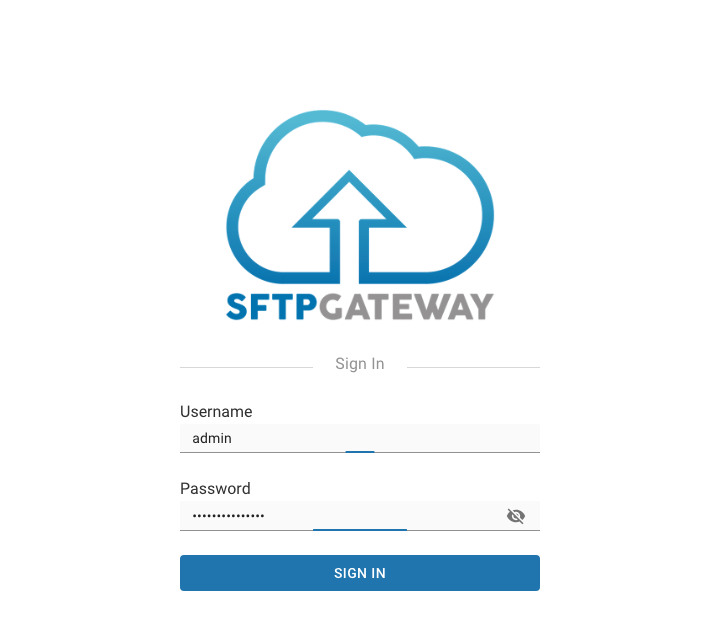
You can learn more about the user interface here.
Start your free 30-day trial
The first time you sign in, SFTP Gateway will prompt you to start a 30-day Trial. The trial license is free and is bound to your deployment's Cluster ID.
Enter your email address, check the box to agree to the End User License Agreement, and click CONTINUE.
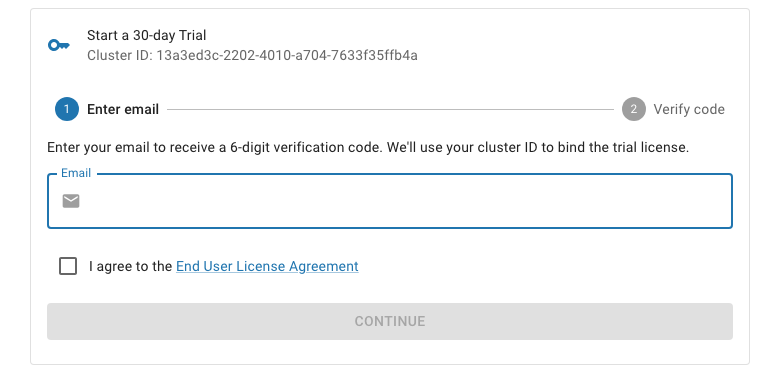
A 6-digit verification code will be sent to your email address (check your spam folder if you don't see it). Enter the code and click VERIFY.
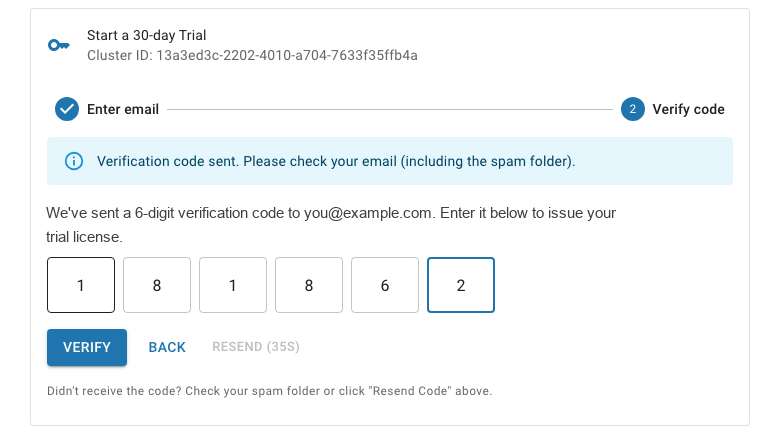
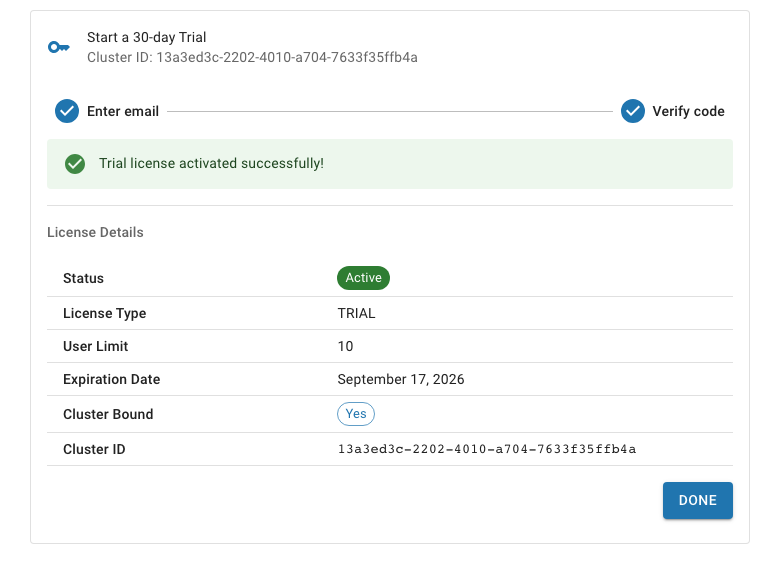
Your trial license is now active. The license details show the TRIAL license type, your user limit, and the expiration date.
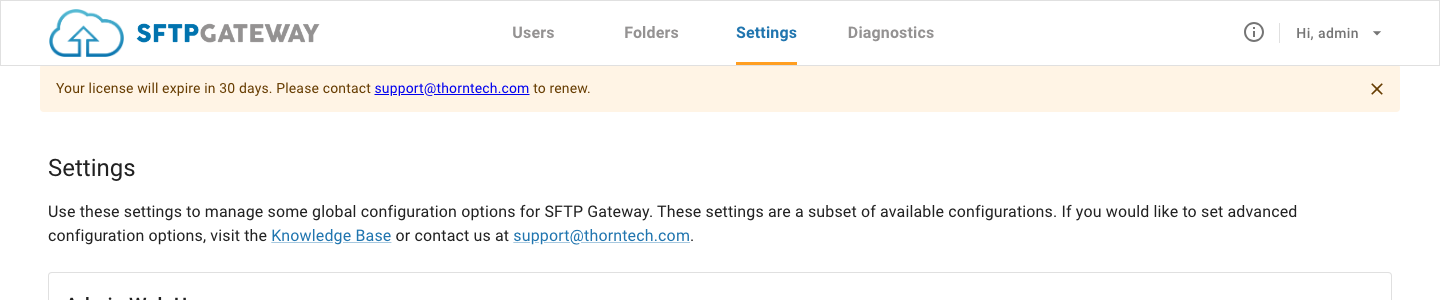
While the trial is active, the Settings page shows a reminder with the time remaining on your license.
When you're ready to license your deployment — or any time during your trial — book a call with our Sales team for a license that fits your needs.
Create a new user
To add a new user, click on the "Add User" button in the top right corner of the Users page. You will be taken to the Create User form (click here to learn more).
Enter a username.
Select Generate new SSH key pair to generate a new key pair for the user. The private key will be downloaded when the user is created. Alternatively, you can select Upload user-provided SSH key to upload an existing public key.
Click Save. You will be presented with connection instructions that you can copy and paste into an email to the user, along with their new private key (if generated).
By default, files that SFTP users upload will end up in the default S3 bucket that you specified during the setup process.
Connection With SFTP Client
For more information on how your users can connect to SFTP Gateway with an SFTP client such as FileZilla or WinSCP, please see our SFTP Client Article
View your files on S3
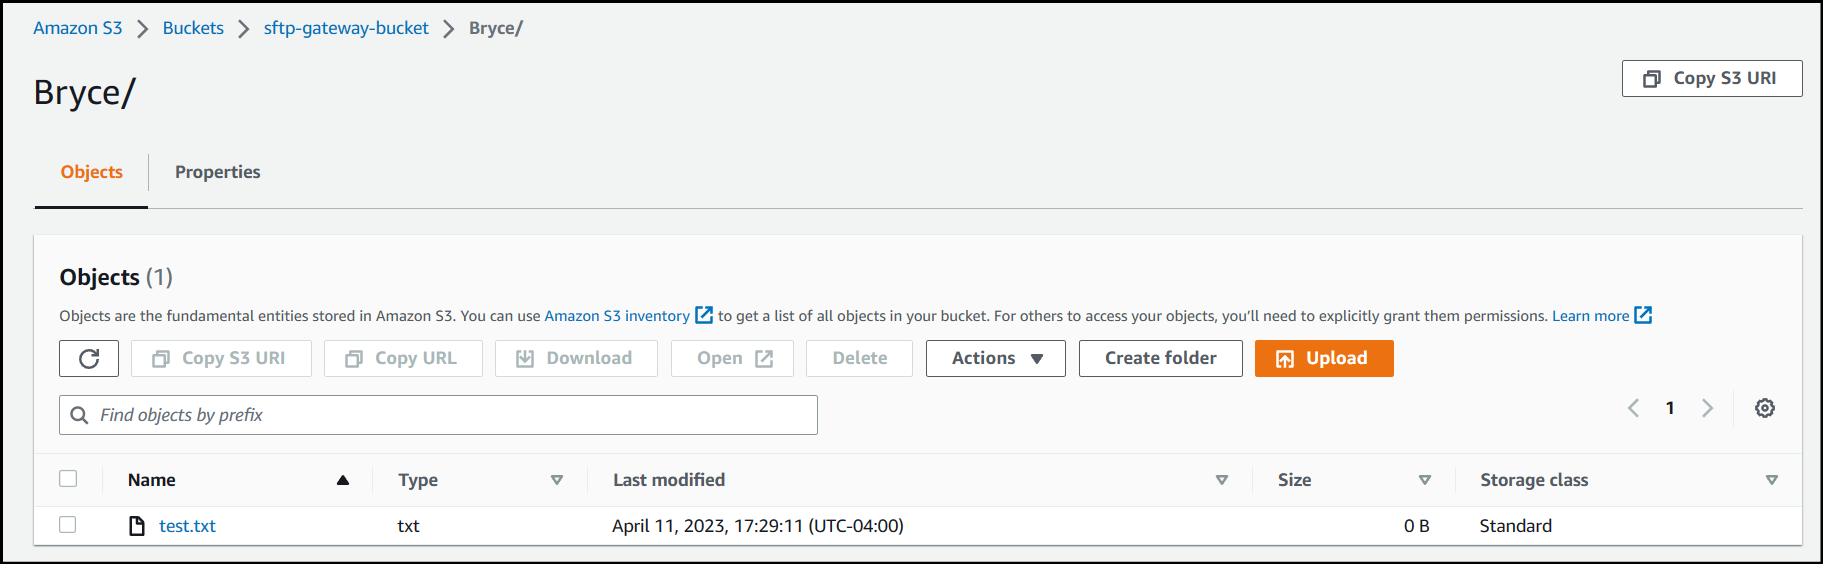
Once you are done transferring the files, go to S3 in your AWS console and navigate to your default SFTP Gateway bucket that you specified earlier. (If you forget the name, you can see it on the settings page in the admin UI).
Video Example
For more information, we have a video that walks through setting up SFTP Gateway on AWS.